You can build a website by describing what you want in plain language, then asking AI to make changes until it feels right for your business. You don’t need to write code, arrange every element yourself, or become an expert at prompting.
For this walkthrough, I’m using Hostinger’s AI Website Builder to create a site for a local smoothie business. The same process works for a photography portfolio, a restaurant website, or a coaching landing page. We’ll generate the initial design, customize the content, check the mobile layout, and publish it with a custom domain.
The AI gives you a fast starting point. Your most important job is to make the website genuinely yours, especially the photos, business information, and copy.
What You'll Learn
- Describe your business, sections, design, desired feel, and functionality to give AI a clear starting point.
- Use chat for larger changes and direct editing for precise text and image updates.
- Replace sample business details and test the mobile experience before publishing.
- Connect your custom domain, verify your email, and republish whenever you make updates.
Table of Contents
- 1. Choose Your Hostinger Plan
- 2. Start a Website With the Agentic AI Builder
- 3. Write a Website Prompt That Gives AI Clear Direction
- 4. Customize Your Website With Chat and Direct Editing
- 5. Manage Revisions, AI Credits, and Store Products
- 6. Check the Mobile Layout and Publish Your Website
- 7. Connect Your Custom Domain
- Keep Your Website Updated
1. Choose Your Hostinger Plan
Hostinger combines the AI website builder and hosting in one place, so you don’t need to set up a separate service to store your website’s files.
I recommend the Unlimited plan for this workflow because it gives you more AI credits to build and edit your site. In the checkout shown here, the 48-month option offers the largest savings, while plans of 12 months or longer include an eligible custom domain free for the first year.
Before paying, review your selected billing period, the order total, and the domain offer. The free domain is a first-year benefit, not a permanently free registration.
You can use my Hostinger discount link to get an additional discount on your plan. Check that the discount is applied in the order summary before continuing.
This is an affiliate link. If you make a purchase through it, we earn a small commission at no extra cost to you.
Once you’ve selected your plan, create your account, enter your billing details, and complete payment.
2. Start a Website With the Agentic AI Builder
After signing up, Hostinger asks a few questions about how you want to build your website. Choose these options:
- Select Create a new site.
- Choose Describe it, we build it, then click Next.
- For your building style, choose Agentic.
The distinction between the two building styles is straightforward. Manual gives you a drag-and-drop workflow. Agentic lets you describe what you want and have AI build or change it for you.
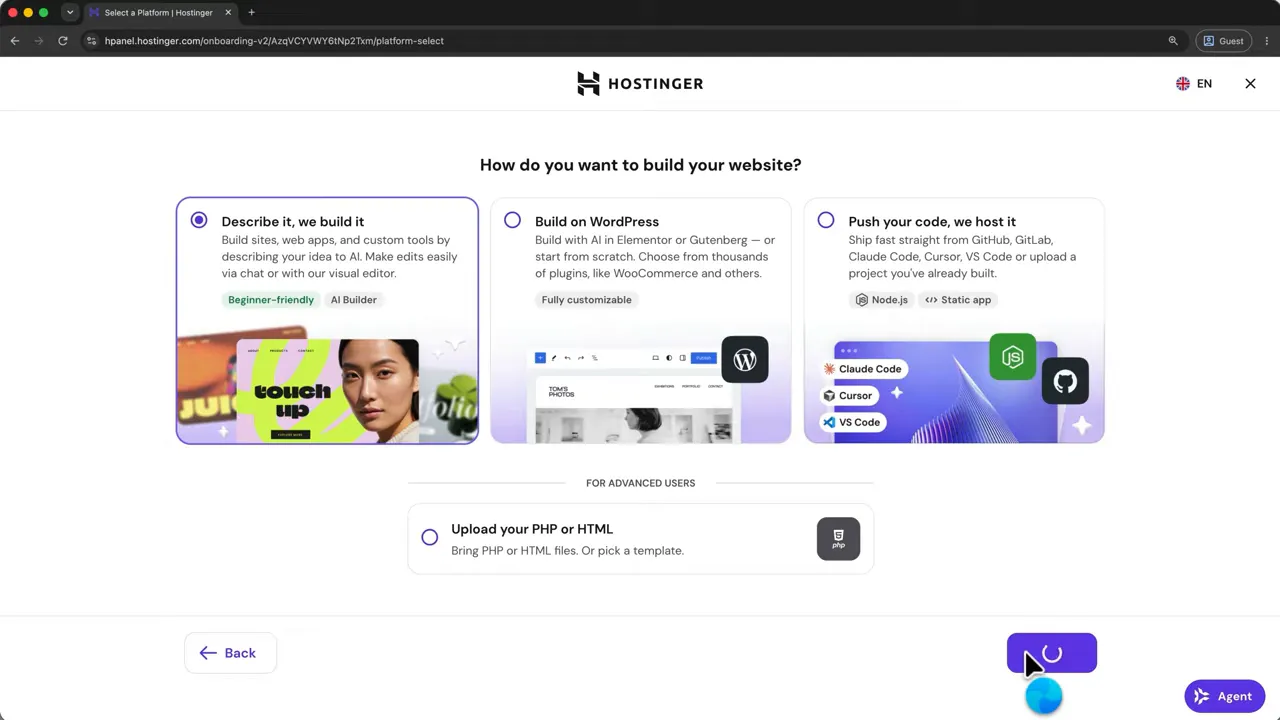
Agentic uses AI credits. I’ll explain how to check your usage once we’ve made a few changes.
Next, you can search for a domain name or choose a temporary domain. If you’re still deciding on your website address, use the temporary domain for now. You can build and publish the site first, then connect your custom domain later.
3. Write a Website Prompt That Gives AI Clear Direction
You don’t need a perfect prompt, but a little detail makes a big difference. I’ve tested a lot of prompts, and these are the five things I recommend including:
- Website type and business name. Explain what you’re building and who it’s for.
- Sections and their purpose. List the pages or sections you need and what each should do.
- Visual style and colors. Describe the design direction, including specific colors if you have them.
- Overall feel. Tell AI whether the site should feel playful, calm, professional, fresh, or something else.
- Extra functionality. Include anything a website like yours needs, such as an online ordering button and its destination link.
For the smoothie business example, that means describing the shop, requesting sections such as the menu, story, gallery, and location information, and asking for a bright, playful design.
A prompt modeled on that approach could look like this:
Create a website for my local smoothie business, Blend Bar. Include a menu section to showcase our smoothies, an Our Story section to introduce the business, a gallery, and a Visit Us section for our address and opening hours. Use bright green, yellow, and pink for a vibrant, playful design that feels fresh and fun. Include an Order Online button, and connect it to the ordering link I provide.
Replace the business name, sections, colors, and functionality with your own requirements. If a button needs to open a specific ordering or booking page, include the actual destination in your prompt.
Use voice input or reference files if that’s easier
If talking through your business feels more natural than typing, use the voice input option. You can also attach images and PDFs, which is useful when you already have a clear design direction or reference material.
There’s also an Improve description button that rewrites your prompt. I’ve had good results testing it, so it’s worth trying. Just review the revised description before submitting it.
When you’re happy with the prompt, send it. The AI may ask a few follow-up questions before it starts building. Answer those if prompted, then give it a few minutes to generate the initial site.
You may see code being written in the background, but you don’t need to work with it. There are also tips and a quick guide available while the build runs.
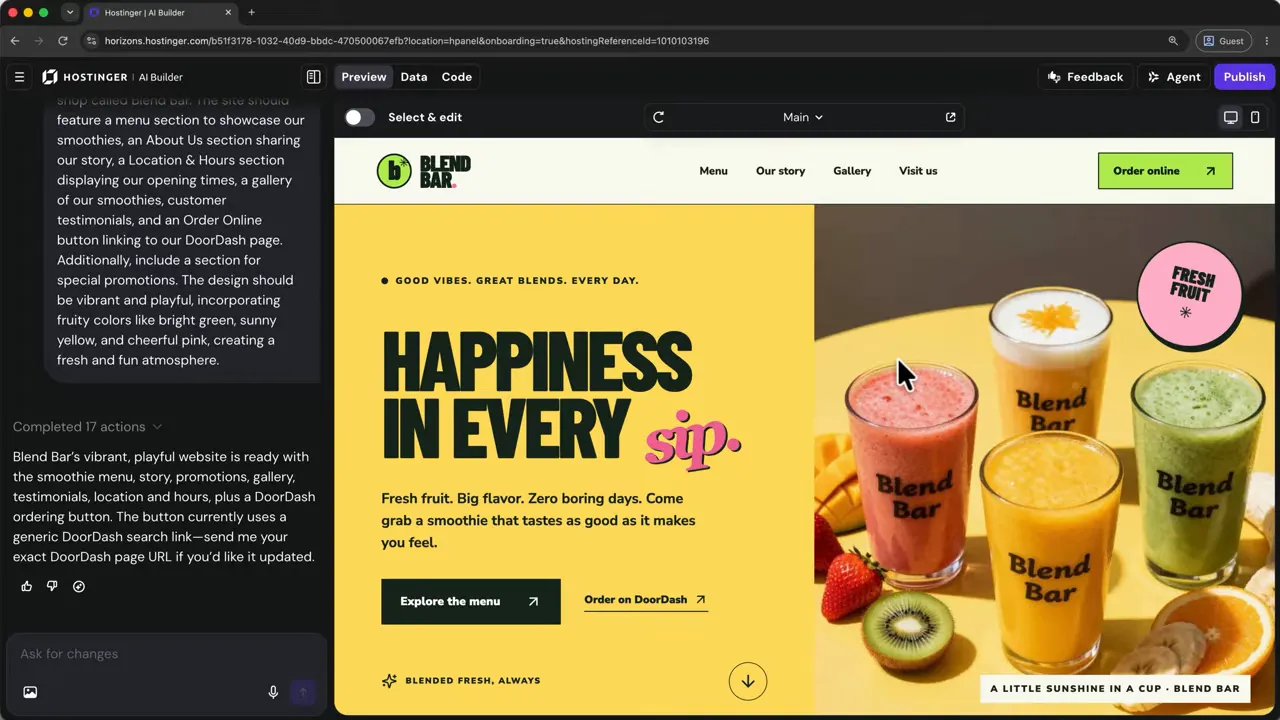
Once the website appears, scroll through it. Treat this as a solid starting point rather than a finished website ready to publish unchanged.
4. Customize Your Website With Chat and Direct Editing
You have two main ways to make changes: ask the AI in chat, or select an element and edit it directly. Use chat for larger changes, such as adding a page. Use direct editing for smaller adjustments where you know exactly what you want.
Add pages and make larger changes through chat
The chat panel is on the left side of the builder. For the best results, follow three simple rules:
- Make one change at a time.
- Be specific about the result you want.
- Name the page or section you want to change.
For example, the initial smoothie website includes a story section, but it doesn’t have a dedicated page introducing the team. Rather than asking AI to “improve the website,” I request a new Team page and describe what I want included.
The goal is to give AI enough direction to get the change right on the first attempt. Specify the page, the content it should contain, and the design you want it to follow.
Send the request and wait for the update. Once it’s finished, the builder provides a summary of what it changed. Open the new page and review the actual result, not just the summary.
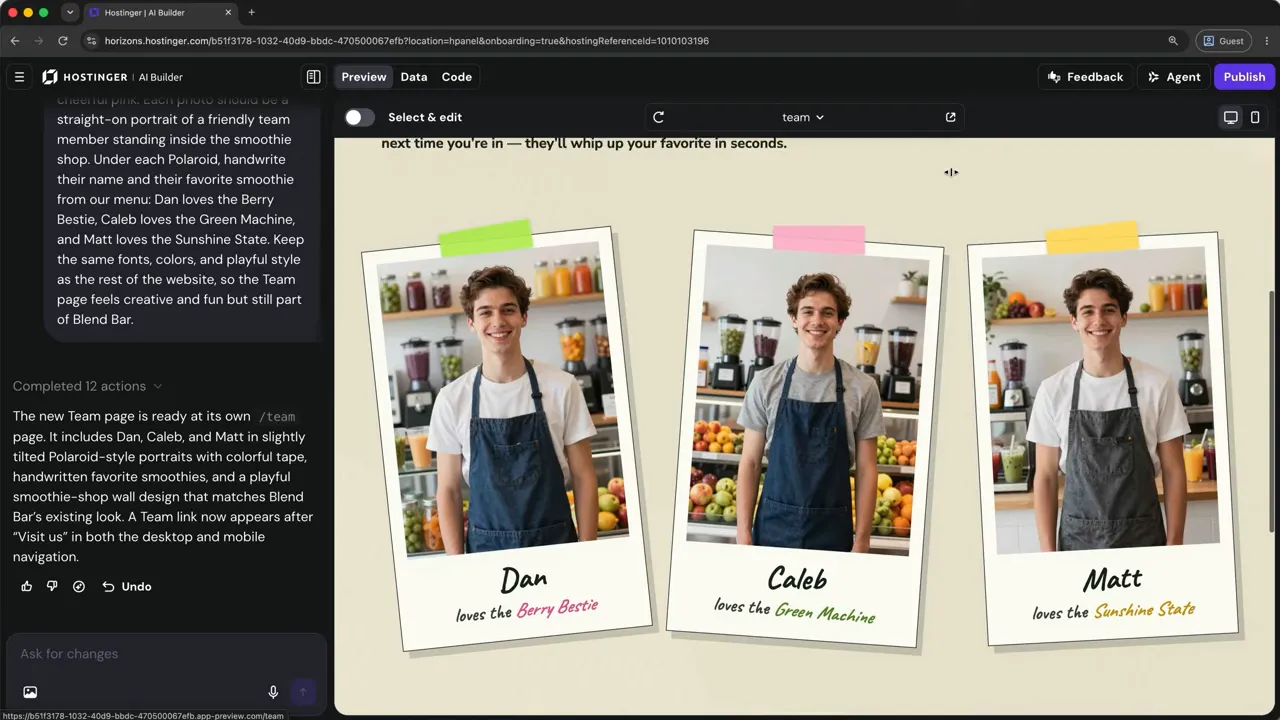
At this point, the initial site and an extra page have been created with two prompts. There’s been no need to edit code or drag individual elements into place.
Edit text directly with Select and edit
For a small copy change, you don’t need to describe it in chat:
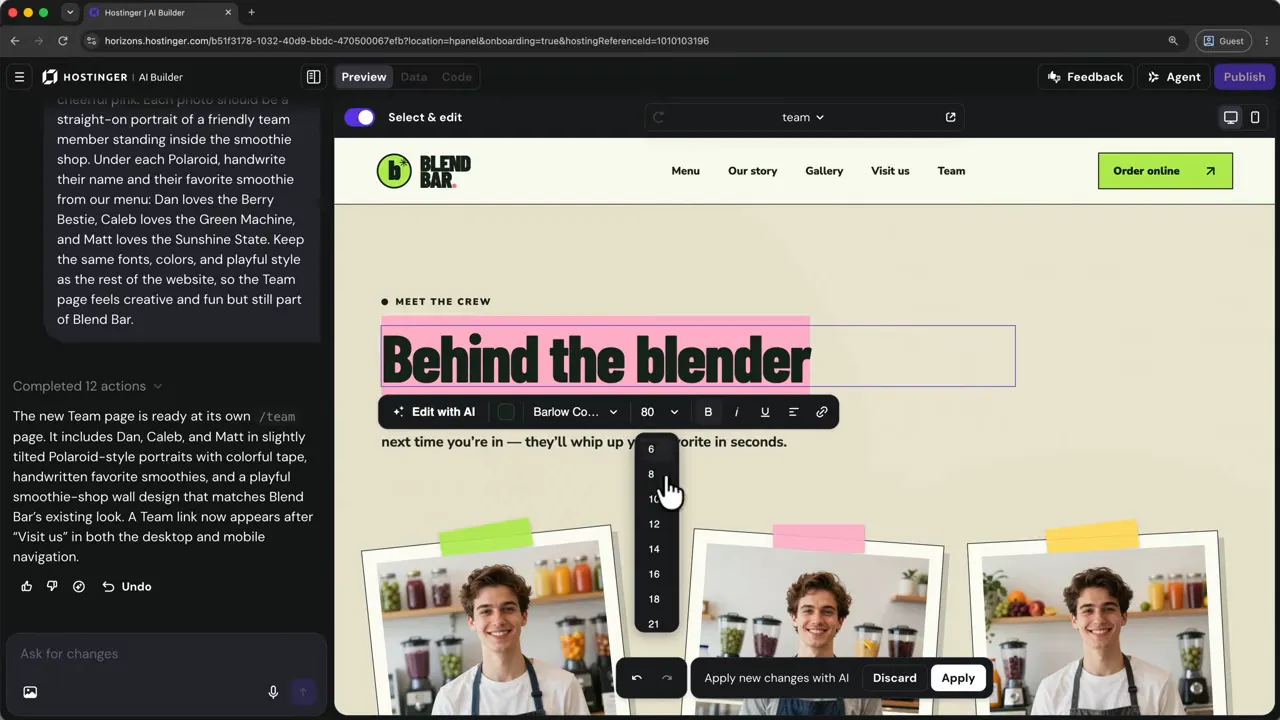
- Turn on Select and edit near the top left of the preview.
- Select the text you want to change.
- Type your replacement text.
- Use the formatting options below the element if you want to adjust its appearance, such as its size.
- Click Apply when you’re done.
In the Team page example, I change the heading to “Behind the blender” and adjust its size directly in the preview.
Replace images or request a targeted AI edit
Replacing the generated photos and copy with your own is likely to be the biggest part of customizing the website.
To replace a photo, enable Select and edit, scroll to the image, select it, and use the upload option to add your own image.
You can also choose Edit with AI on an element and describe what you want changed. Add your comment, and the builder pins that instruction to the relevant part of the page. Click Apply when you’re ready to process the change.
This gives you a way to point AI at a specific element instead of explaining its location in a general chat message.
Replace sample business details before publishing
Don’t assume the generated business information is correct. Review every section that includes details about your business.
- Replace sample contact information.
- Add your real business address.
- Check every opening-hours entry.
- Remove sample promotions or banners that don’t apply.
- Replace placeholder photos and website copy.
For the smoothie website, that includes removing a sample happy-hour banner and supplying the real address. After leaving any AI edit comments, remember to click Apply.
5. Manage Revisions, AI Credits, and Store Products
Undo a change or restore an earlier version
If you don’t like a recent change, use Undo. You can also return to an earlier message and restore the website to the state it was in before that change.
That gives you room to experiment without feeling committed to every AI-generated result.
Check your AI credit usage
AI change requests consume credits, and larger changes use more. There are two useful places to check usage:
- For one request: hover over the AI logo beneath its reply to see how many credits that change used.
- For your overall usage: open the top-left menu to see your remaining credits, then select AI credit usage for more detail.
From the credit usage area, you can also review pricing and add more credits.
Manage products if your website includes a store
If your site has an online store, an E-commerce button appears in the builder. Click it to open the Hostinger e-commerce dashboard, then select Products to edit and maintain your listings.
This is separate from changing the visual design of the website. Use the builder for the pages and layout, and the product dashboard for your store listings.
6. Check the Mobile Layout and Publish Your Website
Before publishing, switch to mobile view. Don’t stop at checking the homepage. Go through the site and click around to make sure the mobile experience works as expected.
- Review how headings and images fit the narrower layout.
- Open the navigation menu and test its links.
- Visit the other pages, including any you added with AI.
- Test buttons and their destinations.
- Make any necessary changes before going live.
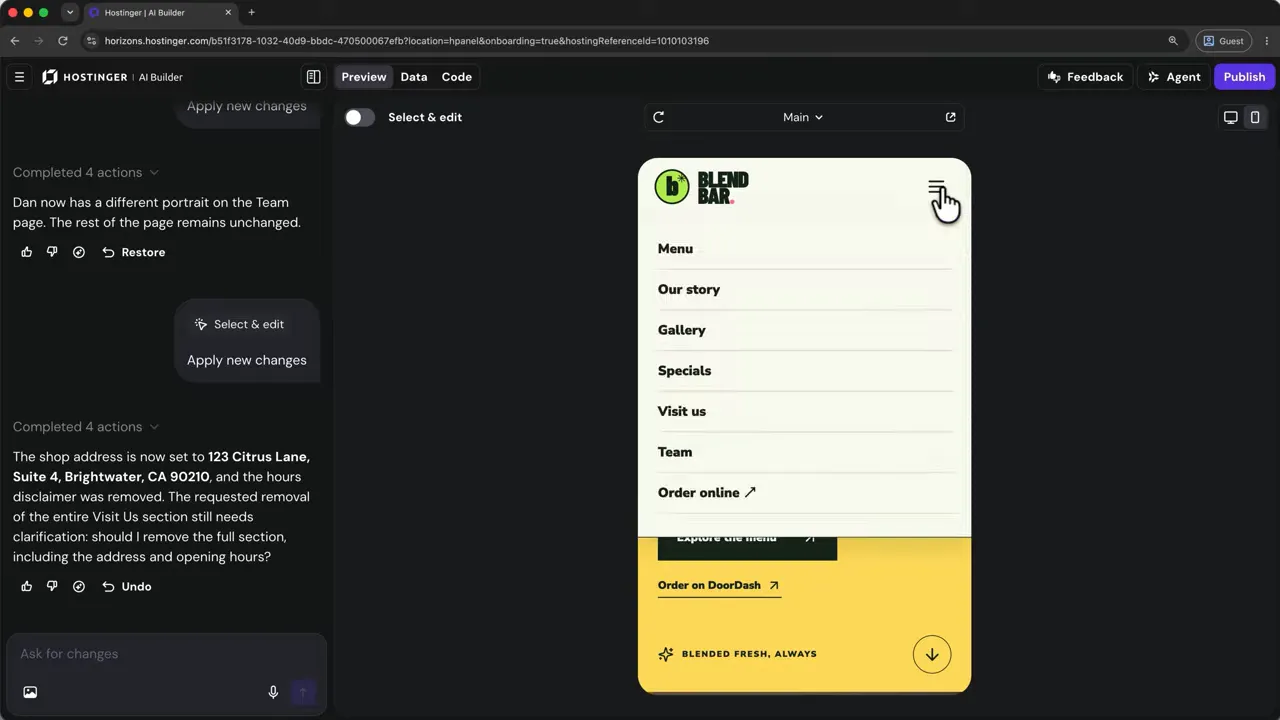
When everything is ready, return to desktop view and click Publish in the top-right corner. The button shows the publishing progress, which typically takes only a few moments.
Once publishing finishes, click View site to open the live website in a new tab. If you started with a temporary domain, that’s the address your site will use for now.
7. Connect Your Custom Domain
A custom domain gives your website a professional address of its own. If you’re new to the terminology, MDN’s guide to domain names provides a useful explanation.
If you didn’t choose a domain during setup, return to the builder and click Connect a custom domain.
- Search for the domain you want.
- Check whether it’s available.
- Select your preferred domain and click Next.
- Enter the owner details required for registration.
- Click Register.
I recommend choosing something short and memorable, and getting a .com if you can. For a domain covered by the included offer, the registration screen shows a cost of $0 for the first year.
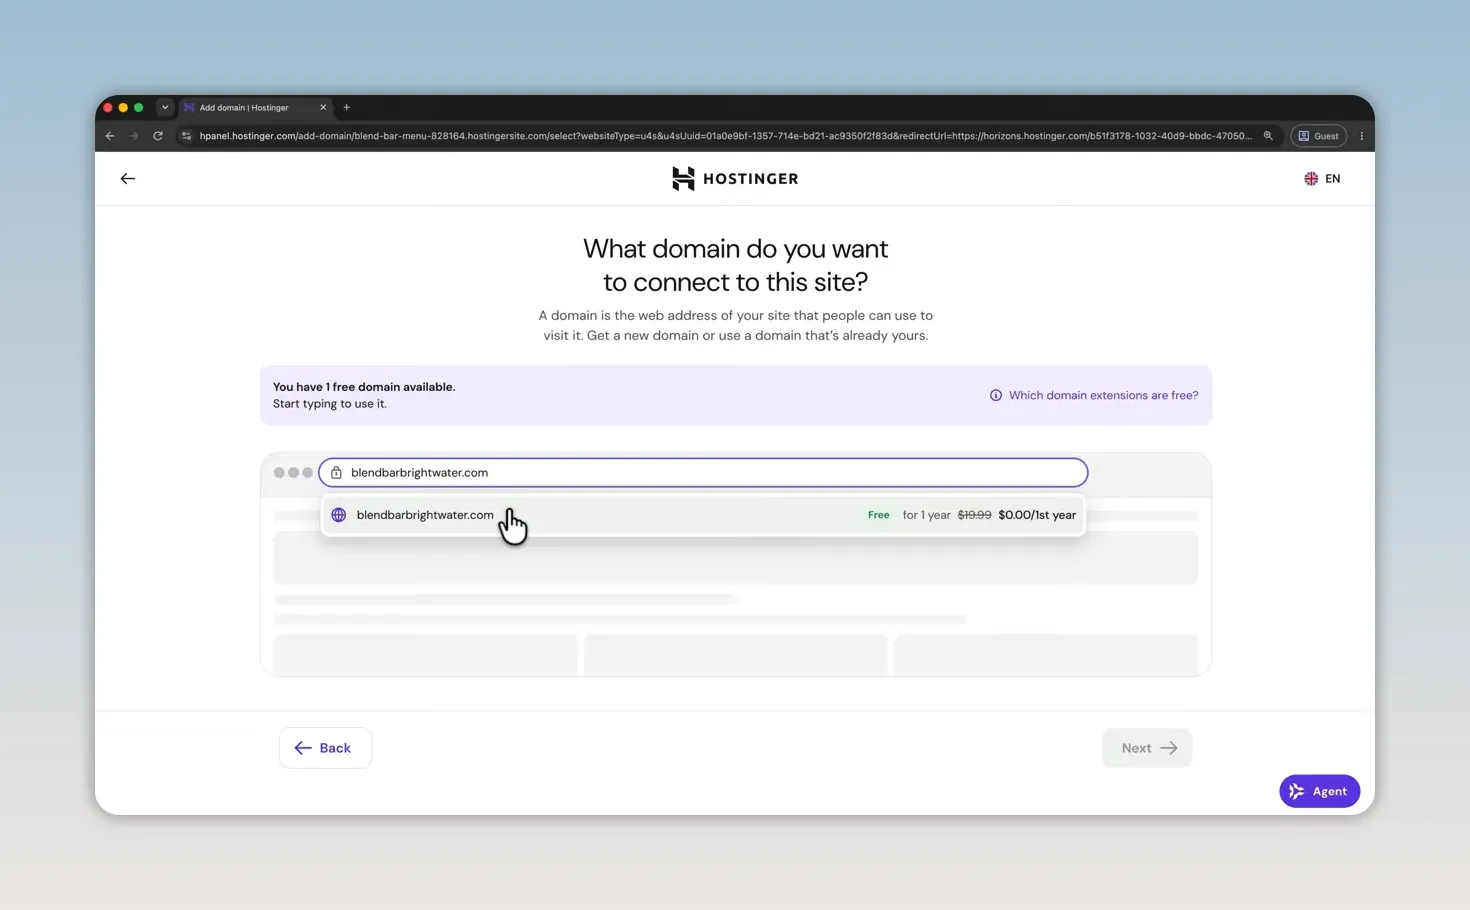
Verify your email within 14 days to keep the domain active. Check your inbox for the verification message from Hostinger and complete that step.
If a warning appears after connecting the domain, it may simply need a little time before the new address starts working. A brief delay doesn’t necessarily mean the connection failed.
Keep Your Website Updated
Your website is now published, and you can keep improving it using the same workflow: open the AI builder, make your edits, and click Publish again to send those changes live.
When you log back into Hostinger, go to Websites, then AI Builder. Your site will be listed there, along with its domain status and a button to return to editing.
If you get stuck, use the Agent button in the top right for help. The top-left menu also lets you create a new project, duplicate the website for experimentation, or return to the Hostinger dashboard.
The process is simple: give AI clear direction, refine one thing at a time, and check the details before publishing. AI handles the initial build, while your own content and business information make it a website you can confidently put online.


