You can build a website without writing a single line of code. Describe what you want in plain language, let AI create the first version, and then customize the text, images, and layout before putting it live on your own domain.
After trying a lot of different AI website builders, the one I personally recommend for this process is the Bluehost AI website builder. It combines an AI chat interface with a visual editor, so you can ask for bigger changes while handling smaller edits yourself.
I’ll use a neighborhood coffee shop called Sunday Coffee Club as an example, taking it from an initial prompt through to publishing and connecting a custom domain. The same basic process applies to other types of websites.
Bluehost offers a 3-day free trial in the setup covered here, so you can build and customize your site before choosing a paid plan. A paid plan is required to connect your own custom domain. Check the current offer and checkout terms before purchasing.
Disclosure: Our Bluehost link is an affiliate link. If you make a purchase through it, we may earn a commission at no extra cost to you.
What You'll Learn
- Write a clear website prompt covering your purpose, audience, structure, style, and required features.
- Edit text and images manually without credits, and reserve AI requests for bigger changes.
- Combine multiple changes into one AI message to make your credit allowance go further.
- Publish your website, upgrade your plan, and connect a custom domain through Bluehost.
Table of Contents
- 1. Write a Clear Website Prompt
- 2. Answer the Follow-Up Questions and Generate Your Site
- 3. Find Your Way Around the Editor
- 4. Edit Text and Images Without Using AI Credits
- 5. Use AI Credits Efficiently for Bigger Changes
- 6. Publish Your Website and Choose a Plan
- 7. Claim and Connect Your Custom Domain
- 8. Know Where to Go for Future Updates
- Build the Foundation with AI, Then Make It Yours
1. Write a Clear Website Prompt
The prompt is the starting instruction for your entire website. You don’t need technical language, and you don’t need to describe every tiny detail. The goal is to give the AI a clear picture of what you’re trying to create.
On the Bluehost AI website builder’s starting page, you’ll find a prompt box at the top. Below it are example website templates created with the builder. If one fits what you need, select Use this prompt to use it as a starting point.
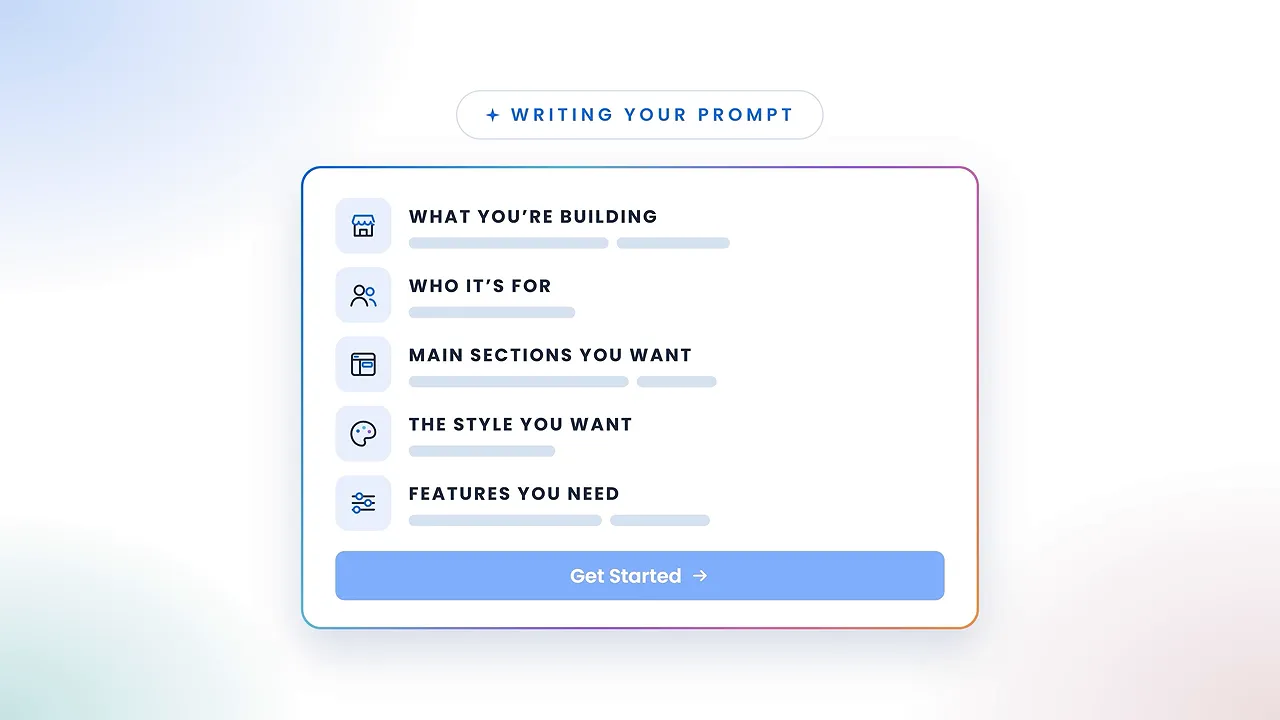
For a site tailored to your business, I’d usually write a custom prompt. A simple structure works well:
- What you’re building: The type of website and the name of your business or project.
- Who it’s for: The audience you want to reach.
- The sections or pages you want: The main content and how it should be organized.
- The style you want: Colors, typography, photography, and the overall feel.
- Important features: Anything the website needs to include.
A Coffee Shop Prompt You Can Adapt
Here’s how I’d put those five pieces together for Sunday Coffee Club:
Build a website for Sunday Coffee Club, a neighborhood coffee shop.
The site should appeal to local people looking for quality coffee and a comfortable place to work, relax, or spend time with friends.
Include a main hero section, our shop’s story, a coffee and pastry menu, a gallery of the space, and a contact section.
Give it a welcoming, modern look with warm neutral colors, clean typography, and plenty of photography.
Make our opening hours and address easy to find, and include a contact form for inquiries.
Each part gives the builder a different kind of direction. The business description establishes the purpose. The audience helps shape the tone. The section list provides the structure, while the visual instructions guide the design.
You can also describe separate pages, what belongs in the header, and how you want the navigation organized. Don’t stress about getting everything perfect on the first try. Bluehost asks follow-up questions to fill in some of the gaps.
Once your prompt is ready, click Get started.
2. Answer the Follow-Up Questions and Generate Your Site
The builder opens with an AI conversation on the left and a website preview area on the right. During setup, the AI asks questions to help narrow down your design preferences.
For the coffee shop, it first asks about site colors. I choose a warm beige and cream direction, then select the first suggested color palette. Your choices help turn a general description such as “warm and welcoming” into a more specific design.
After a few questions, you’ll be prompted to create a Bluehost account. You can sign up with Google, Apple, or GitHub, or enter your details manually and click Create account.
You’ll then return to the builder while it finishes generating the website. Once it’s ready, the first version appears in the preview.
Review the First Version Before Changing Anything
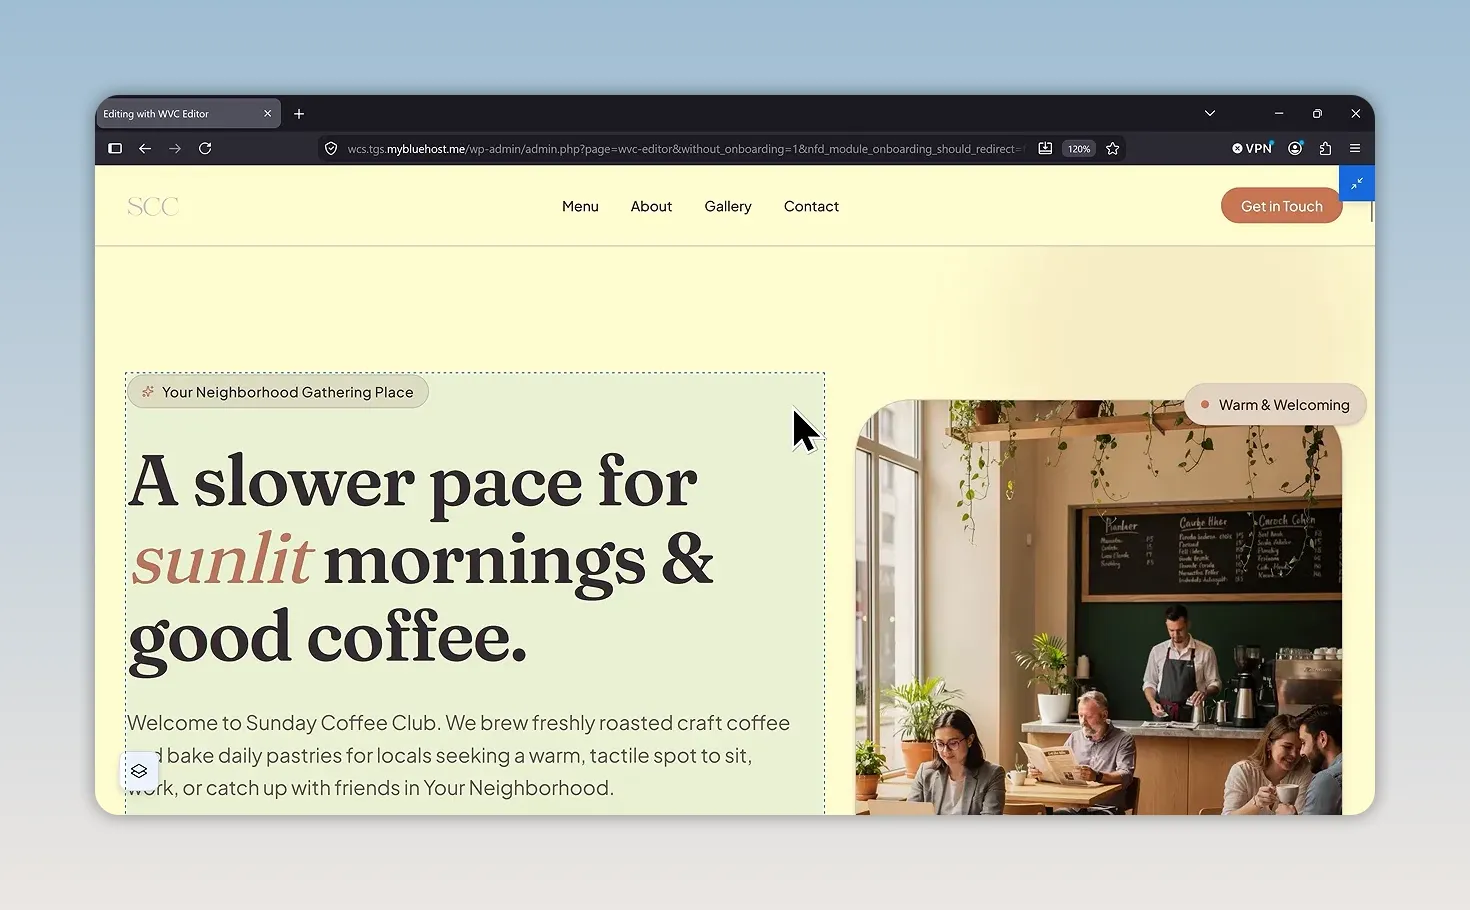
In my example, the AI creates:
- A header with a logo, navigation links, and a contact button.
- A hero section with a large headline and introductory text.
- Buttons for contacting the shop and exploring the menu.
- Opening hours and location information.
- Images and additional sections based on the original prompt.
It’s a really good starting point, but the generated version is not automatically your finished website. Scroll through the whole site and decide what you want to keep, replace, or add.
3. Find Your Way Around the Editor
Before making changes, it helps to know where the main controls live. Most of the tools you’ll use are in the top bar.
- Theme settings: Adjust your colors and fonts, or switch between a light and dark theme.
- Pages and posts: Access the site’s pages and posts.
- Current page selector: Move from the homepage to another page.
- Desktop and mobile preview: Switch between screen sizes to check the layout.
- Full-screen preview: Expand the website for a clearer look, then use the top-right control to return.
- WordPress settings: Access additional site settings.
- Save and publish controls: Save your work and publish changes when you’re ready.
I’d check both the desktop and mobile previews as you customize the site. You can also use full-screen preview whenever you want to judge the page without the chat panel taking up space.
4. Edit Text and Images Without Using AI Credits
There are two ways to change your website, and understanding the difference is important:
- Manual changes in the visual editor do not use AI credits.
- Requests sent to the AI use credits.
For straightforward text and image replacements, stick with the visual editor. You don’t need to spend a credit asking the AI to make a change you can handle with a few clicks.
Change Your Text
Open the visual editor using its icon in the top bar. Click the text you want to change, highlight the relevant words, and type or delete text directly.
For example, I can select part of the homepage headline and remove it myself. That edit doesn’t use any credits.
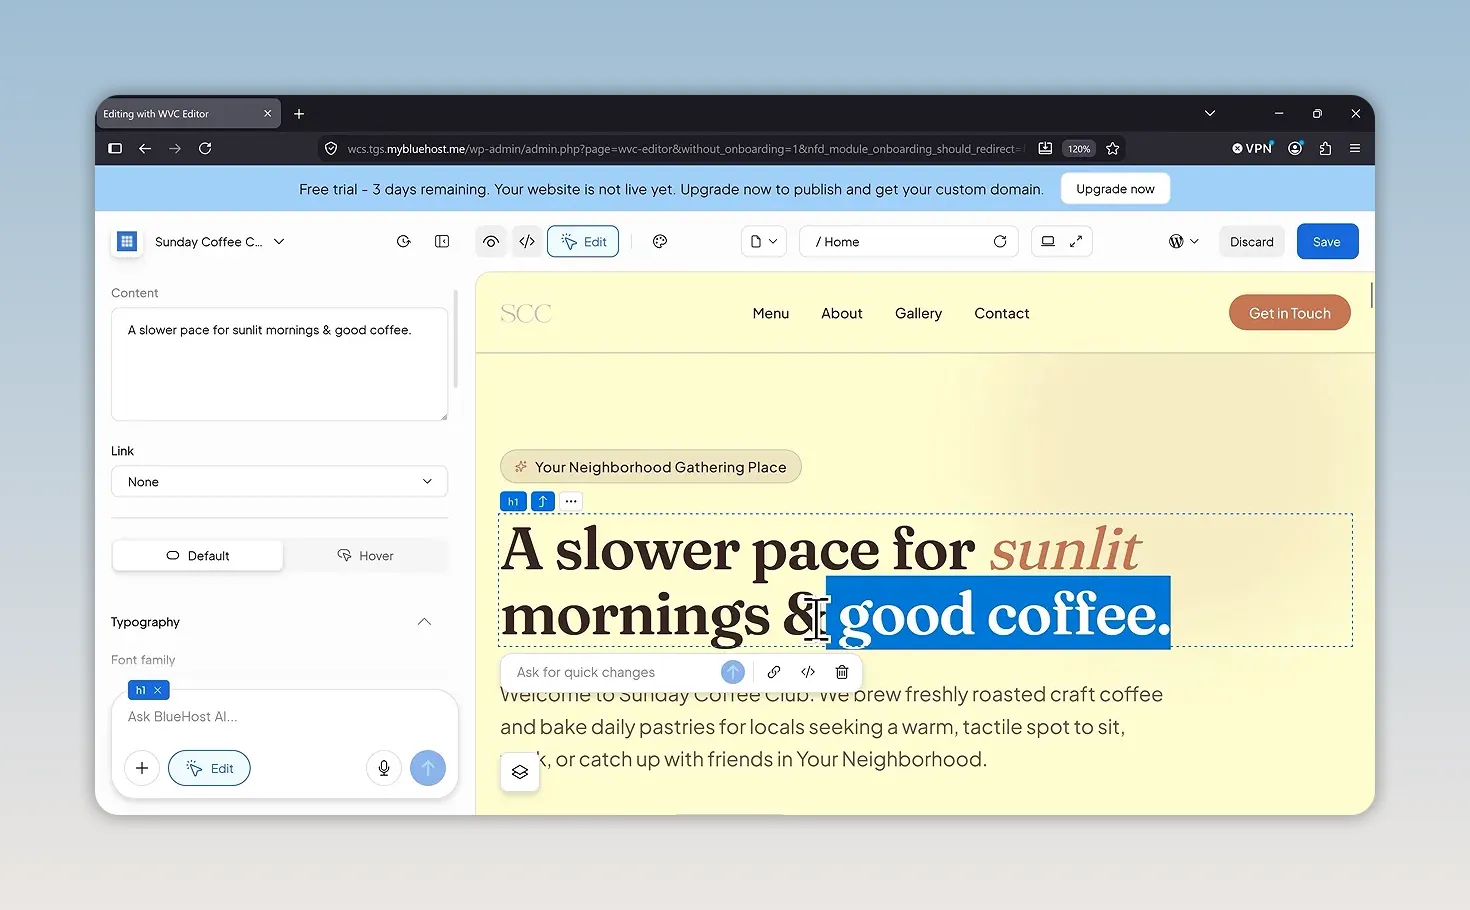
When you select a section, you may also see an Ask for quick changes box. This lets you request an AI edit to the selected section. It’s convenient, but it is still an AI request, so it uses credits even though you’re inside the visual editor.
Replace Your Images
You can also replace generated images with your own files:
- Click the image you want to replace.
- In the left sidebar, select Choose image.
- Drag and drop your replacement image into the upload area.
- Wait for the upload to finish.
- Select the image and click Use this media.
The replacement appears in the page preview. In my example, I swap the main coffee shop photograph for a close-up coffee image.
This is the easiest way to personalize the site’s existing content. Once you’ve finished your manual edits, click Save.
5. Use AI Credits Efficiently for Bigger Changes
For more involved changes, such as adding a new page or creating a new section, return to the AI chat.
The key rule is simple: each message you send to the AI costs one credit. A message requesting one small adjustment costs the same as a message containing several changes.
That makes your workflow important. Rather than sending a separate message for every adjustment:
- Review the entire website.
- Write down the changes you want.
- Combine those changes into one clear message.
- Send the request and inspect the result.
You’re not saving credits by keeping each request tiny. You save them by grouping related changes into a well-organized request.
How Many Credits Do You Get?
The credit allowances covered in this setup are:
- Free trial: Five credits.
- Paid plan: 20 credits each month, with a monthly refill.
- First paid month: 10 bonus credits, bringing that month’s total to 30.
You can check your available balance from the credit indicator near the top-right corner of the builder. Confirm the current allowance for the plan you choose, since offers and plan details can change.
Add Your Logo and a New Section in One Request
For Sunday Coffee Club, I want to upload a custom logo and add a section for free community events called Sunday Sessions. Both changes can go into the same message.
First, click the plus button in the chat area, choose Attach media, and upload your logo.
Then either type your instructions or use the microphone button. I personally like using voice input because you can explain what you want naturally, without trying to sound technical.
A request could look like this:
Apply the attached logo wherever it makes sense across the site. Also create a section named Sunday Sessions for our free community events held on Sunday afternoons.
If you use the microphone, your spoken request is converted into text. Review it before sending, then submit the message and give the AI a few minutes to work.
Once it finishes, the chat provides an update explaining what changed. If the preview hasn’t refreshed, use the preview refresh button.
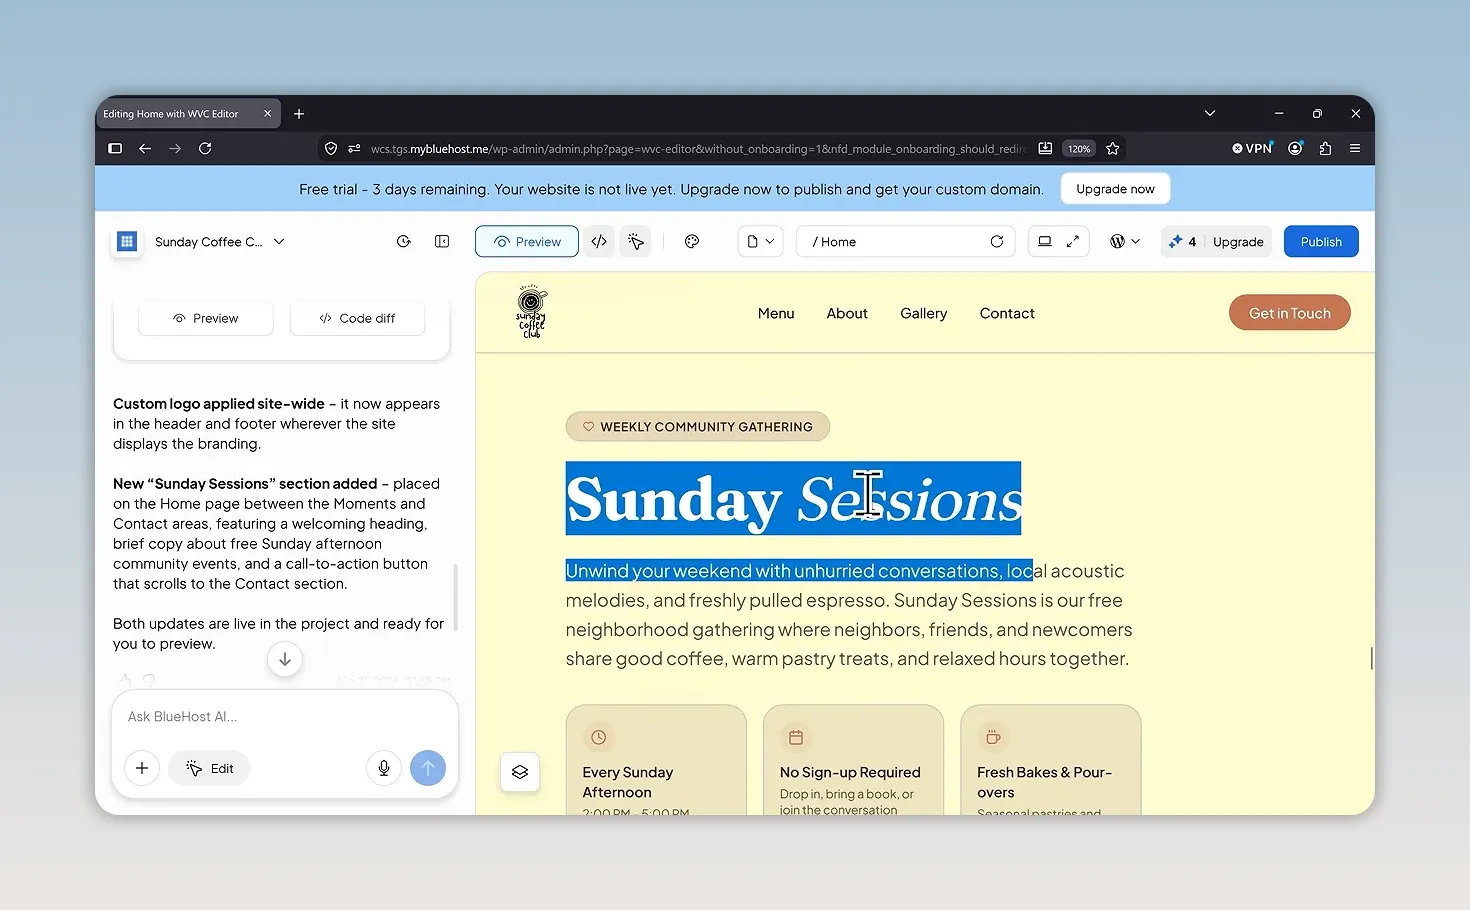
In this example, the logo and new section use one credit altogether, leaving four trial credits. That’s the balance I’d aim for: use the visual editor for smaller content edits and reserve the AI for larger changes.
Restore a Previous Version if Something Goes Wrong
If the AI changes something you don’t like, or an edit breaks part of the site, scroll up in the chat history and find the Restore button for an earlier version.
Restoring brings the site back to that previous working version. You don’t have to keep building on a change that didn’t turn out the way you wanted.
6. Publish Your Website and Choose a Plan
When you’re happy with the website, open the publishing controls in the top-right corner and click Publish changes.
Your site is now live, but initially it uses a temporary domain. Publishing and connecting your own domain are separate steps.
To use a custom domain, click Upgrade now at the top of the builder. This opens the plan checkout.
- Choose your billing term. The checkout shown offers monthly, 1-year, and 2-year options.
- Enter your billing information.
- Add your payment method.
- Review the order and click Submit payment.
- After confirmation, click Go to account.
I choose the 1-year term for this example. Once checkout is complete, you’ll arrive in the Bluehost dashboard, where your new website is listed.
7. Claim and Connect Your Custom Domain
Upgrading doesn’t automatically replace the temporary address. You still need to claim your domain and connect it to the website.
Claim Your Domain
Open the email account you used to sign up for Bluehost. Look for the Bluehost email containing the Claim my domain now link.
- Click the domain claim link.
- Enter the domain name you want.
- Choose the extension, such as .com.
- Click Search for domain.
- Review the domain checkout and complete the order.
For the coffee shop, I search for a domain based on Sunday Coffee Club.
In this example’s checkout, the domain and domain privacy and protection are both free for the first year, making the domain order total $0. The displayed renewal prices are $23.99 for the domain and $15 for domain privacy.
Those are the example’s checkout figures, not a guarantee for every domain or plan. Review your own first-year charges and renewal prices before submitting the order.
After claiming the domain, click Go to account to return to Bluehost.
Connect the Domain to Your Website
Back in the dashboard:
- Select Connect domain to enable.
- Click Add domain.
- Find the domain you just claimed.
- Click Connect to website.
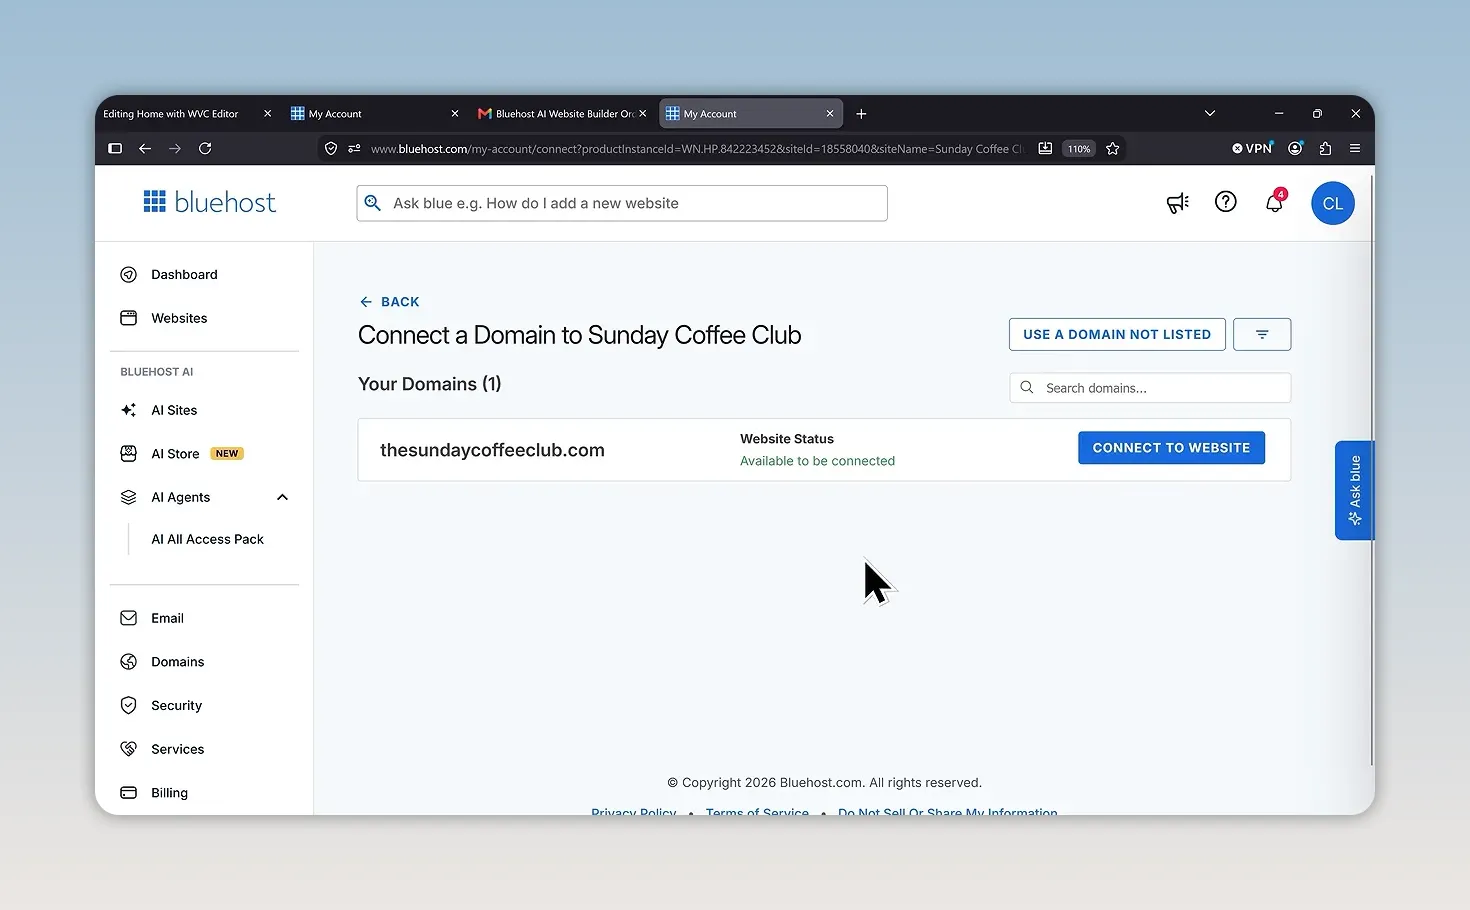
Bluehost processes the connection and assigns the domain to your website. It can take a few hours for the site to fully switch away from the temporary address, so give it some time to update.
8. Know Where to Go for Future Updates
Once your website is built, there are a few different places you’ll use to manage it. Each has a different job.
The Websites Tab: Editing and Site Management
In Bluehost, open the Websites tab to see your sites. Next to your website are two important buttons:
- Manage Site: Opens controls for backups, security, performance, and other site-management settings.
- Edit Site: Takes you back into the AI website builder to change your website’s content and design.
For day-to-day design changes, Edit Site is the button you’ll normally need. Use Manage Site when you need hosting-level controls or want to investigate a problem.
The Bluehost Dashboard: Your Account Hub
The Dashboard tab is the main hub for your Bluehost account. Other Bluehost features are listed in the left sidebar, and your account settings are available from the profile control in the top-right corner.
If you’re unsure where a feature lives, you can ask the Bluehost AI using the question field at the top of the dashboard.
The WordPress Dashboard: Plugins and Technical Settings
Your site also has a WordPress dashboard. To reach it, open your live website while signed in and click your website’s name in the black administration bar along the top.
This is where you manage the more technical side of WordPress, including installing plugins for features such as contact forms or additional SEO tools. The official WordPress plugin management guide is a useful reference if you need help with that later.
You don’t need to use the WordPress dashboard for the design changes covered here. Those happen inside the AI website builder.
Build the Foundation with AI, Then Make It Yours
The biggest advantage of this process is that you start with a complete first version instead of a blank page. A clear prompt gives the AI direction, the visual editor lets you personalize the details without spending credits, and the chat handles bigger structural changes.
Once you’ve refined the site, published it, and connected your domain, you have both a live website and a clear route back to edit it. Keep the workflow simple: edit small details manually, group bigger AI requests, and review the result before publishing.


