CapCut makes video editing easy once you know where the main tools are and how they work together. You can build a complete edit with just a few clips, then polish it with transitions, music, animated text, and automatic captions.
We’ll work through a simple skiing video using three clips. The workflow covers CapCut’s desktop editor from creating a project to exporting the finished video, including the shortcuts that make editing much faster.
What You'll Learn
- Build an edit by importing media, arranging clips, and trimming with timeline tools and shortcuts.
- Refine your footage with transitions, framing adjustments, keyframe animation, speed changes, and color controls.
- Add music, manage audio levels, and customize automatic captions and animated titles.
- Export your finished video with control over resolution, format, codec, bit rate, and frame rate.
Table of Contents
- 1. Create a Project and Get Familiar With the Layout
- 2. Import Footage and Add It to the Timeline
- 3. Trim Clips and Learn the Main Timeline Tools
- 4. Add Transitions Between Clips
- 5. Adjust Framing and Animate With Keyframes
- 6. Change Video Speed and Add Clip Animations
- 7. Correct Color and Apply Filters
- 8. Add Music and Adjust Audio
- 9. Generate and Customize Automatic Captions
- 10. Add Custom Text and Animate It
- 11. Export Your Finished Video
1. Create a Project and Get Familiar With the Layout
Open CapCut and click the large Create project button at the top of the home screen. This opens the main editing workspace.
There are four main areas to get familiar with:
- Media panel, on the left: This is where you import footage, photos, and music. The tabs across the top also give you access to tools and libraries such as audio, text, transitions, and filters.
- Player, in the center: This previews your video as you edit.
- Details panel, on the right: With no clip selected, this shows project information. When you select a clip or another timeline item, this area displays its editing controls.
- Timeline, along the bottom: This is where you arrange clips, trim footage, and layer music, voiceovers, captions, and text.
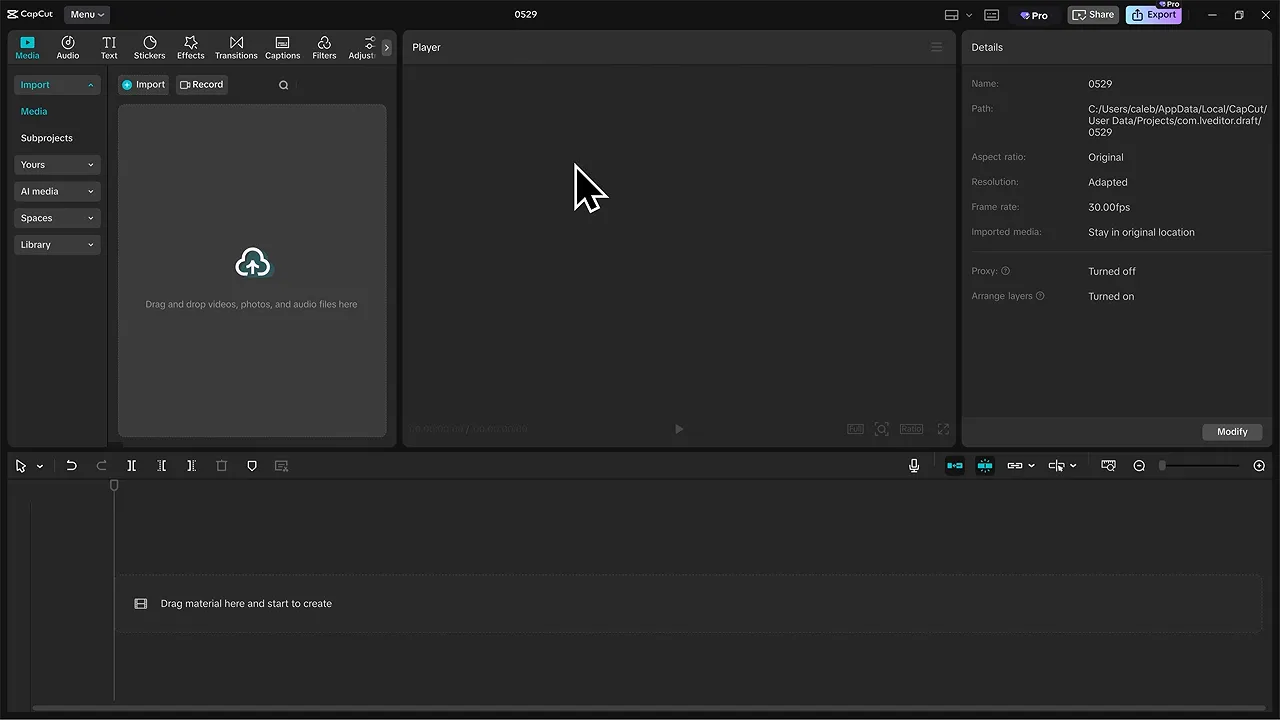
To change your project settings, click Modify in the details panel. Here, you can adjust the project name, aspect ratio, resolution, frame rate, and color space. If the current settings already suit your project, leave them as they are.
2. Import Footage and Add It to the Timeline
Click the import area in the media panel and locate your files. For this example, I’m importing three skiing clips.
- Select the first clip in the file browser.
- Hold Shift and click the third clip to select all three consecutive files.
- Click Open to bring them into the media bin.
Importing makes the files available inside your project, but you still need to place them on the timeline before editing them.
You can do that in either of two ways:
- Hover over a clip in the media bin and click its blue plus button.
- Select your clips and drag and drop them onto the timeline.
Once the clips are on the timeline, you can start shaping the edit.
Zoom in and out of the timeline
Zooming into the timeline makes it easier to place cuts precisely. Zooming out helps you see more of the overall sequence.
- Ctrl + Plus: Zoom in.
- Ctrl + Minus: Zoom out.
- Ctrl + mouse wheel up: Zoom in.
- Ctrl + mouse wheel down: Zoom out.
I prefer holding Ctrl and using the mouse wheel because it’s quick to adjust while editing. These controls change your timeline view, not the framing of the actual video.
3. Trim Clips and Learn the Main Timeline Tools
The first clip in this example is about 11 seconds long, which is more than I need. Before trimming it, I’ll find the exact moment I want to keep.
The playhead is the white vertical marker on your timeline. It indicates your current position in the edit. Drag it forward or backward to move through the footage, and the player updates as you go.
For this skiing shot, I’m looking for the point where the camera becomes nicely centered. Once the playhead is in the right place, there are three main ways to trim.
Method 1: Split the clip and delete the unwanted section
- Select the clip and position the playhead where you want to cut.
- Click the Split icon above the timeline, or press Ctrl + B.
- Select the section you don’t need.
- Press Delete.
The keyboard shortcut is especially useful when you’re making lots of cuts, since you don’t have to return to the Split button each time.
Method 2: Drag the edge of the clip
Move your pointer to the beginning or end of a clip. When the pointer changes to the trim icon, hold the left mouse button and drag the edge inward to shorten it. You can use the playhead as a visual reference for where you want the clip to end.
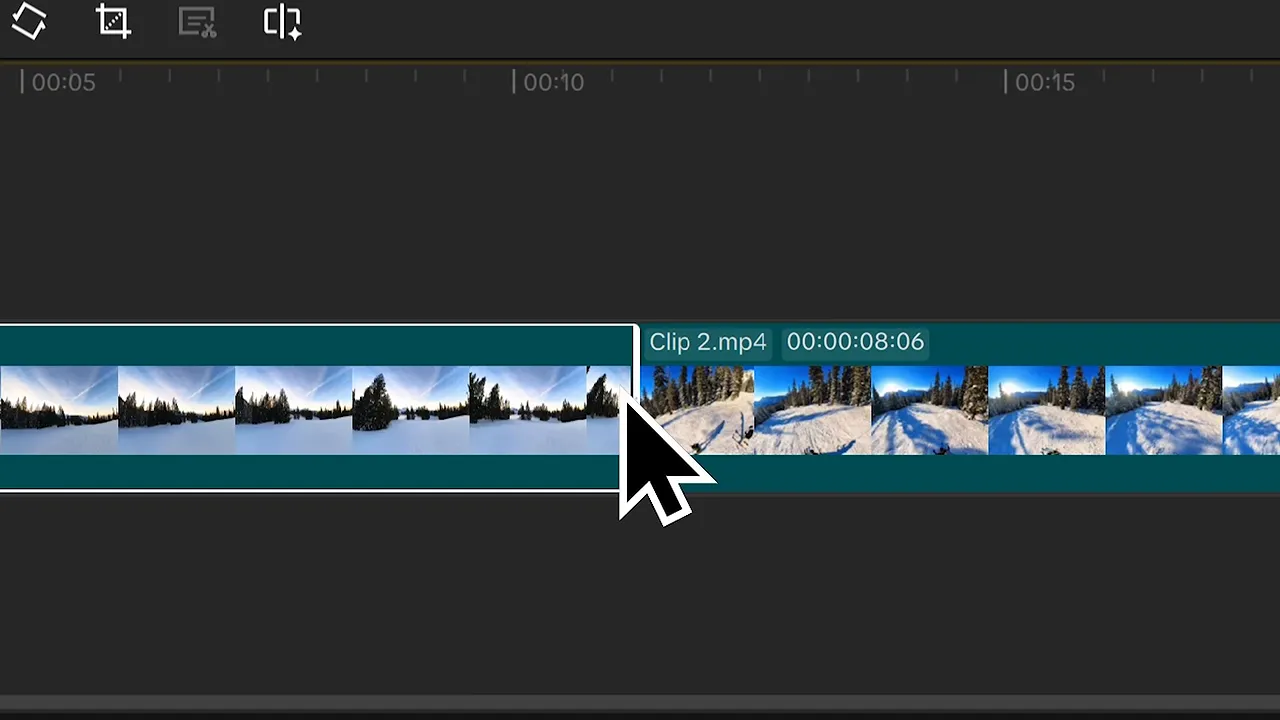
Method 3: Use Q and W
With the relevant clip selected and the playhead positioned at your trim point:
- Q removes the portion of the clip to the left of the playhead.
- W removes the portion of the clip to the right of the playhead.
These shortcuts are a fast way to trim the start or end of a shot without splitting and deleting in separate steps.
Other useful timeline tools
The toolbar above the timeline includes more than cutting controls. Along with Undo, Redo, and Delete, you’ll find:
- Marker: Marks points on your footage or timeline so you can return to an action or planned edit later.
- Freeze frame: Creates a still image from the selected clip at the current position.
- Reverse: Makes the footage play backward.
- Mirror: Flips the image horizontally.
- Rotate: Changes the orientation of the footage.
- Crop: Lets you adjust which area of the image is included.
4. Add Transitions Between Clips
Without a transition, the first skiing shot cuts directly to the second. If you want a different effect between those shots, open the Transitions tab at the top of the media panel.
- Hover over transition thumbnails to preview the available effects.
- Find one you like.
- Drag it onto the boundary between two clips.
- Move the playhead back before the transition and press Spacebar to preview it.
To change the timing, select the transition on the timeline and adjust Duration in the panel on the right. A shorter duration makes the effect faster. For example, reducing it to 0.5 seconds creates a much quicker transition.
Preview the cut again after changing its duration so you can judge how it fits with the footage.
5. Adjust Framing and Animate With Keyframes
Change scale, position, and rotation
Select the clip you want to reframe. In the controls on the right, increase Scale to zoom into the image. For the second skiing clip, I’m using this to bring the person closer in the frame.
Next, adjust Position to move the image. You can use the position controls or simply drag the image directly in the player.
As you drag, blue alignment guides appear when the image lines up with the vertical or horizontal center. These make it easier to center the shot without guessing.
You can also use the Rotation control to rotate the image freely. If you’re experimenting and don’t like a change, press Ctrl + Z to undo it.
Create a zoom animation with keyframes
Changing Scale gives you a fixed zoom. To make the video gradually zoom in during playback, use keyframes.
A keyframe stores a setting at a particular moment. When you give CapCut two different values at two different times, it animates the change between them.
- Select your clip and move the playhead to where the zoom should begin.
- Click the diamond icon next to Transform to add the first keyframe.
- Move the playhead farther into the clip.
- Increase Scale to set the ending zoom.
- CapCut adds another keyframe for the new value.
- Move the playhead between those points or play the section to preview the zoom.
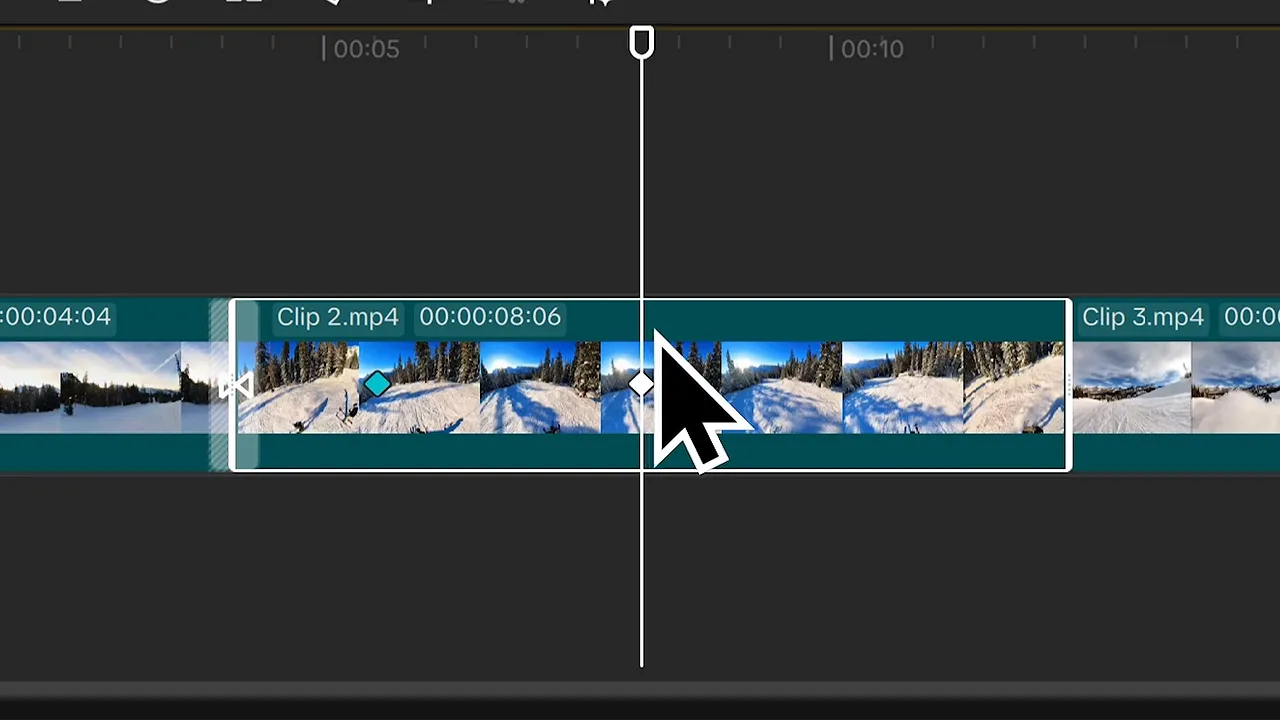
Look for diamond icons throughout CapCut. A property with a diamond beside it can be animated with keyframes, so the same basic process applies beyond a simple zoom.
6. Change Video Speed and Add Clip Animations
Speed up or slow down footage
With a clip selected, open the Speed tab in the right-hand panel.
- Drag the speed slider to the right to make the footage faster.
- Drag it to the left to slow the footage down.
You can also set speed indirectly by entering a target Duration. For example, if a shot needs to last exactly 7.5 seconds, enter 7.5 in the duration field and press Enter. CapCut adjusts the playback speed to fit that length.
This is different from trimming: changing duration through the Speed controls changes how quickly the footage plays.
Apply an animation to an individual clip
Open the Animation tab to find three categories:
- In: Animations for the beginning of a clip.
- Out: Animations for the end of a clip.
- Combo: Combined animation effects for the clip.
These work a little like transitions, but they apply to individual clips rather than the boundary between two shots.
For example, choose Out and select TV Off to add a television-style ending effect. Adjust its duration at the bottom of the animation panel. Setting it to about 1 second shortens the effect.
7. Correct Color and Apply Filters
Select a clip and open Adjust to access the color correction controls. Scroll through the panel to find settings such as:
- Temperature: Changes the warm or cool appearance of the image.
- Saturation: Adjusts the intensity of the colors.
- Exposure: Makes the image brighter or darker.
For the skiing footage, you can experiment with temperature, boost saturation, and increase exposure to brighten the image. The player lets you see each adjustment as you make it.
For a preset look, open Filters in the upper-left library. Drag your chosen filter either directly onto the footage or onto a separate track above it.
Manual adjustments give you control over individual image settings, while filters provide a quick way to apply a particular visual style.
8. Add Music and Adjust Audio
Add a track from CapCut’s stock music library
Open the Audio tab to browse CapCut’s stock music. Click a track’s album cover to preview it.
When you find a song you like, drag it below your footage on the timeline. CapCut creates a separate audio track for it.
Adjust volume, fades, and other audio settings
Select the music clip to bring up its audio controls on the right. These include:
- Volume to increase or decrease the level.
- Fade in and Fade out to soften the beginning and ending.
- Loudness normalization to adjust loudness.
The panel also includes tools for voice enhancement, audio translation, background noise reduction, audio separation, and channel filling. Those are worth exploring when working with a voiceover or other recorded audio.
Check for audio that is too loud
The music in this example has orange and red indicators along its waveform, showing that the level is too high.
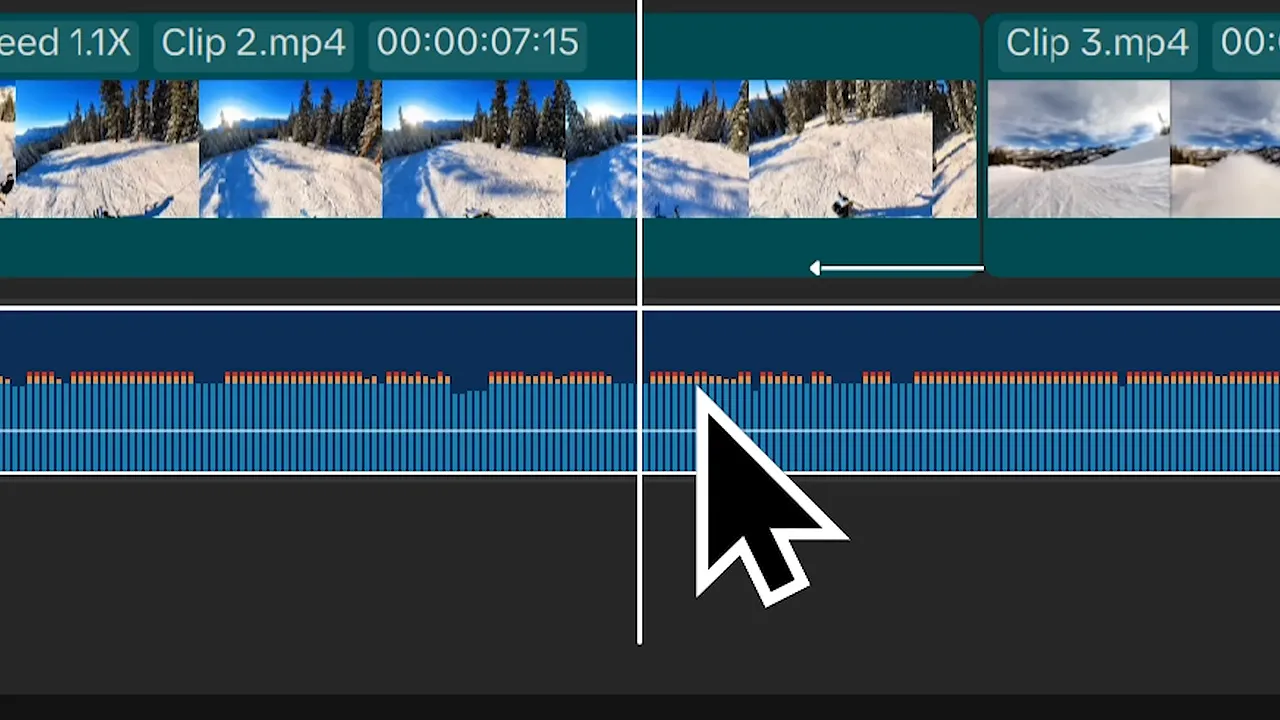
To lower it, keep the audio clip selected, return to the volume control, and reduce the level. You’ll see the waveform become smaller as you turn it down.
I’ll also add a slight fade in and fade out so the music starts and ends more gently.
9. Generate and Customize Automatic Captions
To demonstrate automatic captions, I’m adding a separate voiceover file to the project.
- Return to Media and click Import.
- Select your voiceover file and open it.
- Drag it below the music to create another audio track.
- Move the playhead to the voiceover section so you can preview the result afterward.
- Open the Captions tab.
Before generating captions, choose the spoken language and review the available options. These include bilingual captions, automatic keyword highlighting, AI emojis, and filler-word identification.
Once your options are set, click Generate. CapCut creates captions from the spoken audio and adds them to the timeline.
Correct the wording and style
Move the playhead over the captioned section and select the captions to edit them in the right-hand panel. If a word is incorrect, highlight it in the text field and type the correction.
You can customize:
- Font and font size.
- Bold, underline, and italic formatting.
- Uppercase or lowercase text.
- Text color and alignment.
- Preset caption styles.
In this example, the default white captions blend into the snow. Choosing a yellow preset makes them easier to distinguish from the background.
Open Templates for additional caption designs, including animated styles. Apply one, then play the section again to see how the text appears during speech.
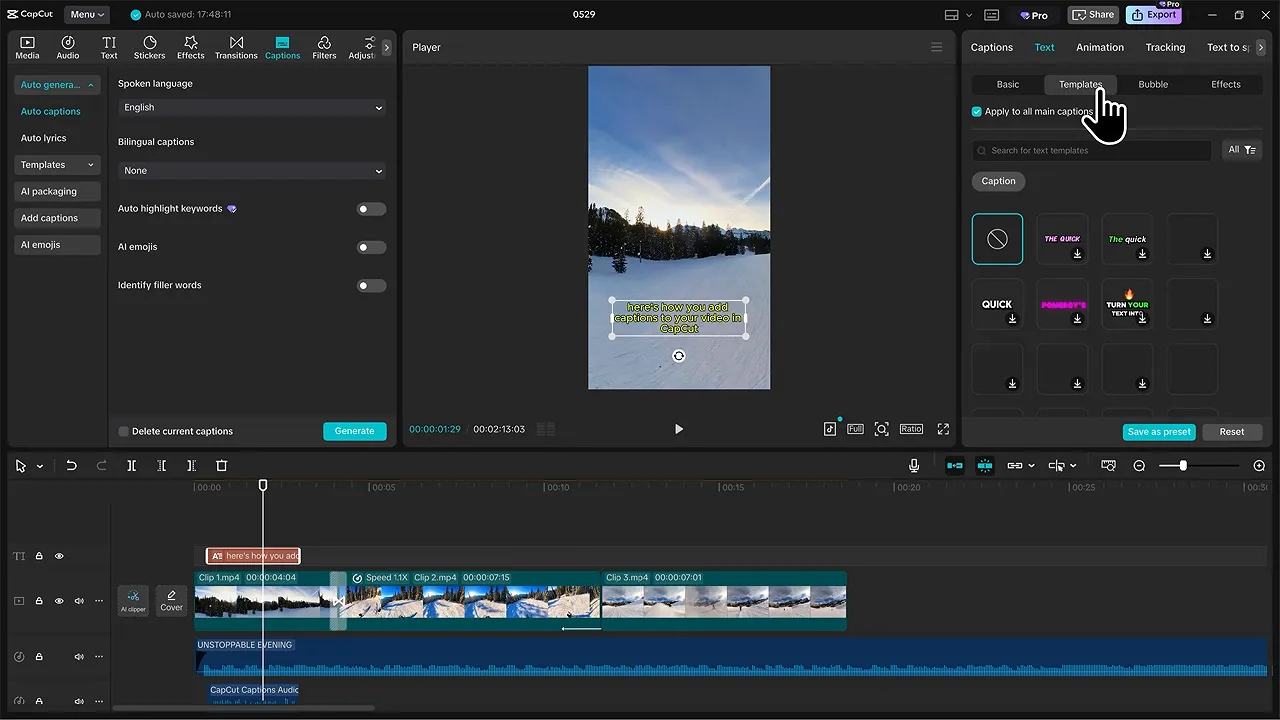
Generating captions is only the first step. Check the wording and make sure the styling remains readable against your footage. For more context on making captions useful, the W3C’s caption guidance is a helpful reference.
10. Add Custom Text and Animate It
Automatic captions follow spoken audio. If you want a title or another custom message, use the Text tab instead.
- Open Text in the upper-left panel.
- Drag Default text onto the timeline above the footage.
- Move the text in the player to a position where it is easy to see.
- Replace the default wording in the right-hand panel.
For the skiing edit, I’m adding the title Skiing Trip and positioning it in the sky. The styling controls are similar to those for captions, so you can change the font, size, color, and preset appearance.
Add entrance and exit animations
With the text selected, open Animation. Text has In, Out, and Loop categories.
For this title, choose a Typewriter entrance animation, then switch to Out and add a fade-out effect.
Move the playhead back to the beginning and press Spacebar. You’ll now have a custom animated title appearing alongside the captions.
11. Export Your Finished Video
Once you’re happy with the edit, click Export in the top-right corner.
The export window lets you choose:
- Video name and the folder where the file will be saved.
- Resolution.
- Bit rate.
- Codec.
- Format.
- Frame rate.
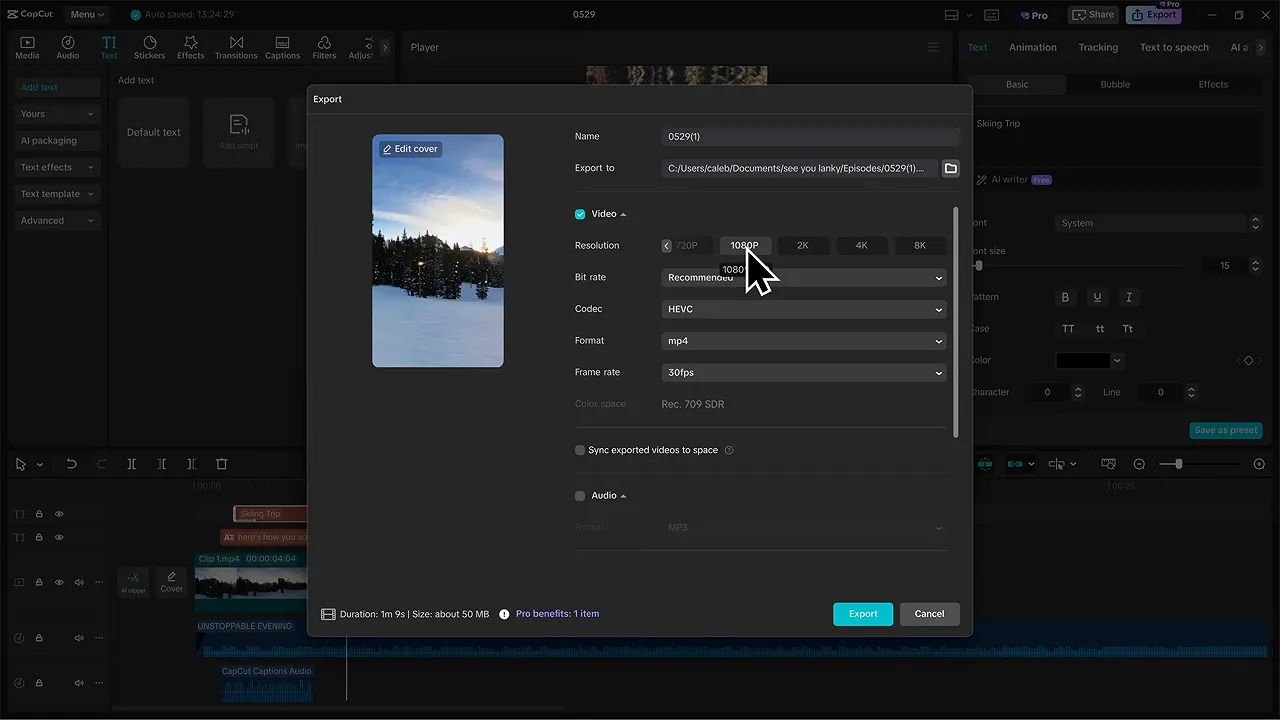
Scroll down to review the additional audio, GIF, and caption settings. Once everything is configured the way you want, click the blue Export button to create the finished file.
That’s the complete workflow: import your clips, trim them into a sequence, refine the framing and timing, add your audio and text, and export. You don’t need to use every effect on every project. Getting comfortable with these core tools gives you a solid foundation for your next edit.
You can sign up for CapCut for free. If you want broader access to its AI features, templates, and assets, you can also explore CapCut Pro through our sign-up link.
Disclosure: This is an affiliate link. If you make a purchase through it, we may earn a commission at no extra cost to you.


