Building your first Shopify store is much easier when you break it into a few manageable steps. Start with a theme, add your branding and products, organize your navigation, and then configure the settings that let customers place an order.
For this setup, I’m using a watch store as an example, with men’s and women’s collections, a New Arrivals section, and a featured smartwatch. You can follow the same process for your own products.
A quick note before you start: Shopify’s interface, available themes, and trial offers change over time. Some labels and screens may look different in your account, but the setup process below gives you the structure to follow.
What You'll Learn
- Customize your Shopify theme with branding, homepage sections, and clear navigation.
- Organize products into collections and activate them before displaying them in your store.
- Configure policies, payments, shipping rates, and a branded domain before launch.
- Test the shopping experience on desktop and mobile before removing password protection.
Table of Contents
- 1. Create Your Shopify Account
- 2. Choose a Theme and Open the Store Editor
- 3. Add Your Logo and Announcement Bar
- 4. Build Your Homepage Hero Section
- 5. Create Collections and Display Them on Your Homepage
- 6. Add Products to Shopify
- 7. Finish the Homepage Product Sections
- 8. Create Your Policies and Add Footer Links
- 9. Customize Your Main Navigation
- 10. Match the Design to Your Brand and Check Mobile
- 11. Configure Your Store Details, Payments, and Shipping
- 12. Connect Your Domain and Set Your Homepage Search Details
- 13. Choose a Plan, Test Your Store, and Remove the Password
1. Create Your Shopify Account
Start by signing up for a Shopify account. Enter your email address, follow the account creation prompts, and provide your business name and address. If Shopify presents an optional onboarding survey, you can complete it or skip it where that option is available.
Once you’ve finished, you’ll arrive in your Shopify dashboard. This is the back office where you’ll manage your products, customize your storefront, and set up payments and shipping.
The original setup used a 14-day free trial. Check the offer and billing terms displayed during signup rather than assuming that trial length still applies.
2. Choose a Theme and Open the Store Editor
From your dashboard, go to Online Store > Themes. Your theme controls the basic design of your store, including its layout, typography options, and available page sections.
The example starts with Dawn as the default theme and switches to Brooklyn. You don’t need to use the same theme to follow along. Browse the free themes available in your account and choose one that fits your business and products.
- Explore the available free themes.
- Add the theme you want to use.
- Open its actions menu and choose Publish when you’re ready to make it your current theme.
- Click Customize to open the theme editor.
Inside the editor, you can switch between templates such as your homepage, product pages, and collection pages. You can also use the device preview control to check different screen sizes.
Understand sections and blocks
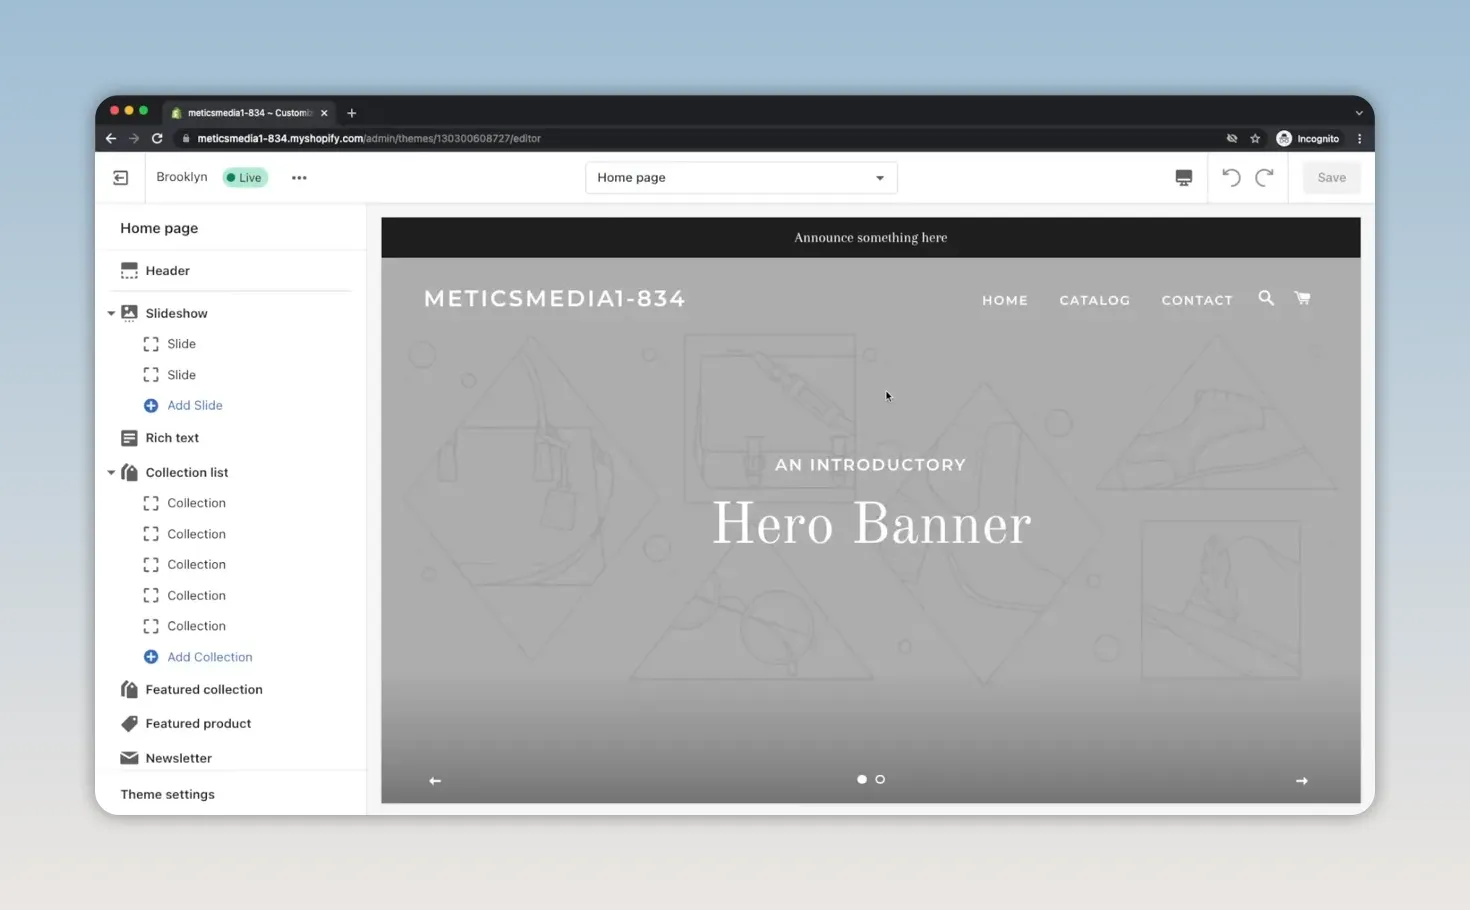
The left sidebar shows the structure of the page you’re editing. The header sits at the top, the footer sits at the bottom, and the main content sections appear in between.
In this example, the homepage includes a slideshow, a text section, a collection list, a featured collection, a featured product, and a newsletter section.
- Reorder sections by dragging them up or down.
- Remove a section by selecting it and clicking Remove section.
- Add content with the Add section control.
- Edit blocks within a section, such as individual slides or collection cards.
3. Add Your Logo and Announcement Bar
Select the Header section and upload your store logo. Depending on your theme, you may also have an option for a separate logo on transparent headers.
For the watch store, I use a white version of the logo over the dark homepage image and a black version on pages with a light background. That keeps the branding readable in both situations.
Next, find the announcement bar settings. This is the strip at the very top of your store, which you can use for a short promotional message, such as a discount code or a free-shipping offer.
If you don’t have a useful message to put there, you can remove it. There’s no need to keep a section simply because it came with the theme.
4. Build Your Homepage Hero Section
The hero section is the large image and message customers encounter first on your homepage. For this store, I’m keeping it simple with one image rather than multiple rotating slides.
- Open the slideshow section.
- Remove any extra slide blocks.
- Select the remaining slide and upload your hero image.
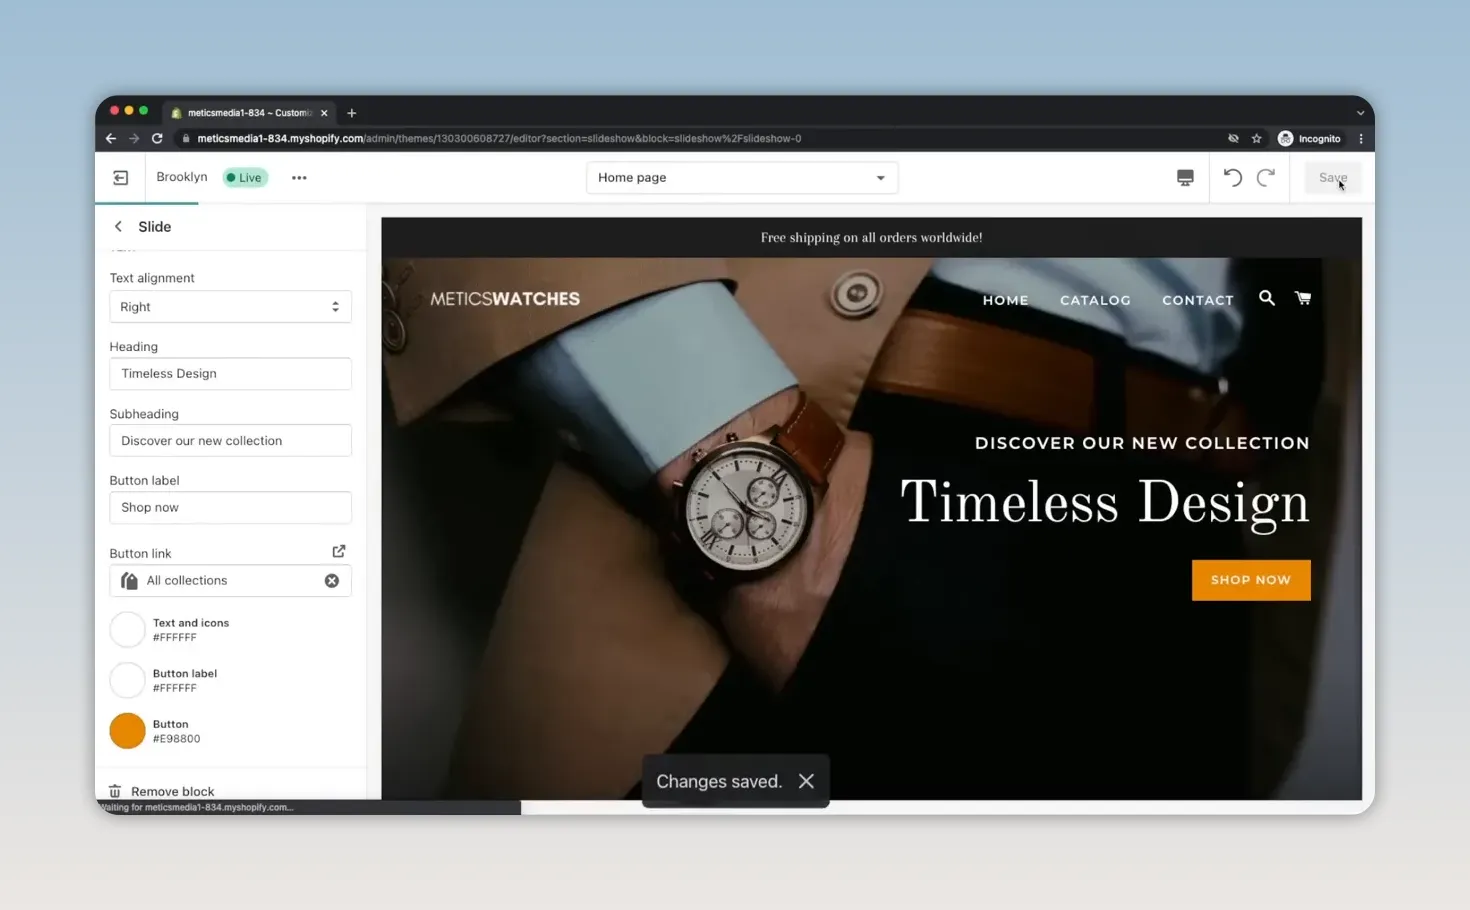
- Adjust the text alignment to suit the image.
- Replace the default heading and subheading.
- Add a Shop Now button and choose its destination.
In the watch store example, the text sits on the right, leaving the watch visible on the left. The heading introduces the design style, and the button links to Collections > All collections.
I also change the button to orange so it stands out against the dark image. The goal is straightforward: give customers a clear next step.
Save your changes regularly. Once the header and hero are finished, save before moving on to the product organization.
5. Create Collections and Display Them on Your Homepage
Collections group related products together. For this watch store, I’m creating three:
- Women’s for the women’s watch range.
- Men’s for the men’s watch range.
- New Arrivals for products I want to highlight as recent additions.
There are two different homepage sections to understand here. A collection list displays links to several collections, while a featured collection displays products from one selected collection.
Create your collections in the dashboard
Keep the theme editor open in one browser tab and open your Shopify dashboard in another. This makes it easier to move between creating content and placing it on your homepage.
- Go to Products > Collections.
- Remove any default collection you don’t need.
- Click Create collection.
- Enter a name and upload a collection image.
- Choose Manual as the collection type.
- Save, then repeat for your other collections.
Manual collections let you choose exactly which products belong in each group. That’s the approach I’m using for this setup.
Connect the collections to your homepage
Return to the editor and select the collection list. I name this section Find Your Style, remove the extra collection blocks, and leave two cards.
Assign the Women’s collection to one card and the Men’s collection to the other. The collection images now replace the placeholder graphics.
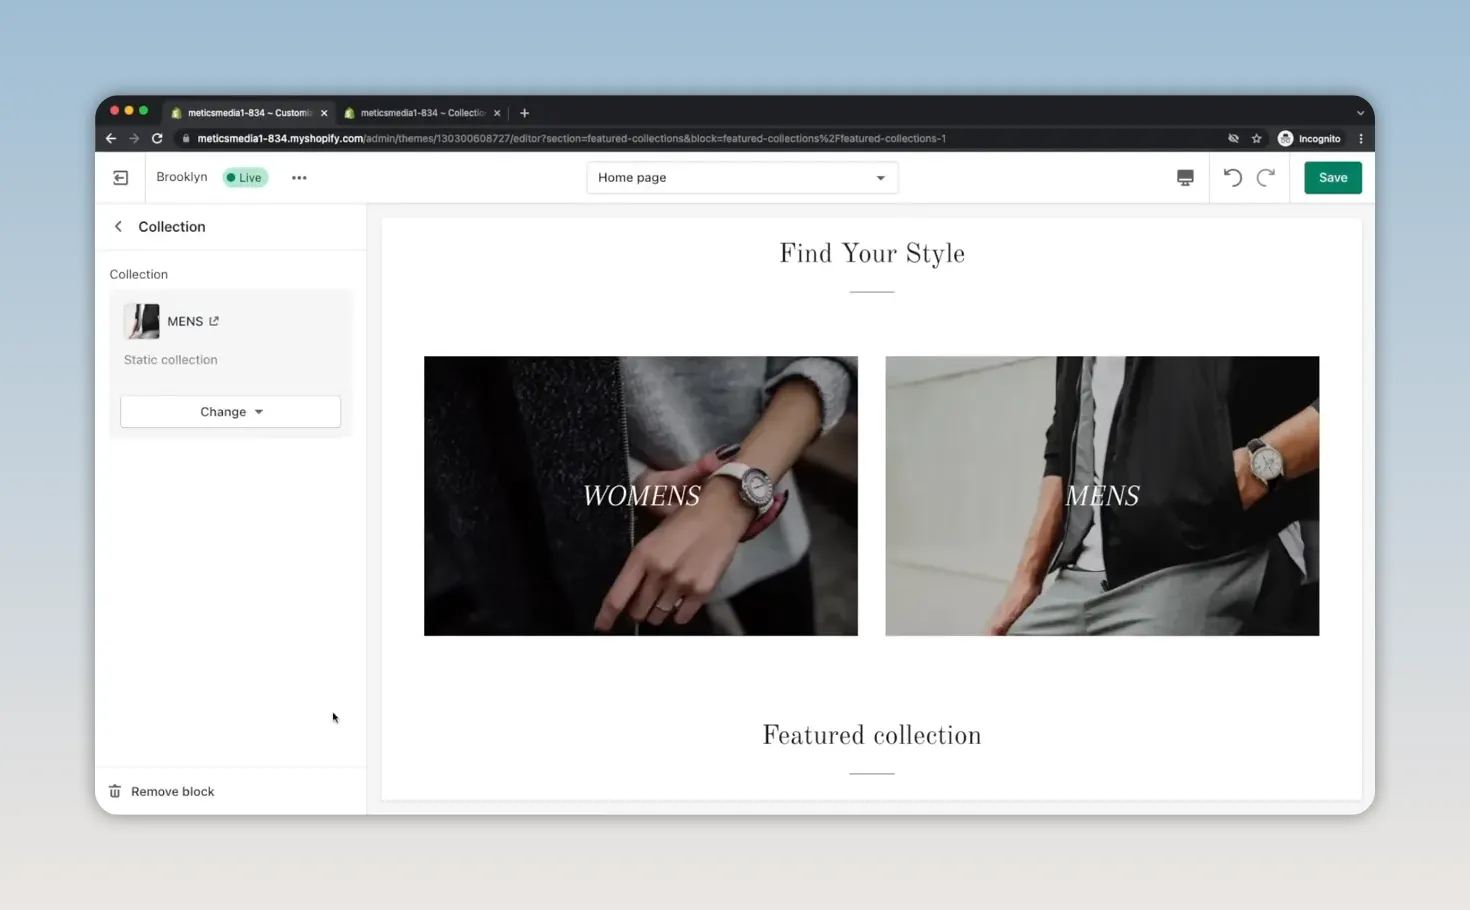
Next, open the featured collection section, give it the heading New Arrivals, and select the matching collection. If you haven’t added any products yet, the section will still show placeholders. We’ll fix that next.
6. Add Products to Shopify
In your dashboard, go to Products and click Add product. The first product in this example is a minimalist leather watch.
Work through the product details:
- Title: Enter the product name.
- Description: Add the information customers need to understand the product.
- Media: Upload a clear product image.
- Price: Enter your selling price.
- Inventory: Enter the available stock quantity.
- Collections: Select the manual collections the product belongs to.
I leave the description blank during the quick example setup, but it’s something to complete before launching. Also review the remaining product fields and fill in the ones that apply to your product.
A product can belong to more than one collection. For example, the minimalist leather watch goes into both Men’s and New Arrivals.
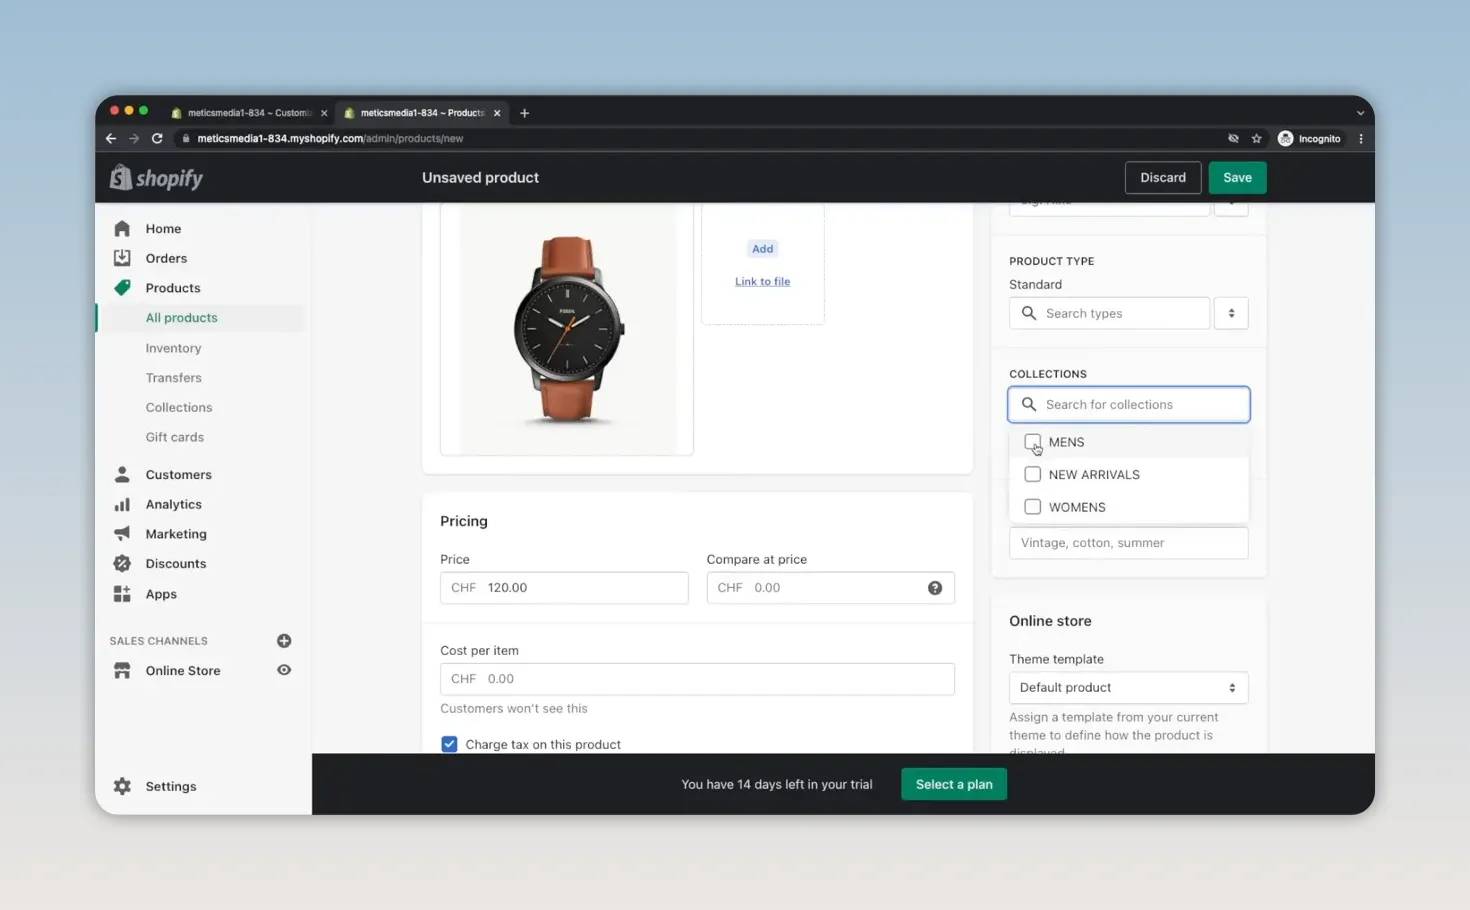
Save the product and repeat the process for the rest of your catalog.
Change products from Draft to Active
When your products are ready, make sure their status is Active. In the product list, you can select multiple products and use the bulk actions menu to set them as active together.
Return to your theme editor. The New Arrivals section should now display the products assigned to that collection instead of placeholders.
7. Finish the Homepage Product Sections
The featured product section highlights one specific item on your homepage. Open it and select the product you want to promote. I use a smartwatch in this example.
This is separate from the featured collection: one section presents a group of products, while the other gives an individual product more space.
The final default section is the newsletter signup. Because email marketing isn’t set up for this example store, I remove that section for now. You can keep it if you’re ready to use it, or add it back later.
8. Create Your Policies and Add Footer Links
Next, set up the pages customers need to understand your store’s policies. Go to Settings > Policies.
Where Shopify provides a template, you can use Create from template as a starting point for policies such as:
- Refund policy
- Privacy policy
- Terms of service
Add your shipping policy as well.
Read and customize every template for your business. Generating the text is not the same as confirming that it accurately describes your store’s practices. Shopify’s store policy documentation provides additional guidance on adding and managing these pages.
Add policies to the footer menu
After saving your policies, open your navigation settings. In the example interface, this is Online Store > Navigation > Footer menu.
- Remove any footer links you don’t need. I remove the default Search link.
- Click Add menu item.
- Choose Policies as the link destination.
- Add each policy you created.
- Save the menu.
Return to the theme editor and confirm the policy links appear in the footer. If your theme has a footer menu selector, make sure it uses the menu you just edited.
You can also add social media links through the footer or theme settings. Enter the profile URLs for the accounts you want to display, then save.
9. Customize Your Main Navigation
The main menu is how customers move through your store, so keep it focused on useful destinations.
Open the Main menu in your navigation settings. You can add and remove links using the same process as the footer menu.
For this store, I add direct links to:
- The Men’s collection
- The Women’s collection
- The Contact page
The example already has a Contact page available. Check that your own store has the page you need before linking to it.
Save the menu, return to your editor, and confirm the updated links appear in the header.
10. Match the Design to Your Brand and Check Mobile
With the content in place, open Theme settings to adjust the overall appearance of your store.
- Colors: Set the colors used for buttons, text, and other theme elements.
- Typography: Choose the fonts for your headings and body text.
- Favicon: Upload the small brand icon that appears in the browser tab.
- Checkout branding: Add your logo to the checkout using the branding controls available in your account.
Save your changes, then switch the preview from desktop to mobile.
Shopify themes generally handle much of the responsive layout for you, but still check the result. Review how the hero image crops, whether the text remains readable, and how the collection cards and products stack on a smaller screen.
Also open your product and checkout pages. Your homepage is only one part of the customer experience.
11. Configure Your Store Details, Payments, and Shipping
The storefront design is nearly finished. Now it’s time to make sure the settings behind it are ready for orders.
Review your business details
Go to Settings > Store details, or the equivalent section in your dashboard. Confirm your store name, legal business name, address, and contact information. Review the other details on the page and correct anything that’s missing or inaccurate.
Set up your payment providers
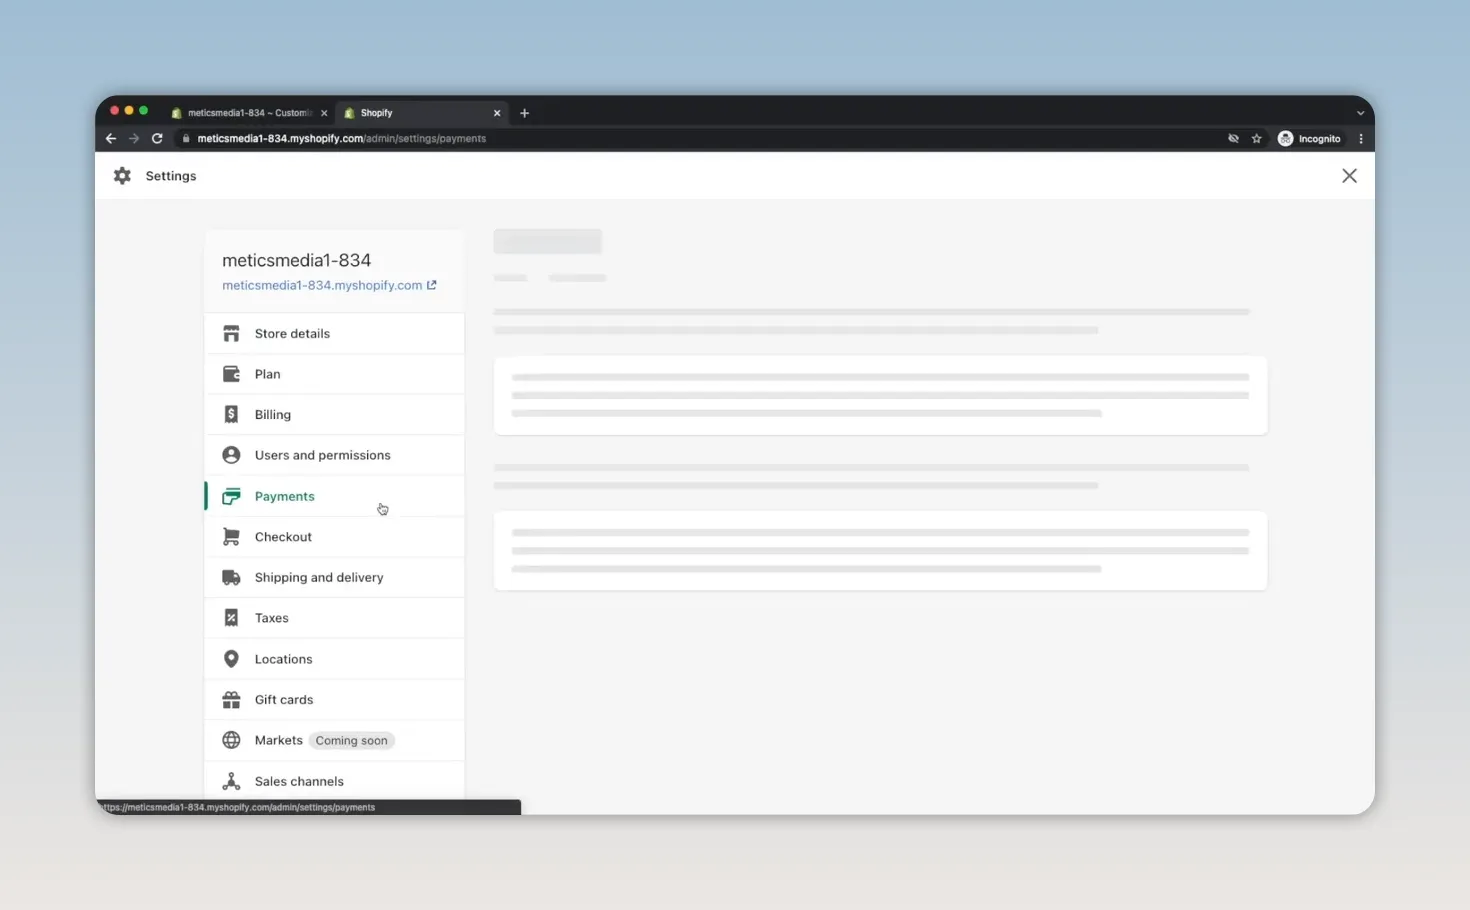
Open Settings > Payments. If you’re using Shopify Payments, click Complete account setup and provide the requested information.
You can also review the alternative payment providers available to your store. Availability and fees depend on your location, provider, and plan, so compare the terms shown for your account rather than assuming an alternative will be cheaper.
Review PayPal Express Checkout as well. If it’s enabled and you don’t want to offer it, deactivate it. If you do want it, check that its setup is complete.
Configure shipping zones and rates
Go to Settings > Shipping and delivery, then open the shipping rate settings.
Shipping zones let you apply different rates to different locations. For this example, I use a simple free-shipping setup:
- Remove the existing zones that don’t fit the intended setup.
- Create a new shipping zone.
- Select the locations you want it to cover.
- Add a rate called Free Shipping.
- Set its price to 0 in your store currency.
- Save your changes.
The example selects “Rest of the world” for its worldwide shipping offer. Check the locations actually included in your own zone before making that promise, and make sure your shipping policy matches the rates you configure.
12. Connect Your Domain and Set Your Homepage Search Details
Your new store starts with a Shopify-provided address containing myshopify.com. For a branded storefront, open Settings > Domains.
You have two options:
- Connect an existing domain if you already own the address you want to use.
- Buy a new domain through Shopify and connect it to your store.
Next, open Online Store > Preferences and enter your homepage title and meta description. Use your store name and a clear description of what you sell. These fields help describe your store in search results, though they don’t guarantee a particular Google ranking.
13. Choose a Plan, Test Your Store, and Remove the Password
Before opening the store to the public, choose a Shopify plan. I use the entry-level Basic plan for this example. Review the current price, billing cycle, trial terms, and payment date before confirming your selection.
Then open your storefront using the preview or eye icon beside Online Store. Go through the store as a customer would:
- Use the main menu and the homepage Shop Now button.
- Open each collection and check its products.
- Review product images, prices, descriptions, and stock availability.
- Open the policy and contact links.
- Add a product to the cart and check the checkout flow.
- Confirm your shipping and payment setup, including a test order where appropriate.
- Repeat the important checks on mobile.
For help testing the purchase flow, use Shopify’s test order instructions.
Once you’re ready, return to the storefront password settings. In the example interface, these are under Online Store > Preferences > Password protection. With an eligible plan selected, disable password protection and save.
Your store is now publicly accessible. The important part is that the full shopping experience works: customers can find products, understand your policies, and complete an order. With those checks finished, your Shopify store is ready to launch.
Made with VideoToBlog using How to Set up a Shopify Store in 13 Minutes - Shopify Tutorial for Beginners


