A branded dropshipping store should feel like a business built around a product, not an AliExpress listing copied onto a website. That comes down to a few things: a clear brand name, useful product information, consistent design, and a checkout that is ready to accept orders.
I’m going to build a simple one-product Shopify store around a mini cooling fan. The example product costs roughly $8 on AliExpress, and I’ll use a selling price of $29.99. You can follow the same setup with the product you want to sell.
The difference between your supplier cost and selling price is not all profit. Shipping, payment fees, apps, advertising, and other expenses still need to fit within that margin. The goal here is to create the store foundation, from importing the product to fulfilling your first order.
Shopify’s interface, app plans, and promotional offers can change, so check the terms shown in your account as you work through the setup.
What You'll Learn
- Import AliExpress products through DSers, then customize the copy, images, variants, and pricing.
- Build a mobile-focused product page with consistent branding, useful information, and relevant reviews.
- Complete your policies, domain, payment providers, and shipping rates before publishing the store.
- Process supplier orders through DSers after customers purchase from your Shopify store.
Table of Contents
- 1. Create Your Shopify Account and Choose a Plan
- 2. Install a Clean Shopify Theme
- 3. Connect DSers to Shopify and AliExpress
- 4. Turn the Imported Listing Into a Branded Product
- 5. Set Your Product Price and Clean Up the URL
- 6. Build the Product Page in Mobile View
- 7. Add Product Reviews With Loox
- 8. Match Your Store Colors, Logo, and Checkout
- 9. Create Your Store Policies and Footer Links
- 10. Build a Simple Homepage and Navigation
- 11. Connect a Custom Domain
- 12. Activate Your Payment Providers
- 13. Configure Shipping Zones and Rates
- 14. Review Your Store Details and Publish
- 15. Fulfill Your First Order Through DSers
1. Create Your Shopify Account and Choose a Plan
Start by opening a Shopify account. My Shopify offer page shows the trial or introductory promotion available at the time you sign up. The exact trial length and discounted pricing can vary.
Some links in this guide are affiliate links. If you purchase through them, I may receive a commission at no additional cost to you.
- Enter your email address and start the signup process.
- Create your password and enter an initial store name.
- Complete or skip optional setup questions where Shopify allows it.
- Once you reach the dashboard, open the plan selection screen.
- Choose your billing frequency, select a plan, and add a payment method.
For this store, I’m using the Basic plan with monthly billing. It provides the features needed for this setup without moving to a higher-tier plan.
Before confirming, read the billing details carefully. Make sure you understand when any trial or introductory period ends and when regular charges begin.
2. Install a Clean Shopify Theme
Next, go to Online Store > Themes. Shopify includes a default theme, and you can also browse its free themes.
I like the Sense theme for this type of branded store because it has a clean, modern design. Add it to your theme library, wait for installation to finish, and click Publish to activate it.
You don’t need to customize every section yet. First, get the product into Shopify so you can design the store around the actual images, variants, and description.
3. Connect DSers to Shopify and AliExpress
To import the product and manage supplier orders, I’m using DSers. This connects the Shopify store to AliExpress and avoids entering all the product information manually.
Install the app and link your accounts
- Create a DSers account.
- Select Shopify as your selling platform.
- Follow the installation process through the Shopify App Store and approve the connection.
- Select the free DSers plan if it meets your needs.
- Connect your AliExpress account by signing in or creating one.
Once both connections are complete, you can move on to the browser extension.
Install and activate the DSers Chrome extension
In DSers, find the Chrome extension installation option. Add the extension to Chrome, then open the browser’s extensions menu and pin it so it is easy to access.
Click the DSers extension and sign in if prompted. Installing the extension alone is not always the final step: make sure it is connected to your DSers account before trying to import a product.
Import only the variants you want to sell
- Open the AliExpress listing for your chosen product.
- Click Add to DSers.
- Return to DSers and open the Import List.
- Open Edit Product, then review the variants.
- Remove the variants you do not intend to offer and save your changes.
- Choose Push to Shopify, review the import options, and confirm.
Now return to your Shopify dashboard and open Products. Your imported product should appear there, ready to edit.
4. Turn the Imported Listing Into a Branded Product
The supplier listing is a starting point, not your finished product page. Open the product in Shopify and replace the imported title and description with your own content.
Choose a brand name
I use Namelix for name inspiration and Namecheckr to help check name availability. I also want to know whether a matching .com domain is available before committing to a name.
For this example, I’m using MyEasyBreeze. The product title combines the brand with a straightforward description:
MyEasyBreeze Mini Cooling Fan
That gives the product a brand identity while still making it immediately clear what it is.
Research the selling points before writing
Spend some time on the description. Rather than simply listing specifications, explain the main benefits and show how the product works.
I look at three places for research:
- Competitor stores: How do other sellers explain the same product?
- Amazon listings: Which features and benefits receive the most attention?
- Customer reviews: What do customers like, ask about, or find confusing?
A reverse image search is useful for finding other stores selling the product. Take a screenshot of an AliExpress product image, upload it to Google’s image search, and explore the matching image sources. This can surface competitor listings you might not find by searching the supplier’s product title.
Use that research to understand the product and customer priorities, then write your own copy. The description should explain why each selling point matters, not just repeat a supplier’s wording.
Add visuals that demonstrate the benefits
Pair the main selling points with images or GIFs showing the product in use. If you have permission to use a product video, a tool such as Ezgif can turn short sections into GIFs for the description.
For the example page, I format the benefit headlines as heading-three text and center the headlines and GIFs. This creates a simple pattern of benefit, demonstration, and explanation.
Keep the layout easy to scan on a phone. Each section should help someone understand the product rather than add more text for its own sake.
Clean up the product images and options
Review the imported media. Keep high-quality images that clearly show the product, and replace weak images with suitable assets you are authorized to use.
Drag the images into the order you want them to appear. Then review the product options and remove unnecessary supplier choices. For this fan, I keep the color options.
Connect each variant to its matching image. If someone selects the green fan, the page should show the green fan, not a different color. Open each variant, select the correct image, and save.
5. Set Your Product Price and Clean Up the URL
For the example store, I set every color variant to $29.99. The supplier listing is roughly $8, so this creates a gap between the purchase cost and retail price, but you still need to account for the other costs of making a sale.
Shopify also has a Compare-at price field. Setting the selling price to $29.99 and the compare-at price to $59.99 creates an approximately 50% discount display.
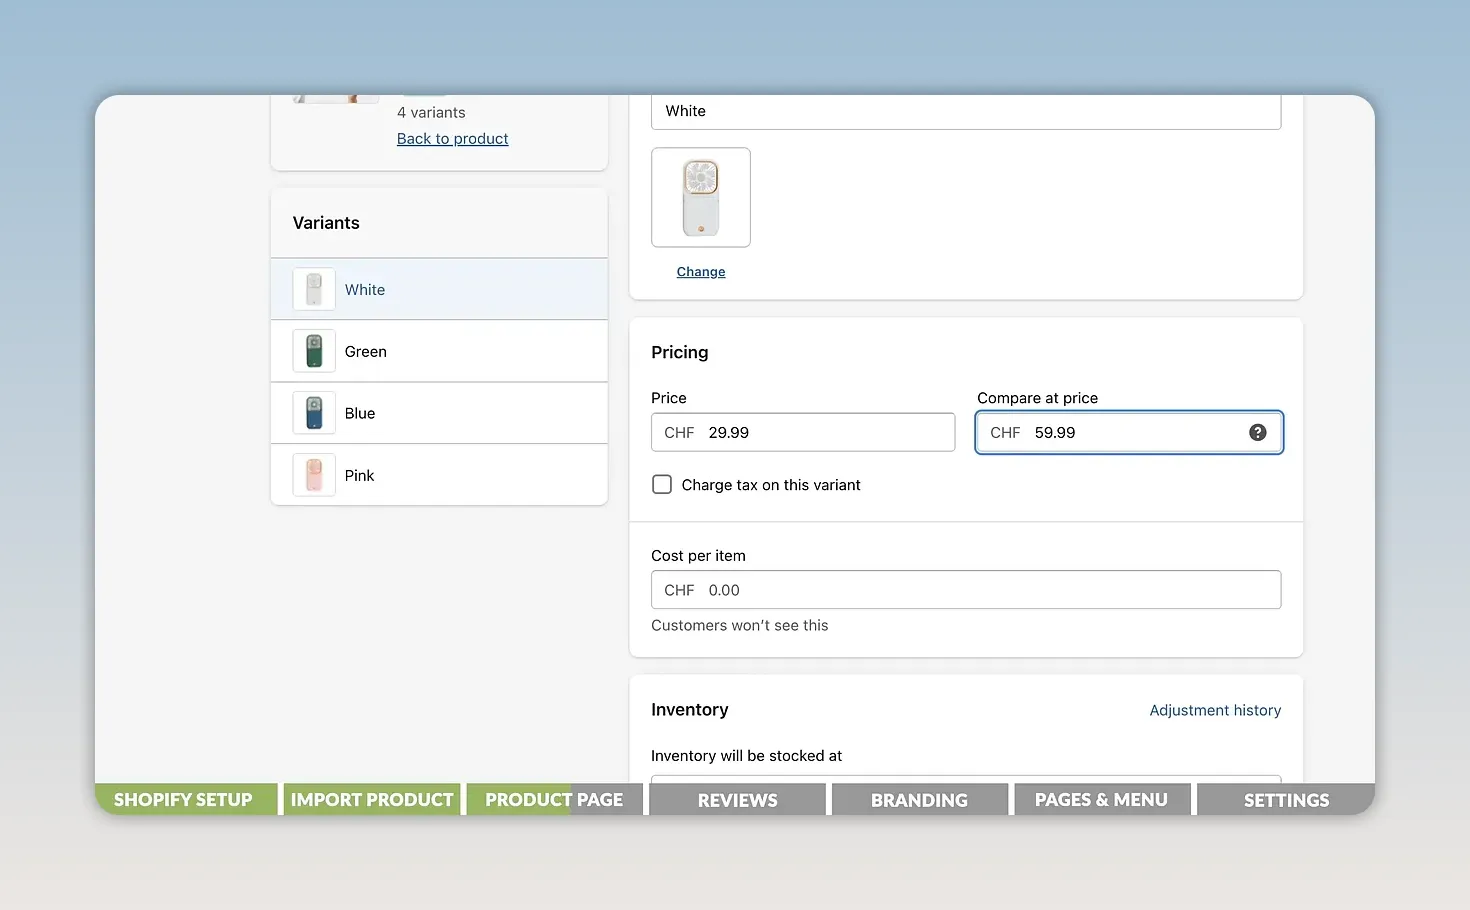
Only use a compare-at price when it represents a genuine, supportable price comparison. The field is a display tool, not a reason to invent a regular price.
Repeat the pricing changes for every variant you intend to sell.
Next, scroll to Search engine listing and click Edit. Replace the long imported URL handle with something short and readable that matches the product. Save your changes before opening the theme editor.
6. Build the Product Page in Mobile View
Go to Online Store > Themes > Customize, then use the page selector to open your product template.
I like to do most of the editing in mobile preview, especially for a store that will receive traffic from Facebook or TikTok ads. This makes it easier to see how the product images, title, buttons, and description fit on a smaller screen.
Remove unnecessary template sections
Start by deleting the default sections that don’t serve your product page. Select a section in the editor and choose Remove section.
For the initial layout, I keep:
- Announcement bar
- Header
- Product information
- Product recommendations
- Footer
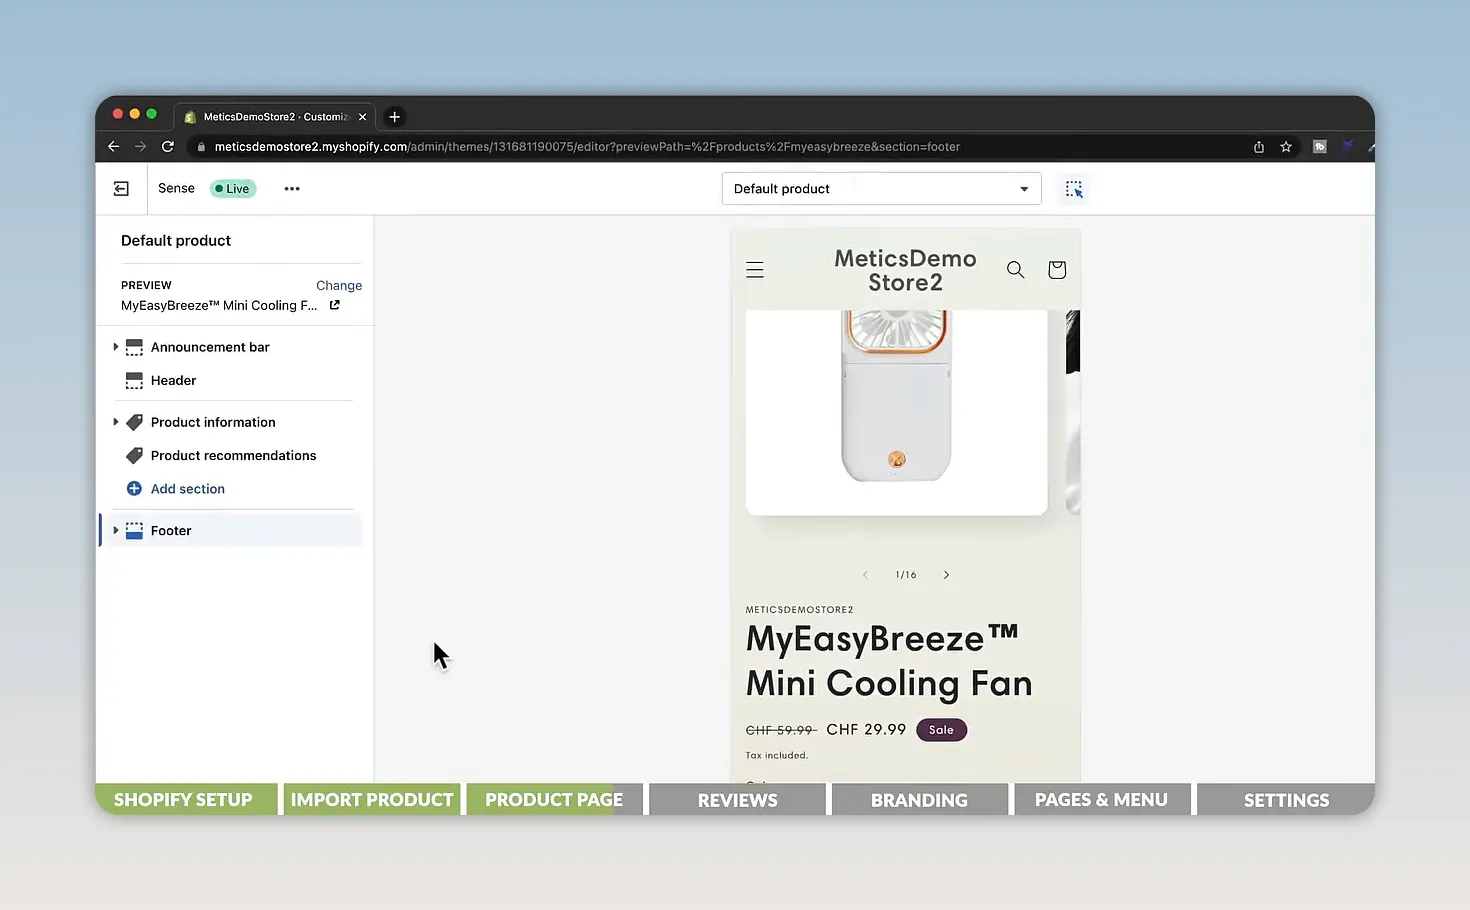
The idea is to remove generic placeholder content and give the product information room to do its job.
Edit the announcement bar
Use the announcement bar for a clear, accurate offer. The example design combines a discount message with free shipping.
Keep the wording consistent with your actual pricing and shipping settings. If free shipping applies only to the United States, make that clear. Likewise, use a time-limited message only when the offer really has that deadline.
Add collapsible product information
The collapsible rows in the product section are useful for practical details that customers may need before ordering. Click each row to change its heading, icon, and content.
For this store, I add:
- FAQs: Answers to common product questions.
- Product information: Relevant specifications and details.
- How to use: Instructions for operating the product.
- Shipping: Delivery information and shipping terms.
- Return policy: A clear explanation of the return process.
Use information that applies to the actual product and supplier arrangement. Save the theme before moving on.
7. Add Product Reviews With Loox
For reviews, I’m using Loox. The setup demonstrated here uses its AliExpress review importer to add existing product feedback to the Shopify page.
Loox is a paid app. Check its current trial, pricing, and import limits before approving a subscription. In this example, I use the Growth plan to scan up to 100 AliExpress reviews, but plan features can change.
- Install Loox from the Shopify App Store.
- Select a suitable plan and approve the subscription terms.
- Complete the setup, including the review language and star color.
- Open Import Reviews.
- Drag the importer button into your browser’s bookmarks bar.
- Open the exact AliExpress product listing and click the Loox import bookmark.
- Select the matching Shopify product and choose how many reviews to scan.
- Click Preview and Import, then review the entries before importing.
The importer allows you to accept or reject individual entries. Make sure imported feedback genuinely relates to the product you sell, and do not present supplier reviews as purchases made through your own store. Review selection should not create a misleading impression of customer feedback.
Return to your Shopify product page and check that the review widget displays correctly in mobile view.
8. Match Your Store Colors, Logo, and Checkout
A few consistent design choices can make the store feel much more branded. I start by matching the store’s accent colors to the product imagery.
Choose and apply your brand colors
Open Theme settings > Colors. I use the ColorZilla browser extension to sample a color from the product image and copy its color code.
Paste that code into the relevant theme color fields, then review the result across buttons, accents, and backgrounds.
Also check the checkout branding controls available in your Shopify account. Match the checkout button color to the store so the experience stays visually consistent after someone decides to buy.
Create a simple logo
You don’t need a complicated logo for this setup. I use Canva to start with a simple design and customize the text and graphic.
For MyEasyBreeze, the design is a wordmark with a small breeze symbol.
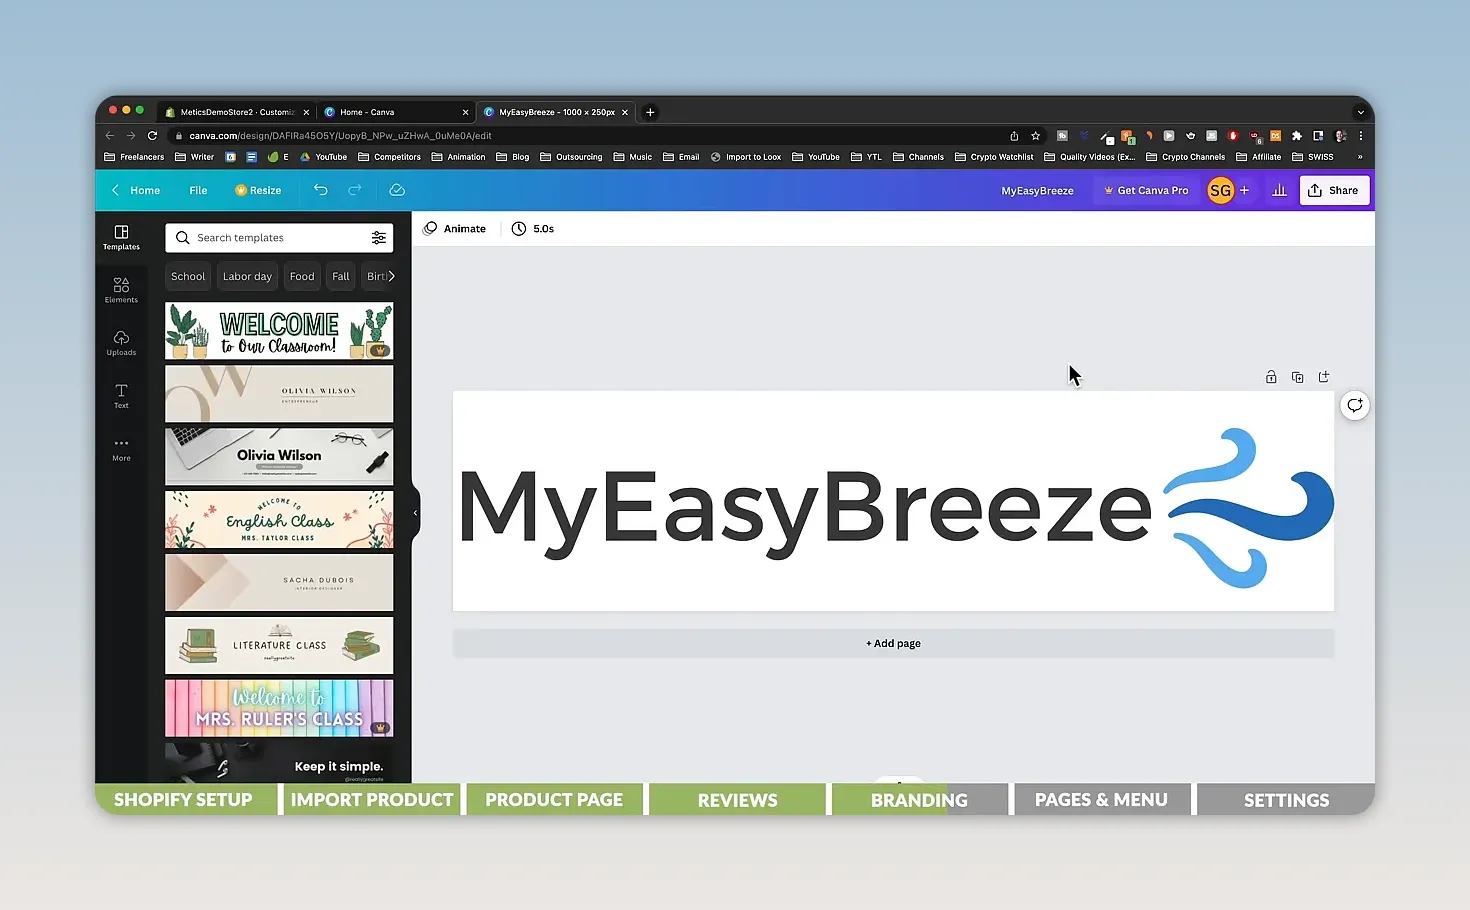
- Download the finished logo as a PNG.
- If it has an unwanted background, remove it with remove.bg.
- Open the header settings in Shopify’s theme editor.
- Upload the transparent logo.
- Adjust its size and save.
Check that the logo remains readable on mobile without making the header unnecessarily tall.
Add a favicon
A favicon is the small icon displayed in a browser tab. I use the breeze symbol from the logo to keep the branding consistent.
Create a simple icon with a transparent background, then upload it through the favicon controls in your theme settings. A compact symbol works better here than trying to squeeze the entire wordmark into a tiny space.
9. Create Your Store Policies and Footer Links
Now add the policies customers need to find before placing an order.
Go to Settings > Policies. Where Shopify provides templates, use them as a starting point for your refund policy, privacy policy, and terms of service.
Read and customize every policy before publishing it. Replace bracketed placeholders, enter your correct business information, and remove or adjust terms that do not apply to your store.
Add your shipping policy manually so it reflects your actual shipping terms.
Once the policies are saved, add them to the footer menu:
- Open the navigation or menus area in Shopify.
- Select the Footer menu.
- Click Add menu item.
- Select the appropriate policy as the link destination.
- Repeat for the remaining policies and save the menu.
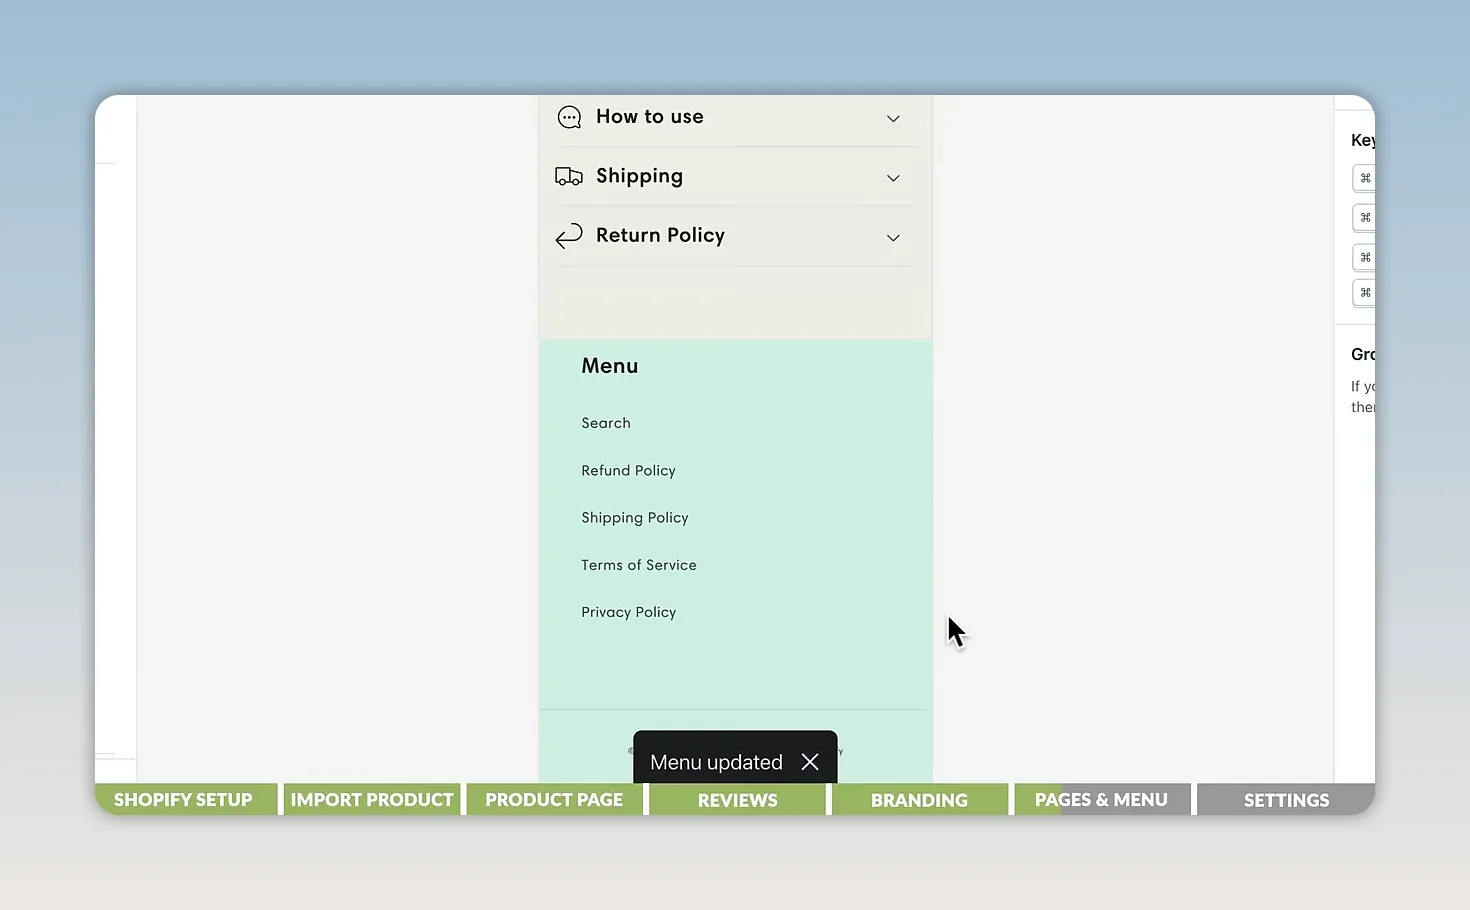
Return to the theme editor and confirm that the footer displays the correct menu. Creating a policy and making it easy to find are two separate steps.
10. Build a Simple Homepage and Navigation
For this store setup, the product page is the priority because the ads will send people directly to it. Still, the homepage should look complete and give anyone who lands there a clear route to the product.
Create the homepage
Switch to the homepage in the theme editor. Remove the unnecessary default sections and keep an Image with text section as the main introduction.
- Add a suitable product or lifestyle image.
- Replace the placeholder heading with your product name.
- Use a smaller heading size if the name wraps awkwardly on mobile.
- Add a short product introduction.
- Change the button text to Buy now and link it to the product.
- Add a Featured product section and select your product.
- Save the changes.
The featured product section gives customers the option to purchase directly from the homepage.
Simplify the main menu
Open Shopify’s menu settings and select the Main menu. For a one-product store, I remove the generic Catalog link and add a direct link to the product page.
Keep the navigation straightforward: a homepage link, a product link, and a contact page are enough for this example. Rearrange the items as needed and save.
Finish the contact page
Open Online Store > Pages and select the contact page. Add a short paragraph explaining what customers can contact you about and what they can expect after submitting the form.
Use expectations you can actually meet. Save the page, then check how the text and contact form appear together on mobile.
11. Connect a Custom Domain
A custom domain replaces the default Shopify address with a web address that matches your brand.
Go to Settings > Domains. You have two options:
- Connect an existing domain: Choose this if you already own the domain and follow Shopify’s connection instructions.
- Buy a new domain: Search for your brand name, review the available domain and price, then confirm the purchase.
For this example, I buy the matching .com domain through Shopify. Purchasing there handles the connection as part of the process.
Once the domain is connected, the front-end branding is in place. Next, make sure the store can accept payments and apply the correct shipping charges.
12. Activate Your Payment Providers
Open Settings > Payments and complete the setup for the providers you want to use.
If your business is eligible, activate Shopify Payments and provide the requested details. Supported payment options can include credit cards and accelerated methods such as Apple Pay or Google Pay, depending on eligibility and configuration.
If Shopify Payments is not available for your business or country, choose a supported third-party provider. Shopify’s Shopify Payments documentation is a useful reference for checking availability and setup requirements.
Also review PayPal’s status in your account and complete any required setup. Don’t assume that a provider appearing in the settings means it is fully ready to receive payments.
13. Configure Shipping Zones and Rates
Go to Settings > Shipping and delivery and manage the shipping profile for your product.
Review the default shipping rates and remove those you do not want to offer. Then create the zones and rates that match your store’s shipping policy.
Set up free shipping for the United States
- Create a shipping zone for the United States.
- Add a rate named Free shipping.
- Set the rate to $0.
- Confirm the rate.
Add an international shipping rate
For the example store, I create another zone for international destinations using the rest-of-world selection and add an $8 shipping rate.
These are example rates, not rates that will suit every product. Use destinations your supplier can serve and charges that work with your costs. Your announcement bar, product information, shipping policy, and checkout should all describe the same offer.
Save the shipping profile when you are finished.
14. Review Your Store Details and Publish
Before making the store public, open the store details settings and review:
- The final store name
- Your business address
- Your contact information
- The store currency
Next, open the online store preferences and enter a homepage title and short meta description that describe your brand and product.
When the store is ready, find the storefront password protection setting, disable it, and save. You will need an eligible active plan to remove the password.
The store is now publicly accessible. Check the main customer journey once more: open the homepage, visit the product, select each variant, review the policies, and confirm that the cart and checkout reflect your setup.
15. Fulfill Your First Order Through DSers
When your first sale comes in, return to DSers and open Open Orders.
Find the order, follow the fulfillment process, and make the supplier payment. This places the supplier order so the product can be shipped directly to your customer.
A customer paying your Shopify store and you paying the supplier are separate steps. Make sure the order is processed rather than assuming the sale alone has arranged shipment.
You now have the core setup for a branded Shopify dropshipping store: an imported product, original product copy, a mobile-focused design, consistent branding, policy pages, a custom domain, payment providers, shipping rates, and an order fulfillment workflow.
The important part is not adding more sections or more apps. It is making sure the store clearly explains the product and that every part of the buying experience matches what you promise.
Made with VideoToBlog using How to Create a Shopify Dropshipping Store in 2026 (STEP-BY-STEP TUTORIAL)


