Building a Shopify store no longer has to mean starting with a blank theme, writing every product description yourself, and spending hours arranging sections. With Atlas AI Store Builder, you can use a product link to generate a storefront, customize it in Shopify, and then improve it with AI product photos and bundle offers.
I’ve tried plenty of AI store builders that felt generic. What stands out to me about Atlas is the attention to the product itself. The descriptions, features, FAQs, and page sections feel much more tailored than a basic template with a product name dropped into it.
For this walkthrough, I’m using a pair of slides from AliExpress. We’ll build the store around that product, replace the supplier photos with cleaner images, create a quantity discount, and then cover how to add more products to the same store.
The initial storefront can come together in minutes. The complete workflow takes longer, especially if you train an AI image model, but you still avoid much of the manual setup.
What You'll Learn
- Generate a Shopify storefront from a product link or an existing Shopify product.
- Customize the Atlas theme and enable its app embed to display the store correctly.
- Train an AI product model to create a cleaner, more consistent image gallery.
- Add quantity bundles and generate additional product pages within the same store.
Table of Contents
- 1. Sign Up for Shopify and Install Atlas
- 2. Generate Your Shopify Store From a Product Link
- 3. Customize the Store and Choose Your Atlas Plan
- 4. Publish the Atlas Theme and Enable the App Embed
- 5. Generate Better Product Photos With AI
- 6. Create a Bundle Offer to Increase Average Order Value
- 7. Add More Products to the Same Shopify Store
- A Faster Way to Build Your Shopify Store
1. Sign Up for Shopify and Install Atlas
First, create your Shopify account. The Shopify trial offer promoted for this setup includes a free trial followed by three months at $1 per month. Check the signup page for current terms and eligibility, then enter your email address and select Start free trial.
Once your Shopify account is ready, install Atlas AI Store Builder:
- Open the Atlas signup page and select Build my free store.
- On the Shopify app listing, click Install.
- Confirm the installation inside your Shopify account.
Atlas will then appear under Apps in your Shopify admin. This is where you’ll generate the store, create product photos, manage bundle deals, and add additional product pages.
You can use the Atlas offer below to follow the same setup. Later, when choosing a plan, apply the code METICS for the promoted 20% discount, subject to the current offer terms.
Disclosure: Some links are affiliate links. If you make a purchase through them, I may earn a commission at no extra cost to you.
2. Generate Your Shopify Store From a Product Link
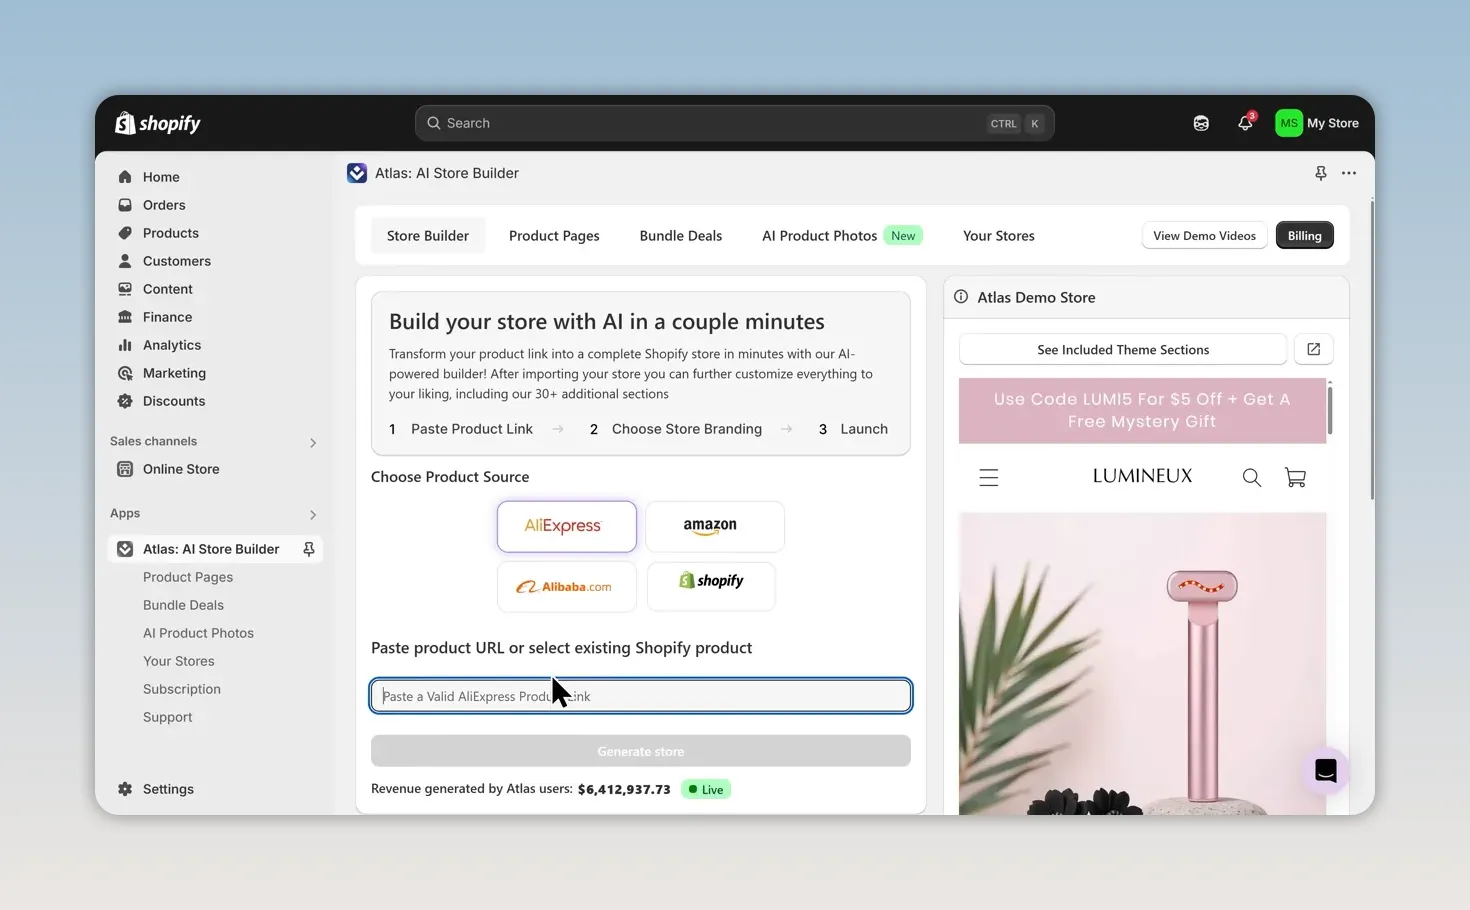
Choose your product source
Inside Atlas, start by selecting where your product comes from. The available sources in this setup are:
- AliExpress
- Amazon
- Alibaba
- Shopify, for products already imported into your account
The Shopify option is useful if you work with a dropshipping platform such as CJdropshipping, Zendrop, or AutoDS. Import the product into Shopify first, then have Atlas build the storefront around that existing product.
For my slides, I select AliExpress, copy the product URL, paste it into Atlas, and click Generate store.
Select the product images to import
Atlas pulls in images from the supplier listing. Select the photos you want to use, or scroll down to upload your own images if you already have them.
Don’t worry if the supplier images aren’t the final look you want. You can use them to get the store started and improve the gallery afterward with the AI product photo tool.
Once you’ve selected your images, click Continue.
Review the generated storefront
You’ll now have a live preview on the right and customization controls on the left. Scroll through the product page rather than only checking the first screen.
In my example, Atlas builds a page with product images, pricing and discount presentation, product benefits, an estimated arrival date, a review section, a description, FAQs, and additional supporting sections farther down.
The product-specific writing is what I like most. For the slides, the copy discusses details such as the material and comfort instead of relying entirely on generic sales language. That consistency carries through the page.
Treat the generated page as an editable starting point. Review product claims, pricing, delivery estimates, guarantees, and review content before publishing so they accurately represent what you sell and can deliver. A polished layout alone does not guarantee sales.
3. Customize the Store and Choose Your Atlas Plan
You can make the first round of changes directly inside the Atlas builder.
- Color: Choose a preset palette or adjust the colors to match your branding.
- Product: Edit the store name, product title, price, and other product information.
- Reviews: Configure the review section and its content.
- FAQs: Review and edit the questions and answers.
- Homepage: Adjust the available homepage details.
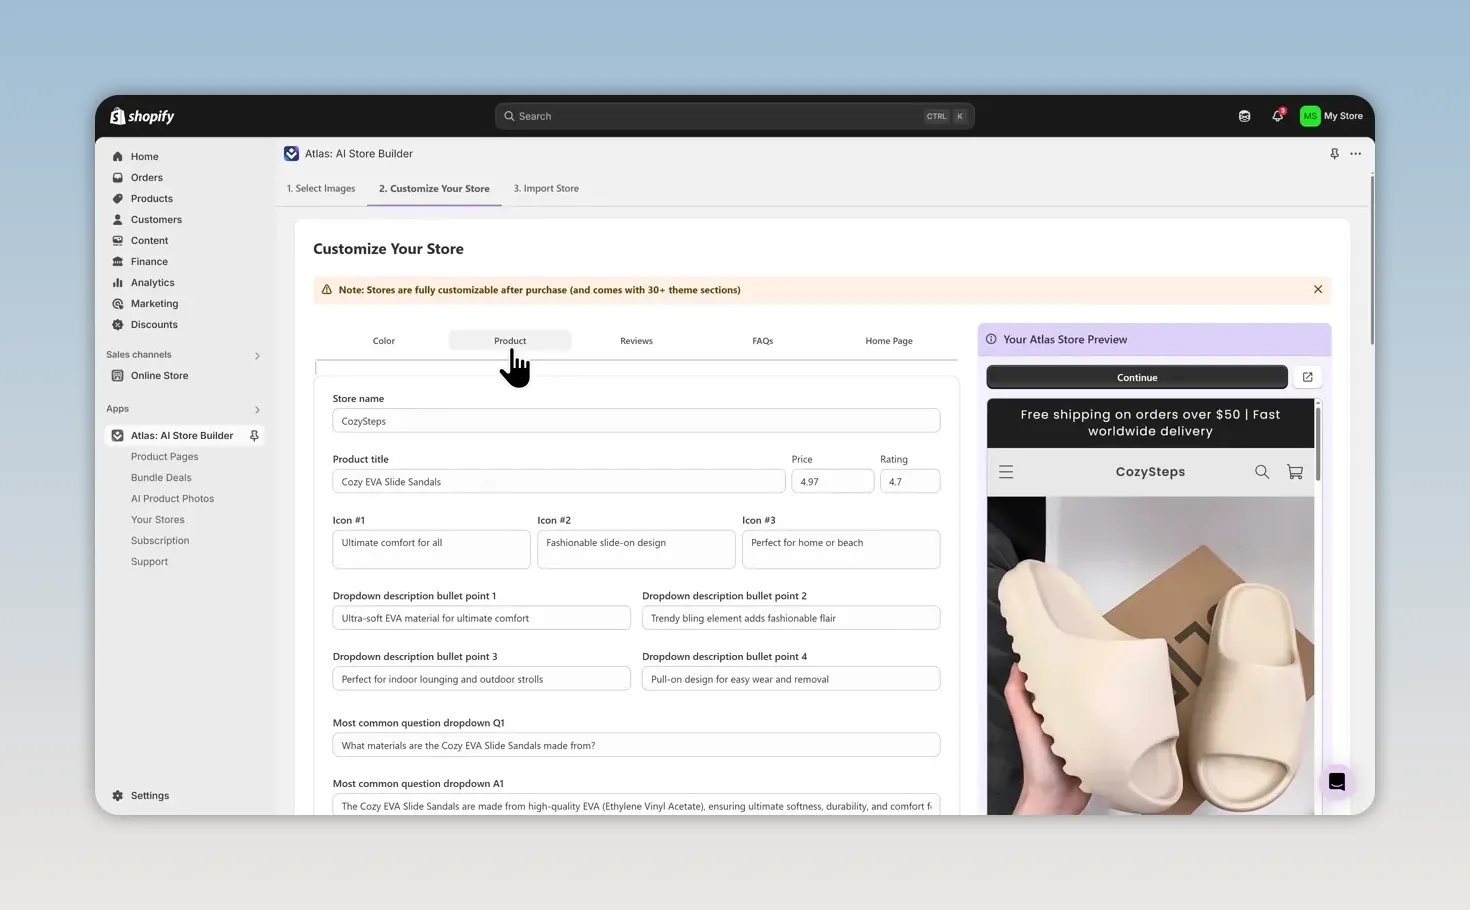
Make the changes you need, check the preview, and click Continue when you’re happy with the result.
Choose a plan with the features you need
Before subscribing, enter METICS in the discount code area and apply it. The offer shown in this setup reduces the selected plan by 20%.
My recommendation for this workflow is the Pro plan, because it includes the bundle tool and AI product photos. Those are the two features we’ll use to improve the initial store.
If you only need store generation, compare the available plans before choosing. Features, pricing, and usage allowances can change, so use the current plan screen to confirm what is included.
Click Subscribe beneath your selected plan, then approve the subscription in Shopify. Atlas will import the generated store into your account. When the import finishes, click View your store.
4. Publish the Atlas Theme and Enable the App Embed
In your Shopify theme library, you should now see a theme named Atlas Theme. The content and customizations you created in the builder transfer to this theme.
- Find Atlas Theme in the theme library.
- Click Publish and confirm.
- Open Customize to enter Shopify’s theme editor.
- Switch the preview to mobile view.
I start with mobile because it lets me check the product page in the narrow layout many customers will use.
If the store does not display correctly, enable Atlas
The first time you open the theme, you may see installation instructions rather than the storefront you just generated. There’s one more setting to enable:
- Click App embeds in the left sidebar.
- Turn on the Atlas app embed.
- Allow the preview to refresh.
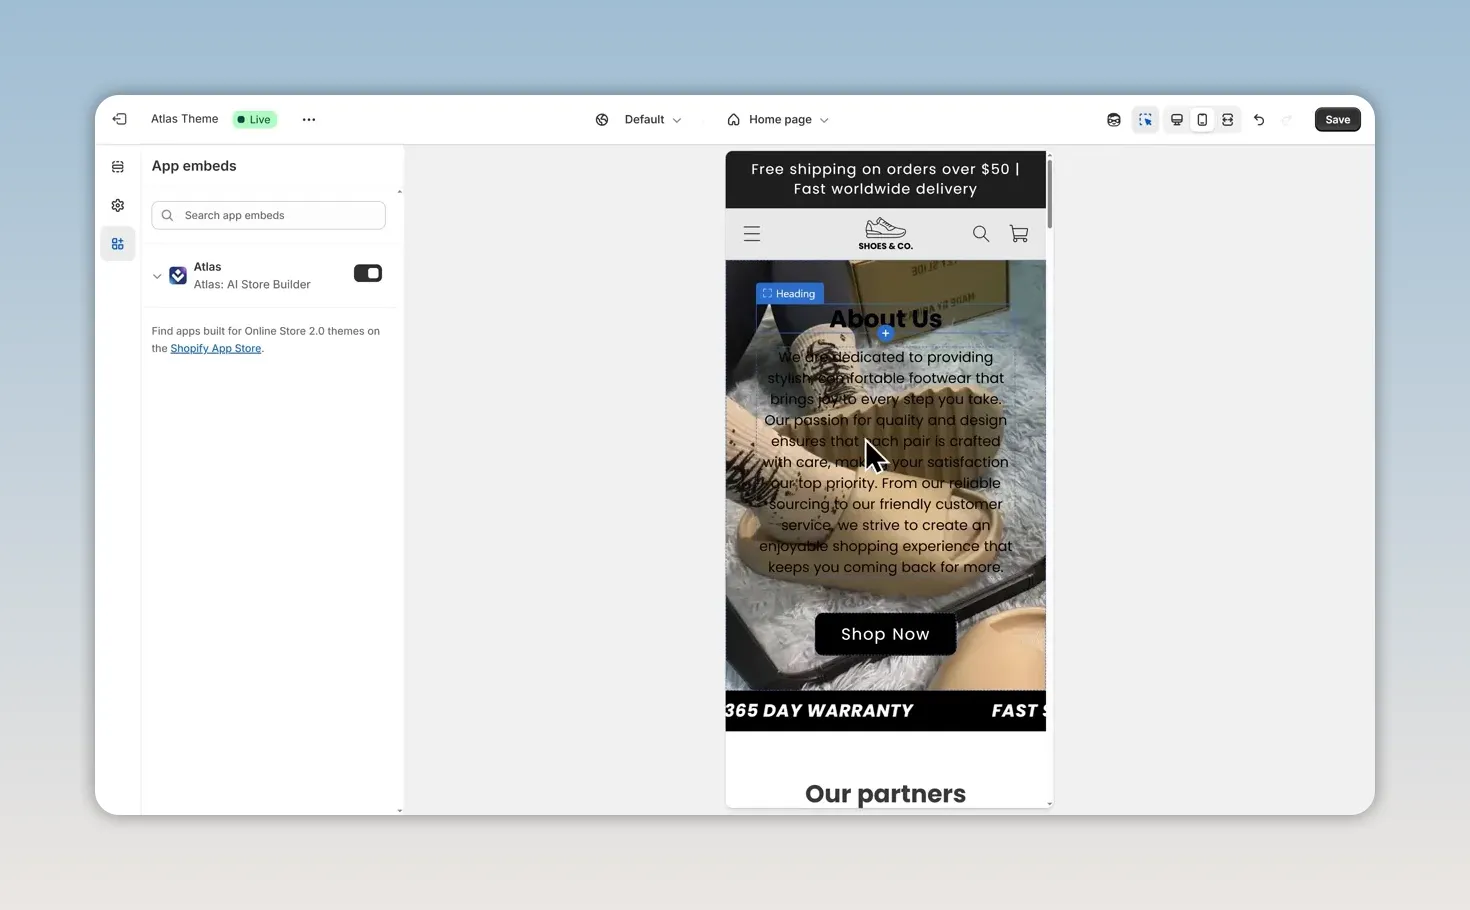
You can now scroll through the homepage and make further changes. For this setup, I’m focusing on the product page.
Edit the product page in Shopify
Use the page selector at the top of the editor and choose Products, then Default product.
Shopify’s theme editor gives you more control than the initial Atlas builder. Click a section in the preview to open its settings on the left. From there, you can edit its text or remove unwanted content with the trash icon.
For example, you can open the review section and adjust the text fields, or remove a section that doesn’t fit your store. If you need more background on how these controls work, Shopify’s theme customization guide is a useful reference.
When you’re finished, click Save in the top-right corner before leaving the editor.
5. Generate Better Product Photos With AI
At this point, the store has a branded layout, but the supplier photos are still the weak spot in my example. They don’t have the clean, consistent presentation I want for the product gallery.
To improve them, exit the theme editor, open Atlas under Apps, and select AI Product Photos.
Prepare the training photos
Atlas includes an onboarding tutorial with image requirements and examples. The training photos matter because they teach the model what your product looks like.
Follow these guidelines:
- Include multiple angles of the product.
- Use at least two images showing only the product.
- Remove text and distracting background objects.
- Keep image quality and product color consistent.
- Aim for the recommended five to eight training photos.
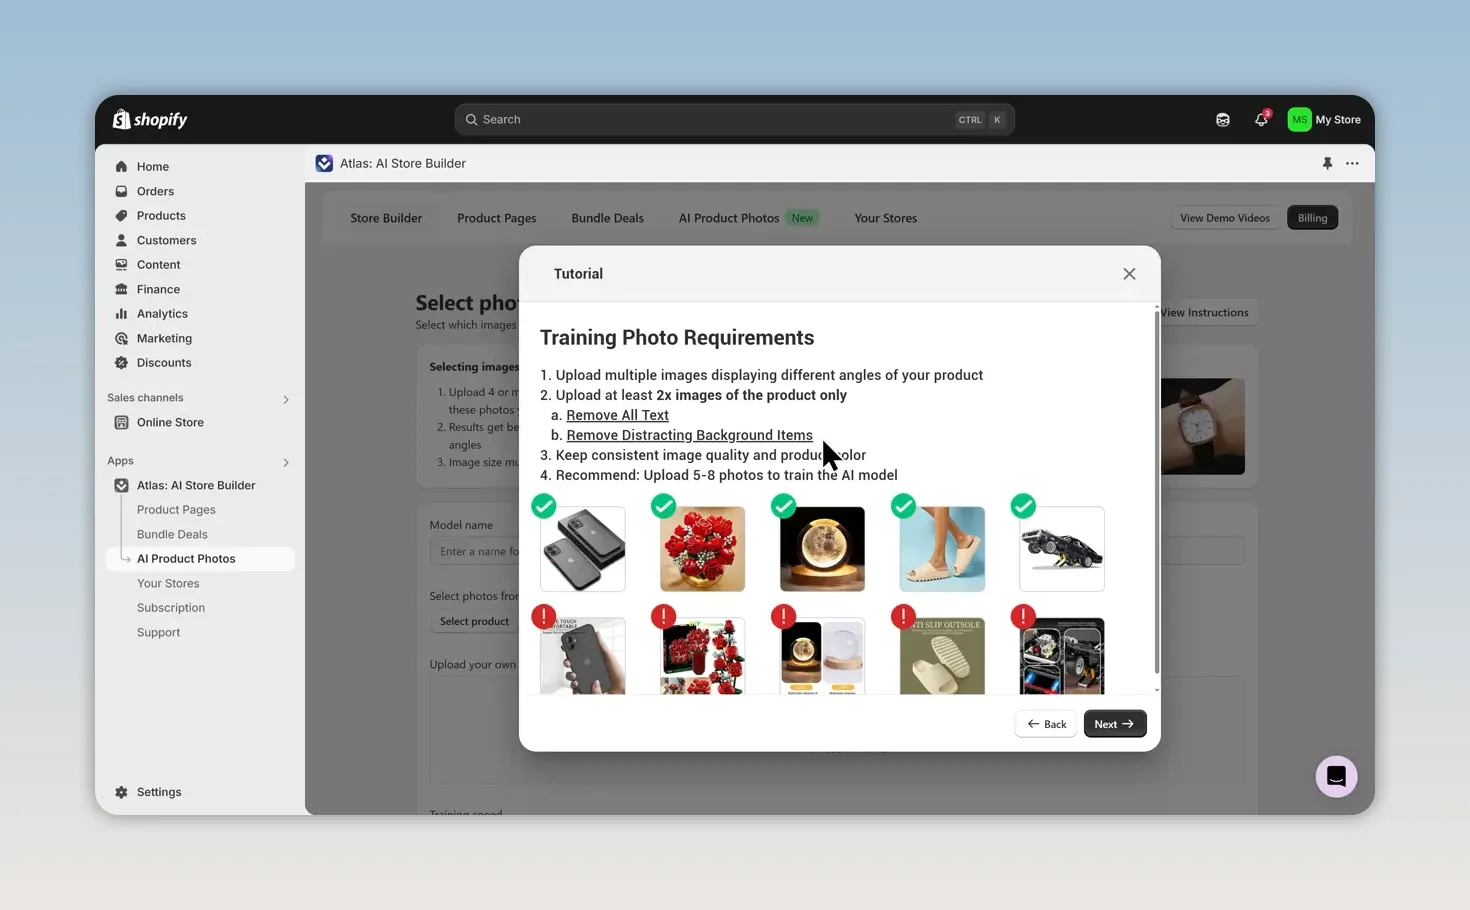
In my example, I use four available photos of the slides. That demonstrates the process, but Atlas recommends five to eight, so use the recommended range when you have suitable images.
Create and train your product model
After completing the onboarding screens, click Train your AI model.
- Name the model. This is an internal name customers won’t see. I use Cloud Slides.
- Select your Shopify product. Its existing product photos will appear below.
- Select your training images. Upload any additional suitable photos you want to include.
- Choose a training speed. I use the 30-minute option for this example; Atlas recommends the three-hour option for the best results.
- Click Start training your model.
The model status will initially show Processing. Once it changes to Succeeded, use the Actions button on the right to begin generating images.
This training time is separate from generating the initial storefront. It’s the main reason the complete photo-enhanced setup takes longer than a few minutes.
Use the AI-suggested prompt as a starting point
You can write your image prompt from scratch, but I recommend clicking Use AI suggested prompt, then Use this prompt. In my experience, this gives you a stronger starting point and saves a lot of typing.
A useful prompt describes more than the product name. It specifies the product design, color, background, lighting, and environment. The suggested prompt fills in much of that detail for you.
You’re free to edit it. Highlight any text you want to change and replace it with the look you’re aiming for. Once you’re happy, click Generate now and confirm.
Save and upload your favorite images
When generation finishes, choose the results you want to keep. For my slides, the new images give the product a much cleaner presentation than the original supplier gallery.
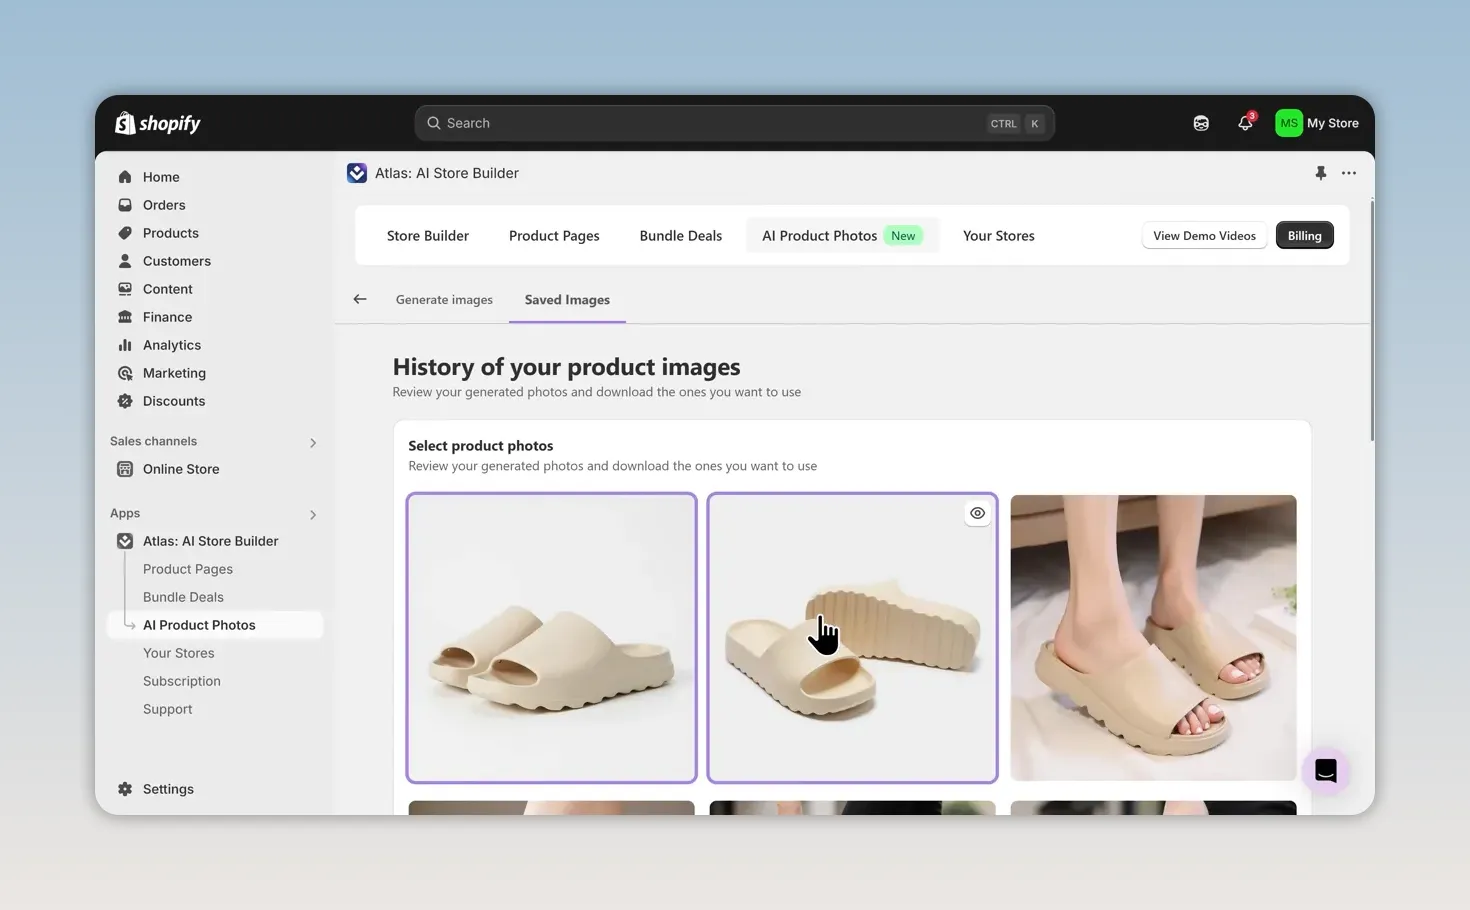
To move those images onto the product page:
- Select your preferred results and click Save selected images.
- Open the Saved images tab.
- Select the images and click Download selected.
- Go to Products in Shopify and open your product.
- In the media area, click the plus icon, then Add media.
- Upload the downloaded files and click Done.
Repeat the process if you want more images for the gallery. Keep the overall style consistent, and check that each generated image still accurately represents your actual product.
6. Create a Bundle Offer to Increase Average Order Value
With the storefront and photos in place, the next improvement is a quantity bundle. The goal is simple: give customers a reason to buy more than one item in a single order.
Open Atlas → Bundle Deals, then click Create bundle.
Configure the bundle settings
Start by giving the bundle an internal name. Customers won’t see this name. Then configure the customer-facing offer using the live preview on the right.
The settings let you adjust:
- The bundle title and add-to-cart button text.
- Whether the offer applies to all products, a specific collection, or a specific product.
- Whether variant images appear.
- The image size and corner radius.
- The pricing display, including price per item and compare-price options.
Set up your quantity discounts
The default offer has three tiers:
- Buy one: Regular price, with no discount.
- Buy two: 10% off.
- Buy three: 20% off.
I keep those defaults for this example. They give customers a clear incentive to add more pairs to their order.
The aim is to increase average order value. If additional items can ship without a matching increase in shipping costs, the larger order may also improve your margins. Check your actual product and fulfillment costs before deciding how much discount to offer.
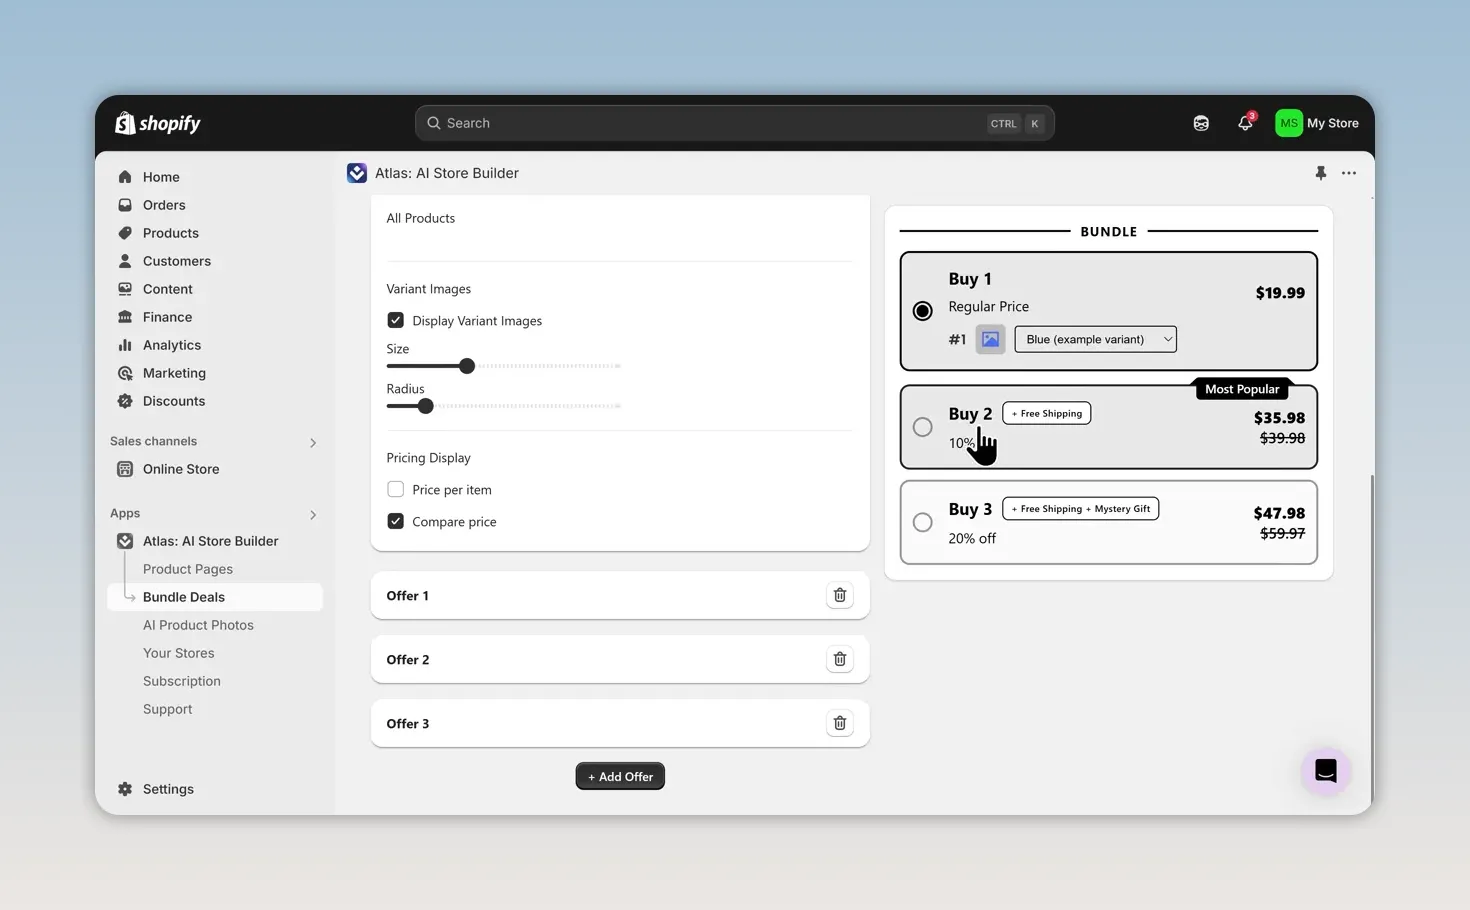
To change a tier, expand the offer settings. You can edit its title, subtitle, inside badge, outside badge, and discount type.
The available pricing and discount options include:
- Regular price.
- A fixed-amount discount.
- A percentage discount.
- A specific price.
- A buy-one-get-one-free offer.
Once the offer is configured, open the Design tab to adjust its colors, then click Publish.
Add the Atlas Bundler block to your product page
Publishing the bundle inside Atlas is not the final step. You also need to place the bundle block in your Shopify theme.
- Return to your store and click Customize on the Atlas theme.
- Open Products → Default product.
- Click the plus icon where you want to insert the bundle.
- Search for Atlas and open the Apps results.
- Add Atlas Bundler.
The quantity offer should now appear in the product-page preview.
If you’re using the bundle’s add-to-cart button, remove the redundant original purchase button so customers don’t have two competing purchase controls. Click Save before exiting.
7. Add More Products to the Same Shopify Store
You don’t need to generate a separate store every time you want to sell another product. Atlas can create additional product pages within an existing Atlas theme.
- Open the Atlas app.
- Select Product Pages.
- Choose the Atlas theme you already created.
- Click Generate product page.
- Select the new product source, paste the product link or choose an existing Shopify product, and generate the page.
This follows the same basic process as the first product, but adds a page to the store you already have.
A Faster Way to Build Your Shopify Store
The biggest advantage of this workflow is that you’re not spending hours building the first version manually. Atlas handles the initial page structure and product-specific content, while Shopify’s theme editor gives you room to refine the result.
From there, the two upgrades I’d focus on are consistent product photography and a clear bundle offer. Better images improve how the product is presented, and quantity discounts give customers a reason to increase their order.
Before calling the storefront finished, make one final pass through the mobile product page. Check the copy, images, pricing, delivery information, and purchase controls. AI gets the build moving quickly; your review makes the result fit your business.
Made with VideoToBlog using How to Build a Shopify Store in 5 Minutes (Using AI)


