Building your first Shopify store is easier when you work through the setup in the right order. Start with your theme and branding, add your products, organize your storefront, and then configure the settings that let customers place an order.
We’ll use a clothing store as the example, with collections for hoodies, T-shirts, and shorts. You can follow the same process for your own products or products imported from a supplier.
What You'll Learn
- Customize your Shopify theme with a banner, logo, brand colors, and fonts.
- Add products, organize collections, and connect them to homepage sections and navigation.
- Configure policies, payments, shipping, and business settings before opening your store.
- Connect a custom domain, choose a plan, and remove password protection to launch.
Table of Contents
- 1. Sign Up for Shopify
- 2. Choose Your Store Theme
- 3. Add Your Store Branding
- 4. Add Products to Your Shopify Store
- 5. Organize Products Into Collections
- 6. Customize Your Homepage and Store Pages
- 7. Set Up Your Navigation Menu
- 8. Create Store Policies and Add Them to the Footer
- 9. Activate Your Payment Methods
- 10. Configure Your Shipping Rates
- 11. Review Your General Store Settings
- 12. Connect a Custom Domain
- 13. Choose a Plan and Publish Your Store
1. Sign Up for Shopify
The first step is creating your Shopify account. Enter your details and follow the setup prompts until you reach the Shopify dashboard. This is where you’ll manage your products, customize your store, and configure your business settings.
The signup offer promoted with this guide includes a free trial followed by three months at $1 per month on select plans. Check the current terms and eligibility on the signup page before registering.
2. Choose Your Store Theme
From your dashboard, go to Online Store > Themes. Your theme controls the basic design and layout of your storefront.
For this example, I’m using Dawn, the theme already installed in the example store. If you want a different design, scroll down and select Visit Theme Store to explore the available options.
You don’t need to change themes to start customizing. If you’re happy with Dawn, click Customize to open the store editor.
3. Add Your Store Branding
The theme editor lets you update your storefront while seeing a preview of the changes. Start with the main elements customers will notice when they arrive: your homepage banner, tagline, and logo.
Upload a homepage banner
Select the Image banner section and upload the image you want to use. For the clothing store, I’m using a photo that shows the clothing being worn.
Next, click the heading in the banner and replace the default text with your own tagline. In this example, the heading becomes “Where Quality Meets Style.”
Add your logo, colors, and fonts
Open Theme settings > Logo and upload your logo. In this layout, it appears on the left side of the header.
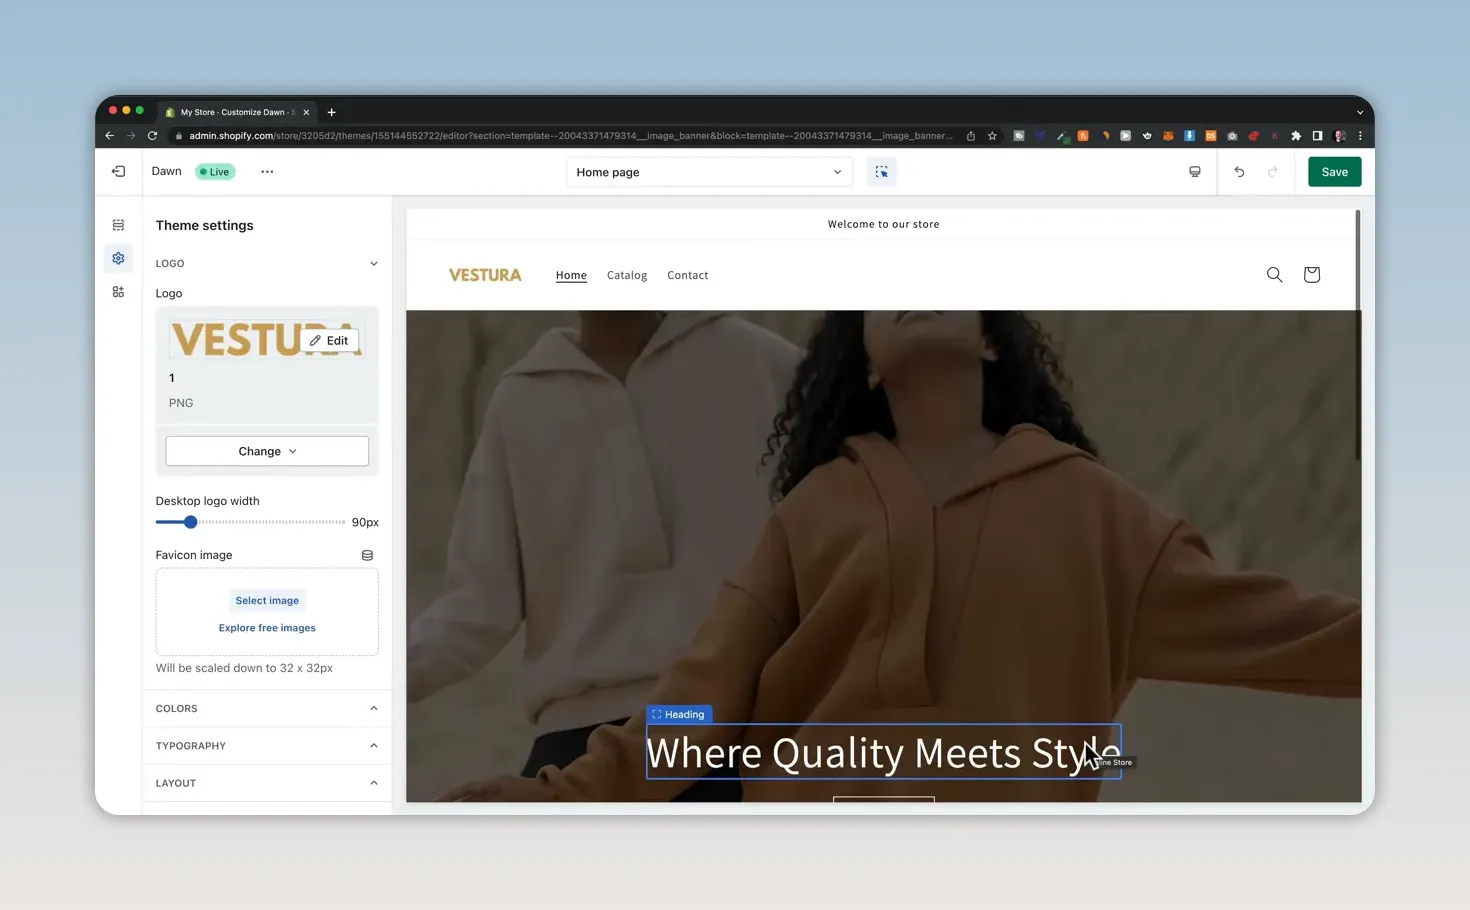
You can also explore the color and typography settings to apply your brand colors and fonts throughout the store.
Once the basic branding is in place, click Save and exit the editor. We’ll come back after adding products and collections.
4. Add Products to Your Shopify Store
Back in the dashboard, open Products. How you add products depends on what you’re selling.
- Your own products: Select Add your products and enter the details manually.
- Supplier products: Import products through the relevant supplier integration rather than recreating each listing yourself.
If you’re using a supplier, there are separate walkthroughs for importing products from AliExpress and adding products from Printful.
Enter the product details
For a manually added product, work through these fields:
- Product name: Enter the name you want customers to see.
- Description: Add a clear description of the product.
- Images: Upload high-quality photos that show the product clearly.
- Price: Set the selling price.
- Inventory: If Shopify will track stock, enter the quantity currently available.
- Variants: Add options such as different sizes or colors.
If you need help writing the description, use Shopify’s AI writing assistant. Enter a few product keywords or features, generate a suggestion, and review the wording before using it.
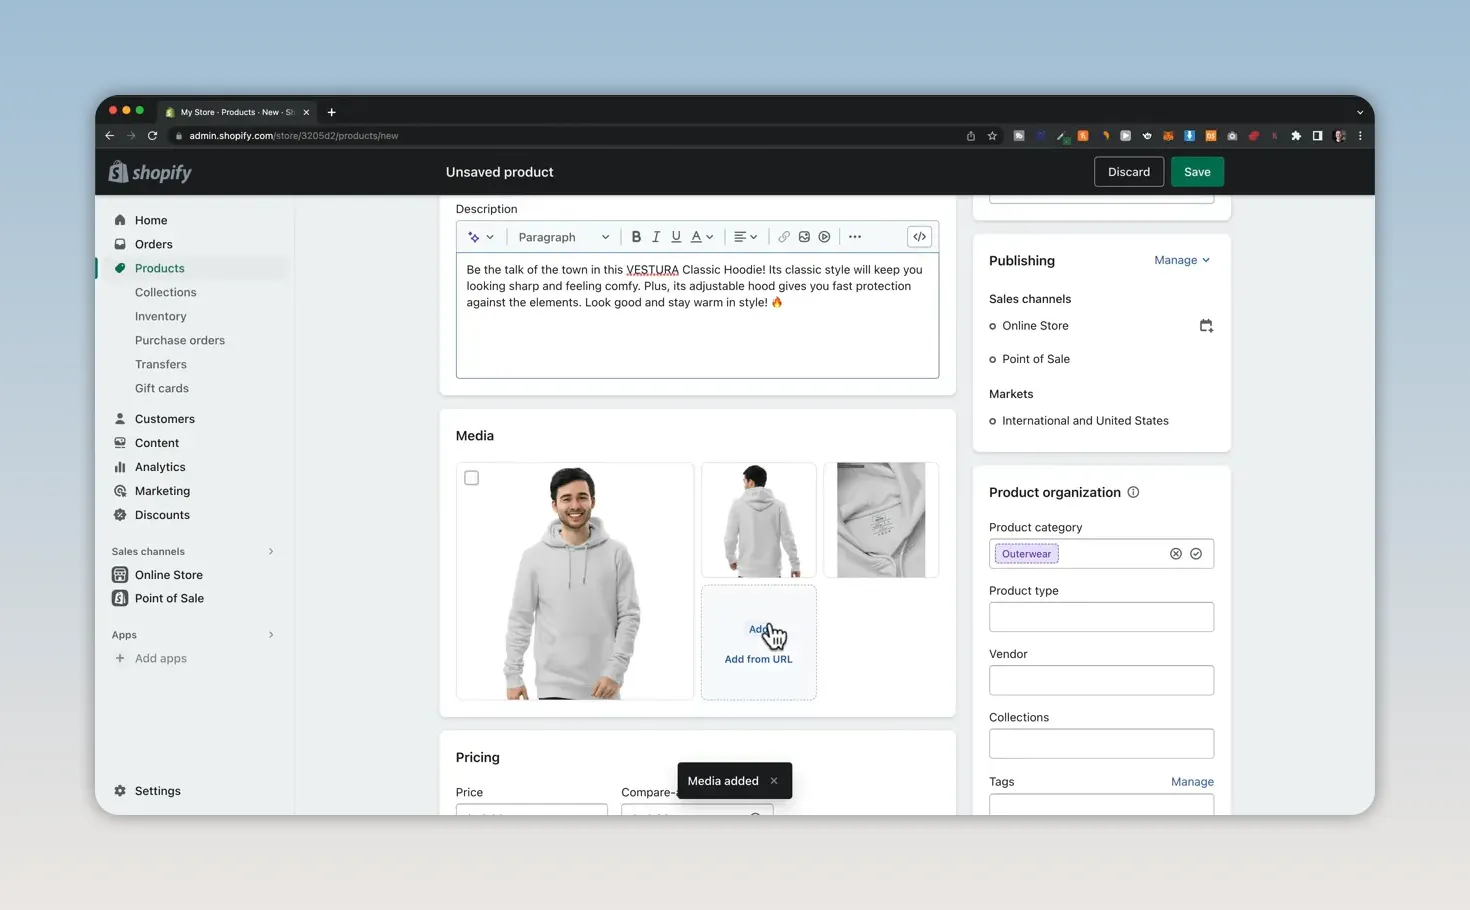
Click Save when the product is complete. Repeat the process until you’ve added the products you want to launch with.
5. Organize Products Into Collections
Collections group related products together so customers can browse by category. For the clothing store, we’ll create separate collections for hoodies, T-shirts, and shorts.
Open Products > Collections and create your first collection.
- Enter a collection title, such as Hoodies.
- Set the collection type to Manual so you can choose which products belong in it.
- Upload a collection image.
- Click Save.
- In the collection’s Products area, add the relevant products.
Repeat these steps for your other categories. The collection images will also be useful when we display these categories on the homepage.
6. Customize Your Homepage and Store Pages
Now that your products and collections are ready, return to Online Store > Themes > Customize.
The example homepage already includes a featured collection section. I’m replacing that with a collection list so customers can choose a clothing category first.
- Select the existing Featured collection section.
- Remove it using the trash icon or Remove section option.
- Click Add section.
- Choose Collection list.
- Select a collection for each collection block.
For this store, the three blocks link to Hoodies, T-shirts, and Shorts.
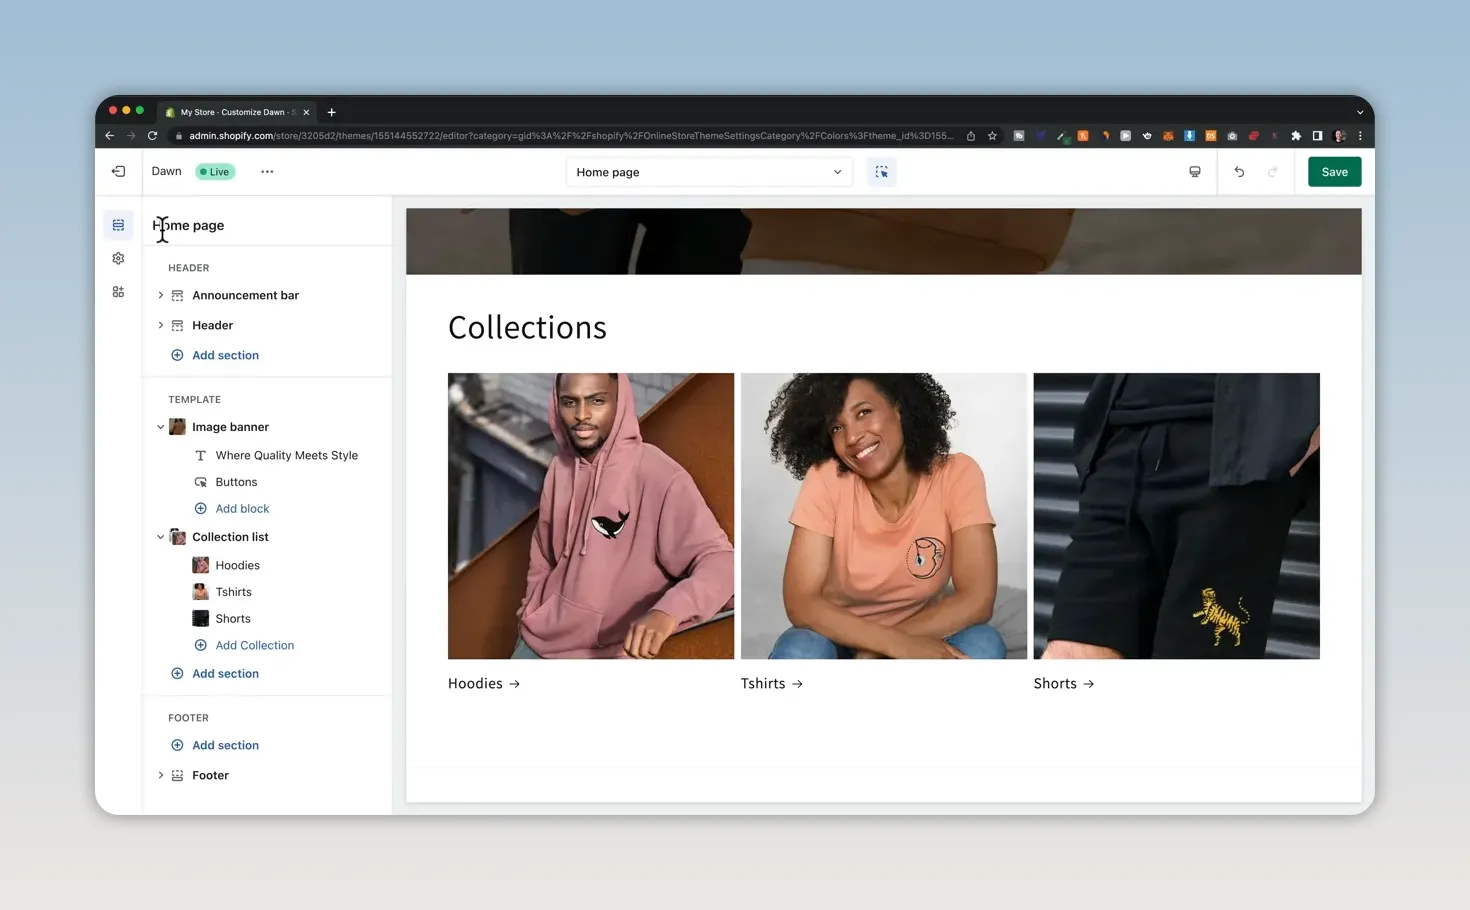
To add more content, click Add section again and select the section you need. You can build out the homepage using the available section types rather than trying to fit everything into one banner.
You can also use the page selector at the top of the editor to switch to other store pages, including product pages, and customize them in the same way. Save your changes before leaving the editor.
7. Set Up Your Navigation Menu
Your main navigation is the menu at the top of the storefront. To edit it, return to the dashboard and open Online Store > Navigation > Main menu.
Click Add menu item, enter a label, and choose its destination. For example, you can add a direct link to your Hoodies collection.
You can also create nested menus. For a clothing store, a useful structure might be:
- Women: Hoodies, Shorts, and T-shirts.
- Men: Hoodies, Shorts, and T-shirts.
Arrange the clothing categories underneath the appropriate parent menu item to create the submenu structure, then save the menu.
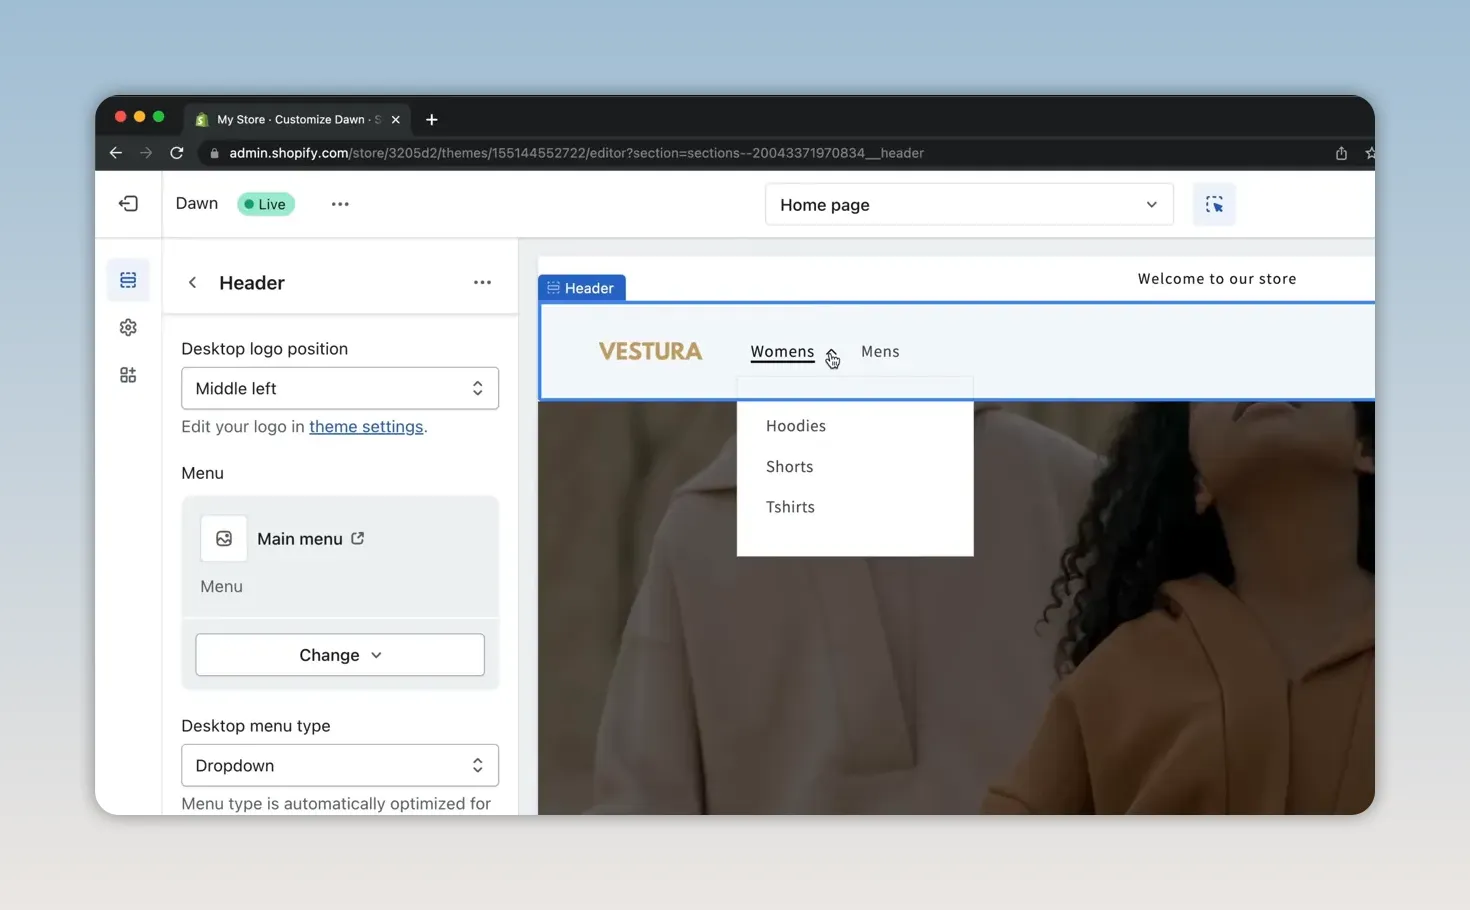
Return to the theme editor and open the menu to check that the structure appears as intended.
8. Create Store Policies and Add Them to the Footer
Before launching, add the policies and contact details customers need. Open Settings > Policies.
Work through the relevant sections, including:
- Refund or return policy.
- Privacy policy.
- Terms of service.
- Shipping policy.
- Contact information.
Where Shopify provides a Create from template option, you can use it as a starting point. Read and customize every policy before saving it. The wording needs to reflect your specific store and how your business operates.
Make the policies accessible from your storefront
Creating policies is only the first part. Next, add links to your footer menu:
- Close Settings and return to Online Store > Navigation.
- Open Footer menu.
- Add menu items linking to your store policies.
- Save the menu.
- Return to the theme editor and scroll to the footer.
- Expand the Footer section, add a Menu block, and select your footer menu.
Your policy links should now appear at the bottom of the store.
9. Activate Your Payment Methods
To let customers pay for their orders, open Settings > Payments.
Select Activate Shopify Payments and complete the requested business and payment details. Supported options can include credit cards, Apple Pay, and Shop Pay, depending on availability and your setup.
If you’re unsure whether you can use it, check Shopify’s list of supported countries for Shopify Payments.
Also review the PayPal section. PayPal appears as a checkout option in the example setup, but check whether any account setup remains incomplete in your own store.
You can deactivate PayPal, but I would generally leave it enabled so customers who prefer it still have that option.
10. Configure Your Shipping Rates
Next, go to Settings > Shipping and delivery. This is where you configure shipping rates for the regions you serve.
You can set up different rates by destination and add conditions based on:
- Order weight: Apply rates to specified weight ranges.
- Order price: Apply rates to specified price ranges.
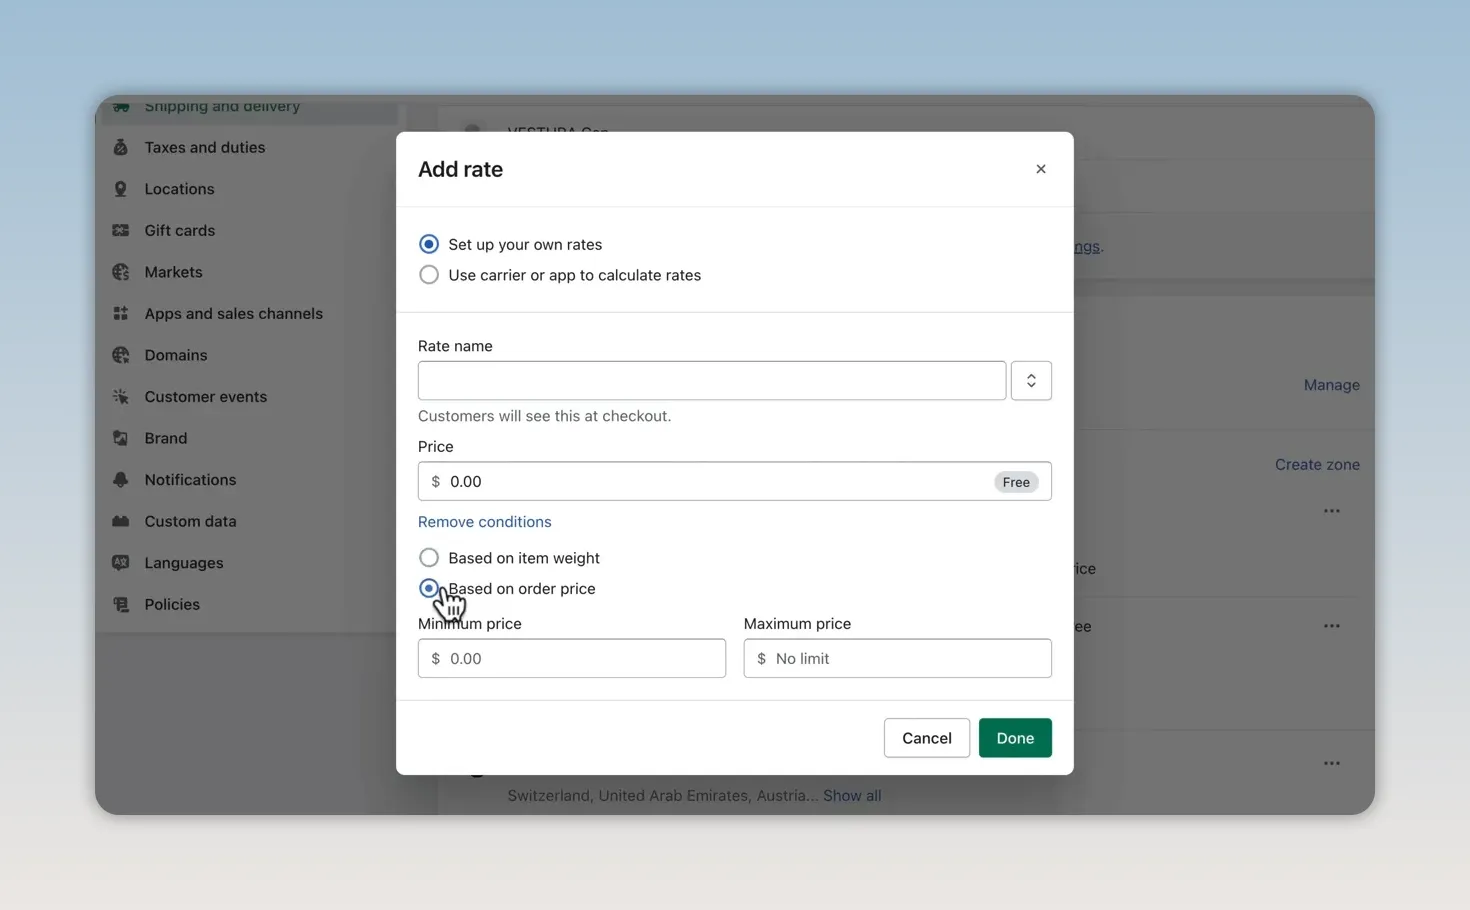
If you imported products from a third-party supplier, a shipping profile may already exist for those products. Open any existing supplier profiles and review them rather than assuming all products use your general shipping settings.
11. Review Your General Store Settings
Before publishing, check the business details behind your storefront.
Store details
Under Settings > Store details, review your store name, store email, billing information, and store currency. Fill in anything that is missing and correct any details that don’t match your business.
Taxes and duties
If you need to collect taxes in particular regions, review Settings > Taxes and duties and configure the applicable settings.
Brand assets
Under Settings > Brand, upload your logo and add your brand colors. This keeps your brand assets available beyond the individual theme settings and helps maintain consistency across connected platforms.
12. Connect a Custom Domain
Your domain is the web address customers use to reach your store. Open Settings > Domains to set it up.
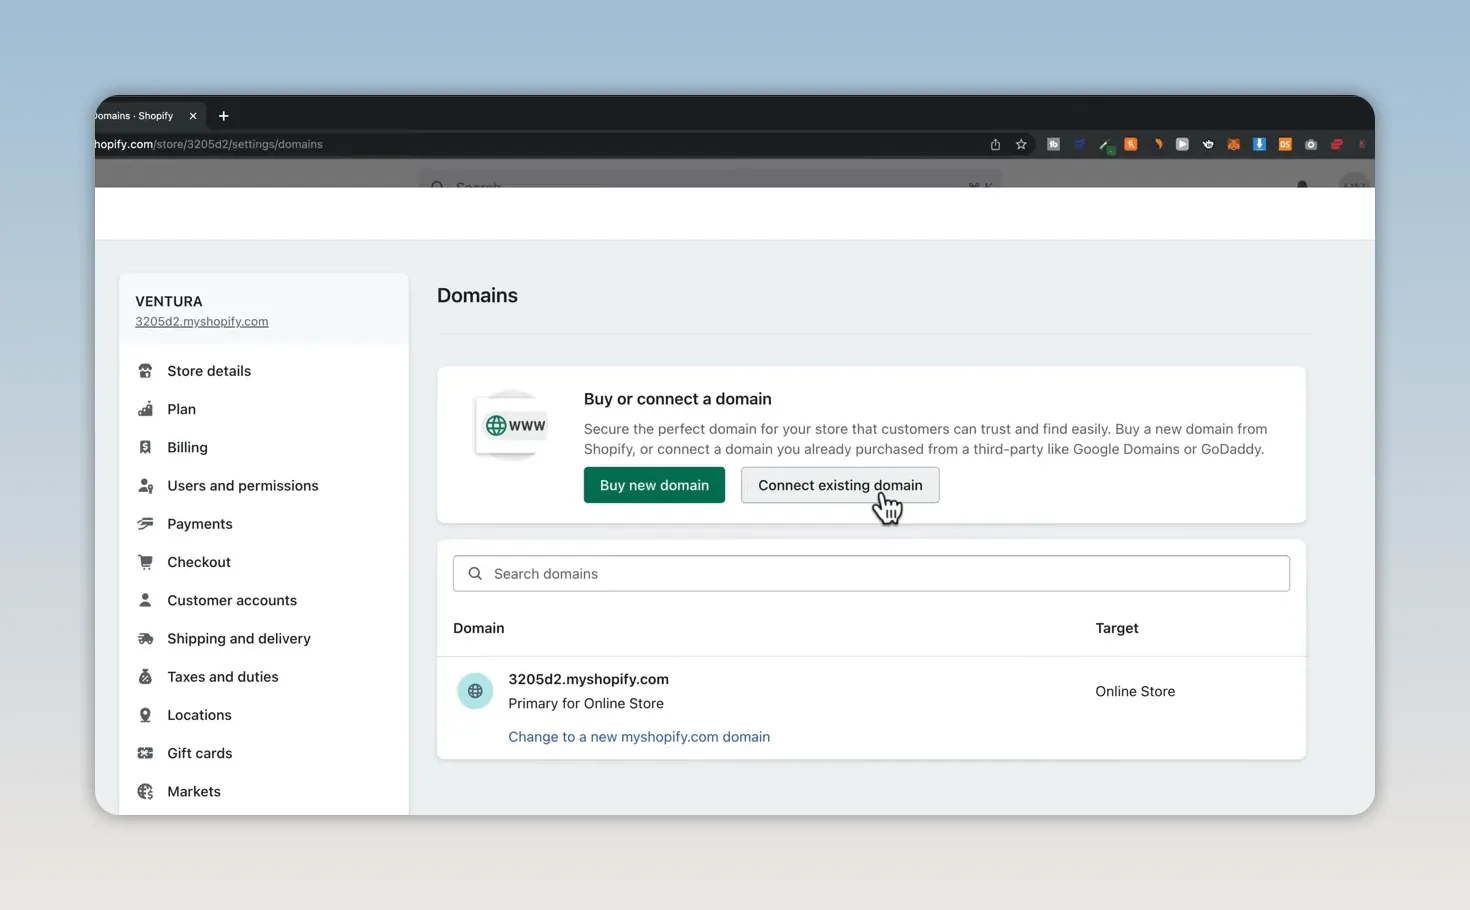
You have two options:
- Connect an existing domain: If you already own a domain, select Connect existing domain and follow the instructions.
- Buy a new domain: Select Buy new domain, enter the address you want, and check its availability.
Your store name is a natural place to start when choosing an address. If the domain is available, you can purchase it through Shopify, which handles the connection to your store.
13. Choose a Plan and Publish Your Store
The final step is choosing a Shopify plan and removing the storefront password.
- Return to Online Store and click Pick a plan.
- Select your plan. I’m using Basic for this example.
- Choose your billing cycle.
- Enter the necessary billing and payment information.
- Review the details and confirm.
Once your plan is selected, return to Online Store and remove the password protection.
Your Shopify store is now open to customers. The core setup is complete: your storefront has its branding, products are organized into collections, navigation and policies are in place, and your payment, shipping, and domain settings are configured.


