Building a professional Shopify store is easier when you work through it in the right order. Choose a design that fits your products, add your branding and catalog, and then configure the settings that make it possible to take orders.
I'll use a watch store as the example, with men's watches, women's watches, and a new arrivals collection. The same process applies whether you're selling your own products or setting up a Shopify dropshipping store.
The goal is to get a complete store ready to sell, without getting lost in every feature in the dashboard. You'll learn Shopify by using the features you actually need.
A quick note: Shopify's interface, themes, plans, and trial offers can change. Some menu labels or theme options may look different in your account, but the setup process below gives you the workflow to follow.
What You'll Learn
- Choose a suitable theme and customize your homepage with consistent branding.
- Organize products into collections and configure pricing, inventory, and variants.
- Set up policies, navigation, payments, shipping, taxes, and your branded domain.
- Check mobile layouts and test checkout before removing your storefront password.
Table of Contents
- 1. Create Your Shopify Account
- 2. Choose a Theme That Already Fits Your Store
- 3. Learn the Theme Editor Before Customizing
- 4. Build the Top of Your Homepage
- 5. Create Collections to Organize Your Products
- 6. Add Your Products
- 7. Create Your Policies and Footer Links
- 8. Build a Simple Main Menu
- 9. Apply Your Branding and Check Mobile Layouts
- 10. Set Your Store Preferences and Choose a Plan
- 11. Confirm Your Business Details and Payments
- 12. Configure Shipping and Taxes
- 13. Connect a Branded Domain
- 14. Test Your Store and Launch
1. Create Your Shopify Account
Start by opening Shopify's signup page and creating your account. Enter your email address, choose a password, and follow the prompts to create your store.
Shopify will assign your store a default address ending in myshopify.com. Don't spend too much time trying to make this your final customer-facing address. We'll connect a branded domain later.
- Enter your email address and create your login.
- Choose your initial store name or store address when prompted.
- Complete the business questions that apply to you, or skip optional questions.
- Enter your name and business address.
- Open your Shopify dashboard.
You can use the Shopify trial to start building before committing to your ongoing subscription. Check the offer and billing terms displayed during signup, since trial lengths and promotions change.
2. Choose a Theme That Already Fits Your Store
In the dashboard, go to Online Store > Themes. You'll see the theme currently installed on your store, along with options to add another one.
The most important thing here is to choose a theme whose structure already looks close to the website you want. That keeps the amount of customization to a minimum. Ideally, most of your work should be adding products, replacing images, and applying your branding.
Preview before you choose
Open the current theme's preview and look through the layout. Pay attention to the homepage, collection pages, and product pages, rather than choosing only because you like the demo photography.
If the layout isn't a good fit, explore the free themes first. You can also browse paid options in the Shopify Theme Store, but you don't need to start with a paid theme to build a professional-looking store.
For the watch store example, I use the Brooklyn theme in its Classic style. If that theme isn't available in your account, choose an available theme with a similar layout and use the corresponding sections.
- Add your chosen theme to the theme library.
- Use the theme's publishing option to make it the current theme.
- Click Customize to open the theme editor.
I like keeping the dashboard open in one browser tab and the theme editor in another. You'll move between them as you create products, collections, policies, and menus.
3. Learn the Theme Editor Before Customizing
The theme editor gives you a preview of your website and a panel for changing its content and settings.
At the top, you can switch between page types, such as the homepage, product pages, collection pages, and blog pages. You can also change the preview between desktop and mobile.
Your homepage is built from three main parts:
- Header: Your logo, main navigation, and any announcement bar.
- Content sections: Images, text, collections, featured products, and other homepage content.
- Footer: Policy links, social links, and other information at the bottom of the store.
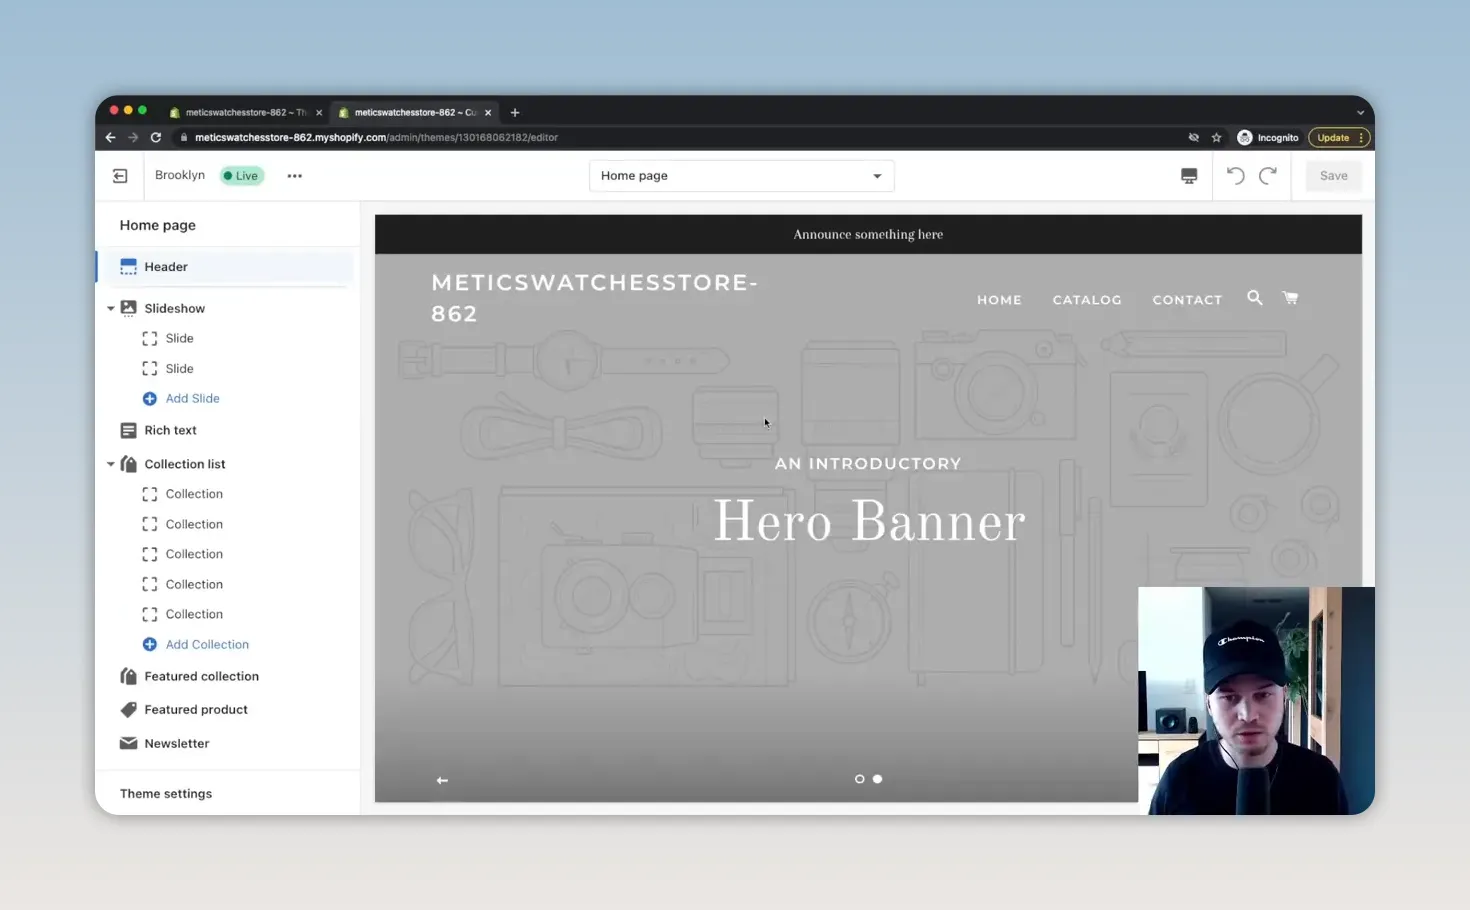
Click a section to edit it. Use Add section to insert something new, drag sections to change their order, or use Remove section to delete anything you don't need.
For example, you could remove a rich text section, add it back, and move it directly below the main image. You're not locked into the theme's starting layout.
Save regularly. If you create something in the dashboard and need to refresh the editor to see it, save your design changes first.
4. Build the Top of Your Homepage
I find it easiest to customize the homepage from top to bottom. Start with the header, then work through the sections underneath it.
Add your logo
Open the header settings, choose the logo image option, and upload your logo.
If you don't have a logo yet, hiring a designer is one option. The important thing for this step is having a logo file you can upload and use consistently throughout your store.
Some themes support a separate logo for a transparent header. For the watch store, I use a white version over the large homepage photograph and a dark version on pages with a white background.
This keeps the branding readable in both situations. If your theme offers this setting, upload both versions and check how they appear on the homepage and collection pages.
Set up the announcement bar
The announcement bar is the strip at the top of your store. You can use it for a relevant promotion, a discount code, or a shipping offer.
For example, if your store genuinely offers free shipping on every order, you could state that here. If you don't have anything useful to announce, turn the bar off rather than leaving in placeholder text.
Create a clear hero section
The large image at the top of your homepage should quickly communicate what you sell and the feel of your brand. Choose a high-quality image that makes sense for your products.
A slideshow doesn't have to contain several slides. For this watch store, I only need one strong image, so I remove the extra slide and use the remaining one as a static hero section.
- Open the slideshow or image banner section.
- Remove any extra slides you don't need.
- Upload your main image.
- Adjust the image overlay until the text is easy to read.
- Position the text where it works best with the photograph.
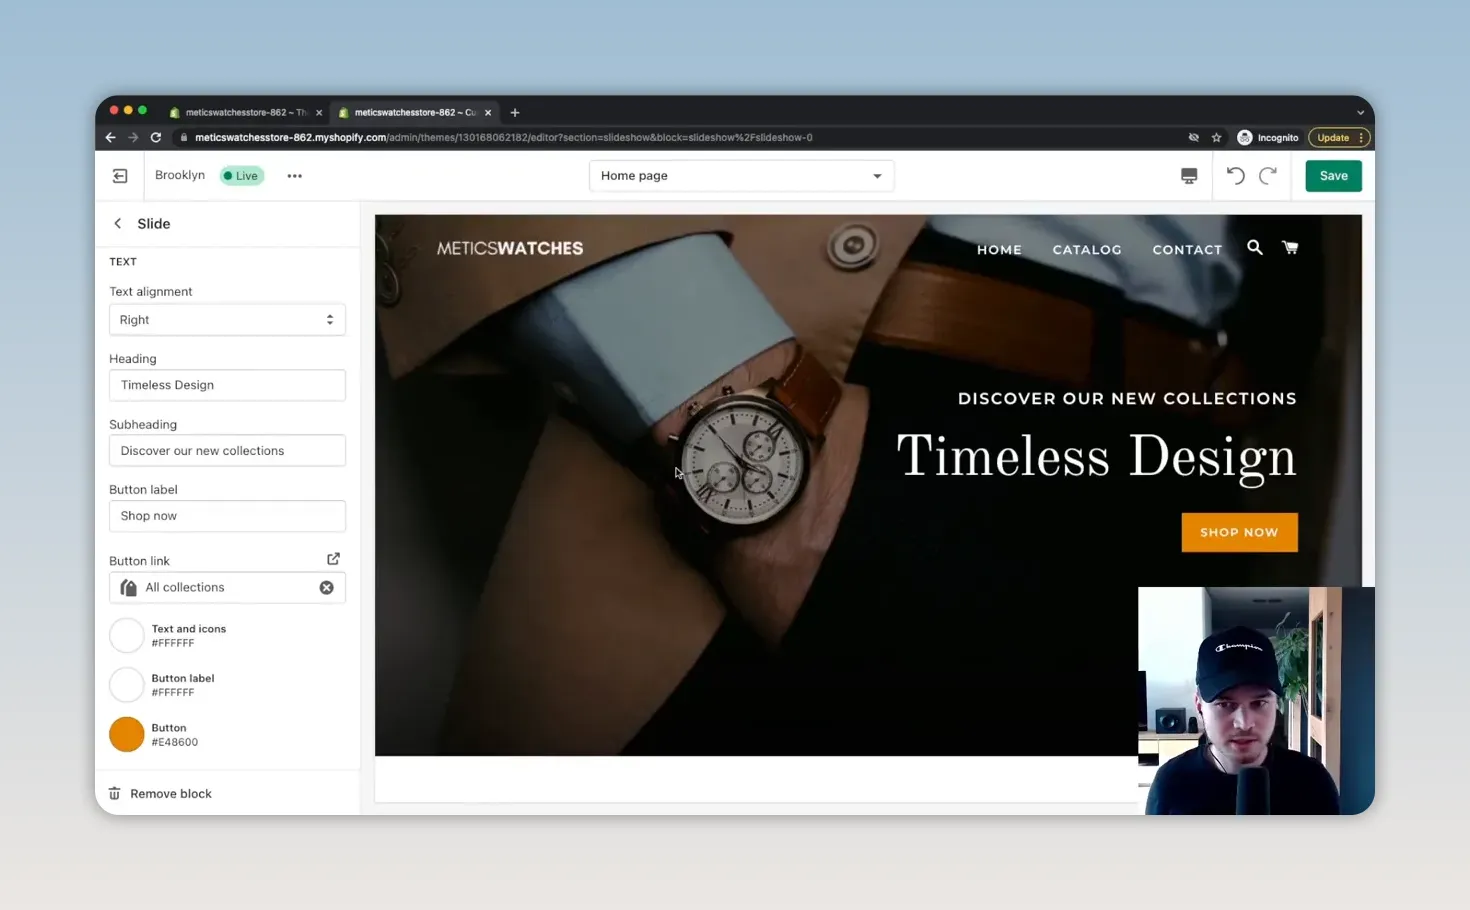
- Replace the placeholder heading with your own headline.
Add a Shop Now button
Give people who are ready to browse a direct route to your products. Add a button label such as Shop Now, then link it to the appropriate shopping destination.
For the example store, I link the button to the collection overview so customers can choose the category they want.
In the theme used here, the button appears after a destination link is added. I also change its color from black to a brighter orange so it stands out against the image.
Keep only useful homepage sections
A rich text section can explain your mission, introduce your brand, or highlight key product features. Keep it if you have something useful to say.
For this example, I remove it. You don't have to fill every section just because it came with the theme.
5. Create Collections to Organize Your Products
Collections group related products together and help customers find what they're looking for.
For a watch store, you might organize products into men's watches, women's watches, digital watches, or modern watches. In this example, I create three collections:
- Men's
- Women's
- New Arrivals
The first two will appear as category links on the homepage. New Arrivals will supply the products shown in a featured collection section.
Create a collection in the dashboard
- Go to Products > Collections.
- Click Create collection.
- Enter the collection title.
- Add a description where appropriate.
- Choose the collection type.
- Upload an image that represents the collection.
- Save it and make it available to your online store.
There are two approaches to collection membership:
- Manual collections: You choose which products belong in the collection.
- Automated collections: Products are included based on rules you define.
I'm using manual collections to keep the setup simple. Repeat the process for each category you need.
Connect collections to your homepage
Return to the theme editor. Save your changes and refresh it if the new collections aren't available yet.
Open the Collection list section and select the collections you want to display. For this store, I keep two collection blocks, assign Women's and Men's, and change the section heading to Find Your Style.
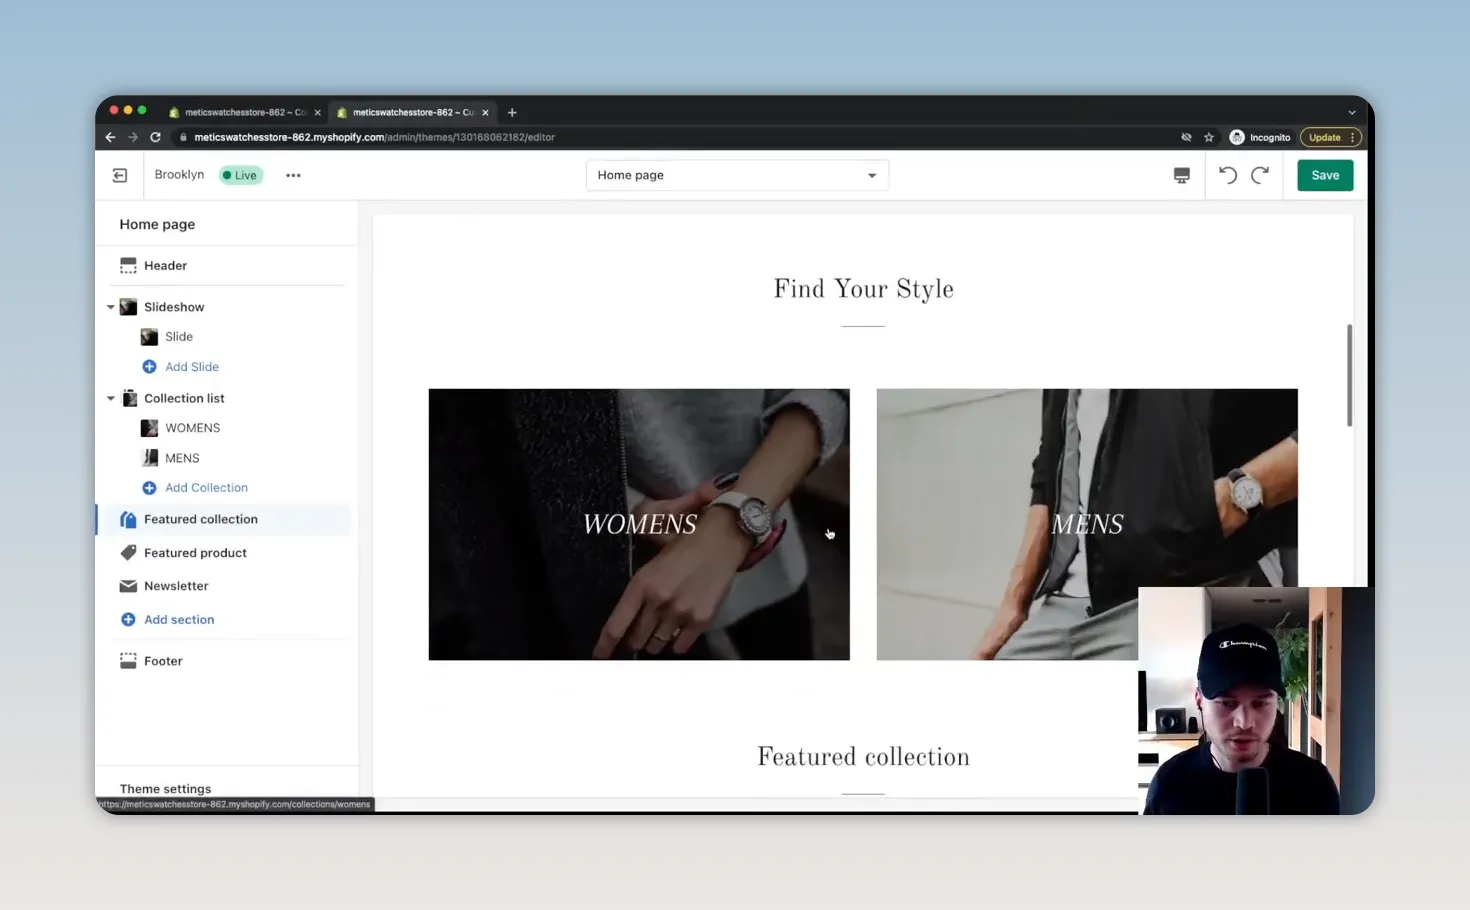
Next, open the Featured collection section. Set the heading to New Arrivals, select that collection, and choose the display style. I use a grid.
The section will remain empty until you add products to the selected collection. That's the next step.
6. Add Your Products
In the dashboard, go to Products and click Add product. Work through the product information carefully, then repeat the process for the rest of your catalog.
Product title, description, and images
Enter the product name and write a description that explains what the customer is buying.
Add high-quality product photographs, ideally showing the item from several angles. A customer should be able to understand the product's appearance before making a purchase.
I use one image per product to keep this example moving, but take the time to add the images and descriptions your actual store needs.
Pricing and cost per item
Enter the selling price in the price field. The example watch is priced at $120.
You can also enter a compare-at price. This is the higher price displayed with a line through it beside the selling price. In the example, that's $150 alongside the $120 selling price. Use this field only when that comparison accurately represents your offer.
The cost per item field lets you record what the product costs you and see the associated margin information.
Inventory and stock settings
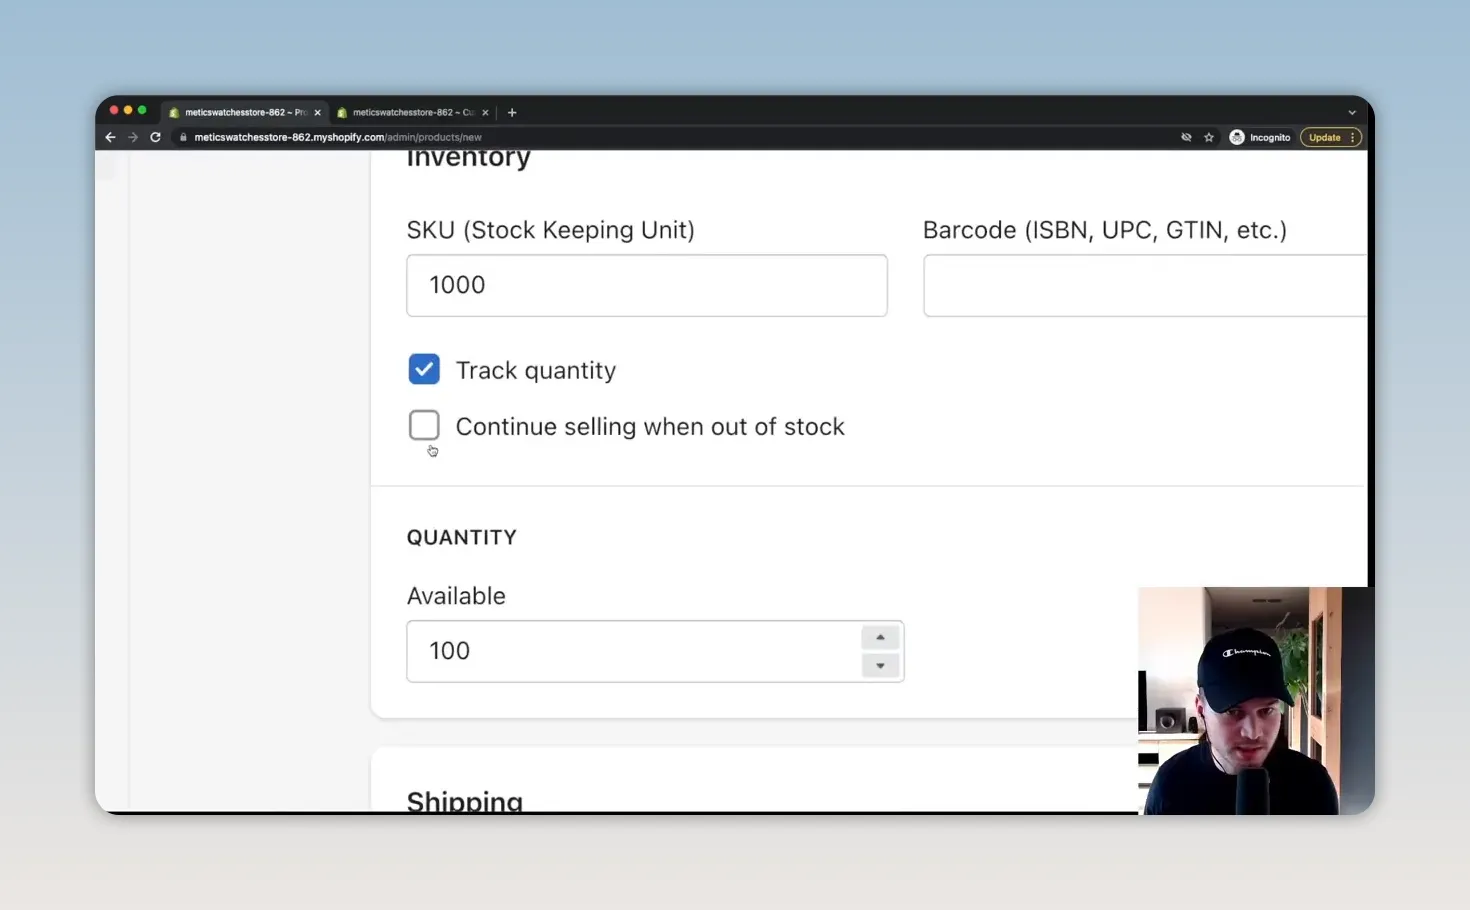
Add a stock keeping unit, or SKU, to identify the product in your inventory. If you're tracking stock in Shopify, enter the available quantity.
With inventory tracking enabled, Shopify uses that quantity to determine whether the product is in stock. Review the Continue selling when out of stock option as well:
- Leave it disabled if you want sales to stop when tracked inventory runs out.
- Enable it only if you intend to accept orders after the available quantity reaches zero.
Product options and variants
If a product comes in different sizes, colors, or other versions, add those options to the product.
For example, a watch could come in black and blue. If the blue version has a different price, you can set that at the variant level.
Assign collections and activate the product
A product can belong to more than one collection. I add the example watch to both Men's and New Arrivals.
Once the information is ready, change the product status from Draft to Active, confirm its online store availability, and save.
Repeat this for your remaining products. Then return to the theme editor and check that the correct products appear in your featured collection and category pages.
Feature an individual product on the homepage
A featured collection displays several products. A Featured product section highlights one specific item.
For the watch store, I select a smartwatch so customers can see its details and purchase it directly from the homepage.
I also remove the newsletter section because email marketing hasn't been set up for this example. Keep or remove that section based on whether you're ready to use it.
7. Create Your Policies and Footer Links
Go to Settings > Policies to add your store's policy content.
Shopify provides templates for certain policies. These can help you get started, but a template is not legal advice or a finished policy for every business.
Review each policy carefully. Add missing information, remove anything that doesn't apply, and make sure the wording matches how your business operates.
The policies covered in this setup are:
- Refund policy
- Privacy policy
- Terms of service
- Shipping policy
Your shipping policy needs to reflect your actual shipping arrangements, so write and review that information specifically for your store.
Add the policies to your footer menu
Saving a policy doesn't complete the footer setup. You also need to make the links easy to find.
- Open your store's navigation or menu settings.
- Select the Footer menu.
- Remove any default links you don't need.
- Click Add menu item.
- Choose the relevant policy as the link destination.
- Repeat for the remaining policies and save.
Return to the theme editor and check that the footer displays the links. Open them to confirm they lead to the correct pages.
Review the other footer settings
Depending on the theme, you may also be able to show or hide payment icons, a region selector, and a language selector.
Add your social profile links in the theme's social media settings if you want those icons to appear in the footer.
8. Build a Simple Main Menu
The main menu should make your most important pages easy to reach. For the example store, I keep the navigation focused on Contact, Women's, and Men's.
Open your navigation settings and select the Main menu. Remove default items you don't need, then add links to the collections and pages you want customers to use.
You can also include an About Us page or a page explaining your mission. If the page doesn't exist yet, create it under Online Store > Pages, save it, and then add it to the menu.
Save the menu and refresh the theme editor to check the result. The exact links will depend on your store, but the goal stays the same: help customers get to the right place without unnecessary choices.
9. Apply Your Branding and Check Mobile Layouts
Open Theme settings to adjust the design choices used throughout the website.
Colors and typography
Set the theme colors to match your brand. Review the colors used for text, buttons, backgrounds, and other elements so the website feels consistent.
Next, choose your typography. For the watch store, I change the headings to Montserrat for a more modern look. Choose the available font that best fits your own branding.
Favicon and checkout logo
A favicon is the small icon shown in the browser tab. Upload a suitable version of your logo or brand mark in the favicon setting, save, and refresh the storefront to check it.
Also add your logo to the checkout branding settings available in your account. This carries the store's identity into the purchase process.
Review desktop and mobile
Switch the editor to its mobile preview and go through the homepage from top to bottom.
Shopify themes provide responsive layouts, but you still need to check how your particular content fits. Look at the hero image, headline, collection images, product grid, and footer.
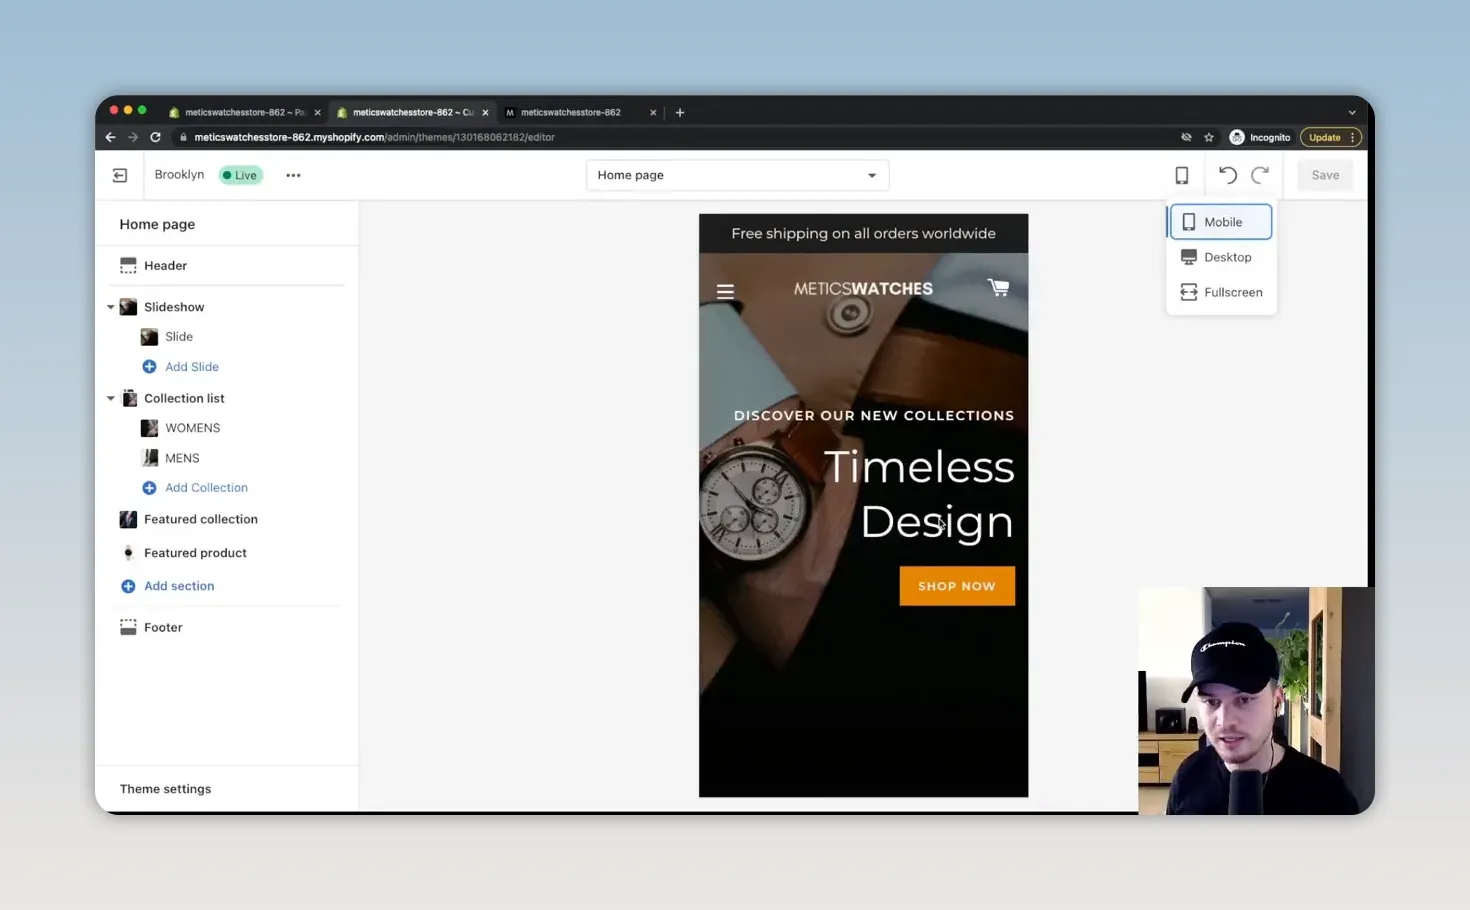
Then inspect a product page on both mobile and desktop. The theme supplies the basic page design, so you may not need major layout changes, but make sure your images and content look right.
10. Set Your Store Preferences and Choose a Plan
Homepage title and meta description
Open Online Store > Preferences and enter your homepage title and meta description.
The homepage title helps identify your store in search results. The meta description gives you a place to describe what you sell and why someone might want to visit.
Use relevant product keywords naturally. The description isn't a direct ranking factor, but clear wording can help people understand the relevance of your store and encourage clicks. Search engines may choose a different snippet; Google's snippet guidance explains how that works.
Social sharing image
Review the social sharing image as well. This is the image that can appear when someone shares your store on a social platform. Choose the image you want associated with your store.
Select your Shopify plan
You need an eligible paid plan before removing the storefront password and opening the store publicly.
For a straightforward new store, the Basic plan is the starting point I use in this example. Compare the available plans against your needs rather than automatically choosing the most expensive option.
Look at both the subscription cost and the applicable payment or transaction fees. At a higher sales volume, lower rates on a higher plan may offset some of its additional subscription cost.
I prefer monthly billing at the beginning because I haven't yet established how the store will perform. Review the billing cycle, payment method, and trial terms before confirming.
Keep password protection enabled until the remaining settings and tests are complete. Choosing a plan and making the store public are separate steps.
11. Confirm Your Business Details and Payments
Store details
Under Settings > Store details, review your basic business information:
- Customer-facing store name
- Legal company name
- Business address
- Contact information
- Sender email address
- Store currency
- Time zone
Make sure the name and address are accurate, since business information can appear on customer-facing documents.
The sender email is the address associated with messages such as order confirmations and shipping updates. If you have a branded email address, use the appropriate address for your business rather than leaving an unrelated personal one.
Payment providers
Go to Settings > Payments to configure how customers will pay and how you'll receive the money.
Shopify Payments is a straightforward option where available. Complete the account setup and provide the requested business and payout information. Supported payment options can include credit cards and digital wallets such as Apple Pay and Google Pay.
Review PayPal separately. If you want to offer it, complete the necessary setup. If you don't want to offer it, use the deactivation option rather than assuming it's unavailable.
You can also explore the third-party providers listed for your store. Compare the actual rates and availability for your country and account rather than assuming a particular provider will always be cheaper. Shopify's payment documentation is a useful reference for the available options.
12. Configure Shipping and Taxes
Create shipping zones and rates
Open Settings > Shipping and delivery and manage the rates for your shipping profile.
Review any default shipping zones and rates before using them. Your settings should match the destinations you actually serve and the prices you intend to charge.
For a simple free-shipping setup:
- Create a shipping zone.
- Select the countries or regions included in that zone.
- Click Add rate.
- Name the rate Free Shipping.
- Set the price to $0.
- Save the rate and shipping settings.
The example store uses free worldwide shipping to keep the demonstration simple. That isn't a requirement for your business. You can create separate zones for the United States, Canada, or other destinations and give each its own rate.
The rate offered at checkout should correspond to the customer's destination. Make sure your announcement bar and shipping policy agree with the rates you've configured.
Review your tax obligations
Open the tax settings and determine what applies to your business.
Whether you need to collect taxes depends on factors including where you're selling from and where your customers are located. There isn't one setting that's right for every store.
Check the relevant tax rules or get professional advice, then configure Shopify to match your obligations.
13. Connect a Branded Domain
Your default myshopify.com address works as an initial store address, but a branded domain gives customers a cleaner address to use.
Go to Settings > Domains. You have two main options:
- Connect an existing domain: Use this if you already own the domain you want.
- Buy a new domain: Search for an available domain and purchase it through Shopify.
Buying through Shopify is the simpler route because the domain is connected to the store as part of the process. You can also purchase through an outside domain provider and follow Shopify's connection instructions.
Compare the options, choose the branded address you want customers to use, and complete the connection before launch.
14. Test Your Store and Launch
Open your storefront using the preview or eye icon beside Online Store. Go through it as a customer would, rather than only checking the homepage design.
Before sending traffic to the store, work through this final checklist:
- Homepage: Check the logo, hero image, headline, and shopping button.
- Navigation: Open each main menu link and collection.
- Products: Verify images, descriptions, prices, variants, and availability.
- Footer: Open your policies and check any social links.
- Mobile: Review the homepage and product pages in the mobile layout.
- Checkout: Go through the purchase process and check the applicable shipping, tax, and payment options.
For instructions on completing a test purchase, use Shopify's test order guidance.
Once the store is ready, return to the password protection setting, disable the storefront password, and save. Your store can then be accessed publicly.
At that point, you have the core pieces in place: a branded storefront, organized products, clear navigation, policies, payment providers, shipping settings, and a connected domain. Make sure the buying process works before spending money to bring people to it.
Made with VideoToBlog using Shopify Tutorial for Beginners - Step by Step


