Creating your first website can feel overwhelming, but you do not have to build everything from scratch. With Wix, you can start with a professionally designed template, replace the content, adjust the layout, and publish your own website step by step.
For this guide, I’m building a website for an Italian restaurant called Bella Cucina, which means “beautiful kitchen” in Italian. The website will include a restaurant menu, table reservations, an Our Story page, an Events page, and contact information. You can follow the same process for a different type of business and simply choose the pages and features you need.
What You'll Learn
- Choose a Wix template with a structure you like before customizing its content and design.
- Build pages from sections and elements, then connect navigation, forms, maps, and business apps.
- Refine the mobile layout after desktop edits to fix overlapping elements and spacing.
- Preview your site before publishing and choose a suitable paid plan for a custom domain.
Table of Contents
- 1. Create Your Wix Account and Set Up Your Website
- 2. Understand the Wix Dashboard
- 3. Choose Between Wix AI and a Template
- 4. Get Comfortable With the Wix Editor
- 5. Edit Text, Buttons, and Images
- 6. Add New Sections and Elements
- 7. Manage Pages and Your Navigation Menu
- 8. Create and Connect Your Contact Form
- 9. Add Your Business Location With Google Maps
- 10. Customize Your Website Header
- 11. Change Colors and Fonts Across the Site
- 12. Optimize Your Wix Website for Mobile
- 13. Use Wix Apps for Additional Features
- 14. Preview and Publish Your Website
- 15. Connect a Custom Domain and Remove Wix Branding
1. Create Your Wix Account and Set Up Your Website
Start by opening the Wix sign-up page, entering your email address, and clicking Start Now. Choose a password and complete the registration.
Wix then takes you through an onboarding process. Choose whether you’re building a website for yourself, your business, or someone else.
You may be offered an AI chat that helps personalize your website dashboard. For this walkthrough, choose Set Up Without Chat. We’ll enter the information manually so we have control over the setup.
- Choose your website type. Search for the category that describes your business. I’m selecting Italian restaurant.
- Enter your business name. In this example, that’s Bella Cucina.
- Add a business description. Briefly explain what your business offers. I used ChatGPT to help draft the initial description.
- Select your website goals. Keep only the features you actually want.
- Complete the remaining setup questions. I’m also selecting the option to run the site on mobile.
For the restaurant, I’m keeping menu display and table reservations selected, but turning off online ordering. There’s no reason to add an ordering system if the business won’t use it.
Click Finish to open your Wix dashboard.
2. Understand the Wix Dashboard
The dashboard is the back end of your website. It’s where you manage the business side of the site rather than its visual design.
Your website name appears in the top-left corner. You can also use that area to create another website later.
The navigation on the left gives you access to tools such as:
- Website traffic and sales metrics.
- Invoices and orders.
- Restaurant menus and table reservations.
- Your inbox and contacts.
- Marketing features, analytics reports, and automations.
The exact options depend on the type of website you’re creating and the apps installed on it. Don’t worry about exploring every setting right now. First, we need to build the website itself.
Click Design Site to get started.
3. Choose Between Wix AI and a Template
Wix offers two starting points: generate a design with AI using your business information, or choose a professionally designed template and customize it.
I’ve tried both approaches, and for this build I prefer a template. In my testing, the template-based designs looked and felt more professional than the AI-generated results. AI tools will continue to change, but a good template gives us a clear starting point without needing to work out the entire design ourselves.
Click Pick a Template.
Choose a layout you already like
You can browse template categories or use the search bar. I’m searching for “Italian restaurant,” which brings up several restaurant designs.
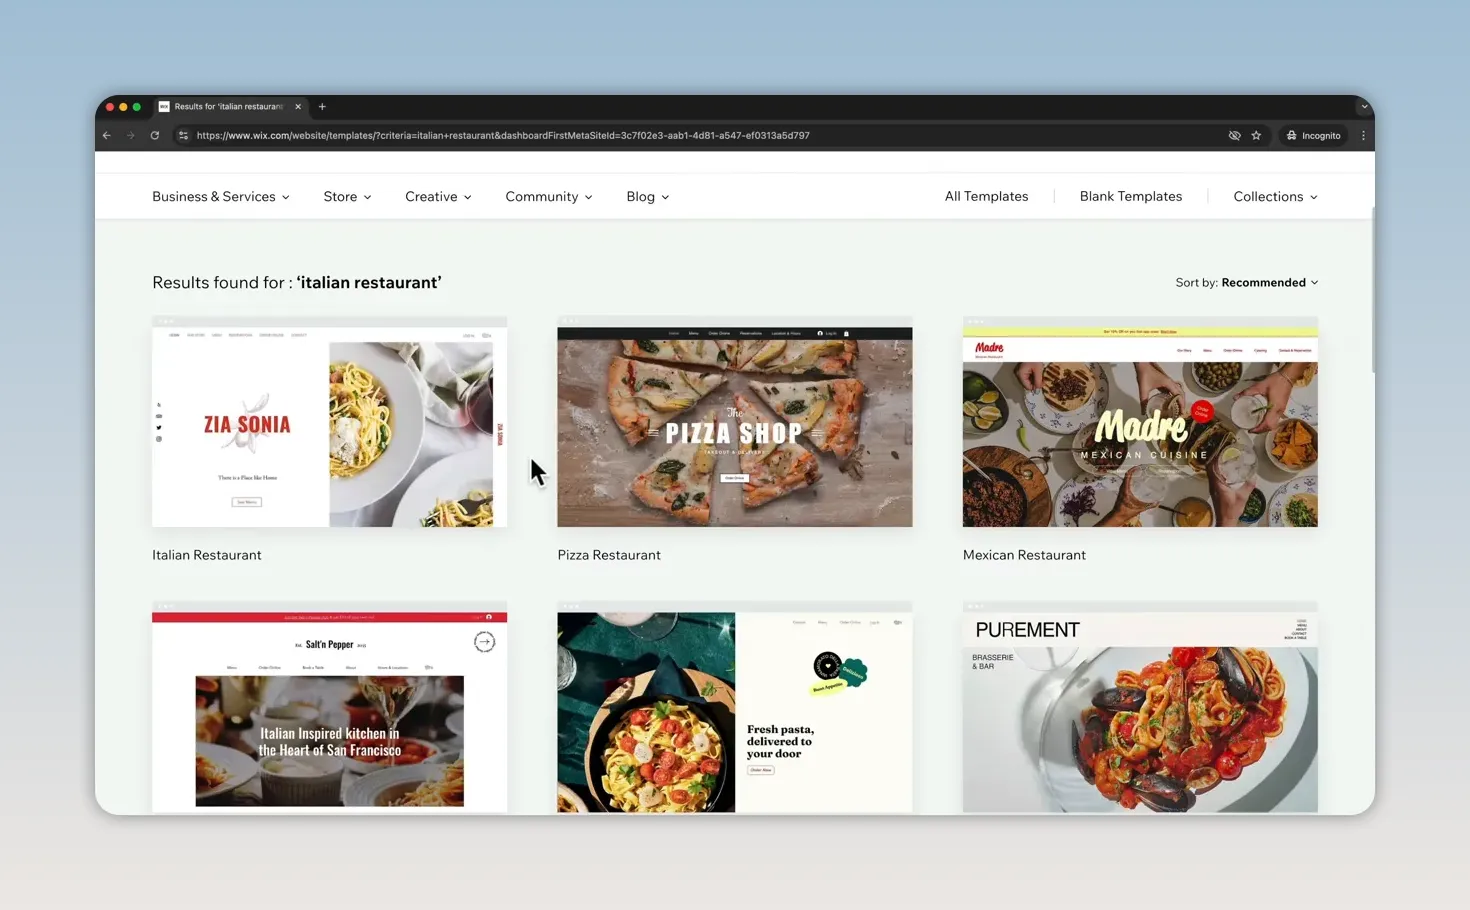
Hover over a template and click View to explore it. Scroll through its sections and check its other pages. Then use the mobile icon at the top to see the smaller-screen layout.
You can change colors, fonts, images, and text later. What matters most at this stage is the structure. Choosing a layout that already suits your business saves a lot of editing time.
Choose carefully: you cannot simply switch the template on this existing Wix Editor site afterward. You can customize the design, but moving to another template means starting a separate site. Wix’s template-changing guidance explains that distinction.
Once you’re happy with the design, click Edit This Site.
4. Get Comfortable With the Wix Editor
The Wix Editor is where you customize the appearance and content of your website.
The first thing I like to do is click Zoom Out. This gives me a better overview of the page and how its different sections fit together.
A few controls are especially useful:
- Page selector: Switch between Home, Our Story, and other pages.
- Desktop and mobile icons: Move between the two layouts.
- Left-side toolbar: Add content, manage pages, and change site design settings.
- Undo: Reverse your most recent change if something doesn’t look right.
How sections and elements work
Each page consists of one or more sections. Our homepage includes an introductory section, an About section, a gallery, a table reservation section, and a contact section.
Inside each section are individual elements, such as headings, paragraphs, images, and buttons.
To rearrange a section, hover over it and use its up or down arrow. For example, you can move the reservation section below the contact section. If you change your mind, click Undo.
Zoom out when you want to review the overall layout. Return to the normal editing view when you want to customize individual elements.
5. Edit Text, Buttons, and Images
Replace the template text
Click a text element, then choose Edit Text. Replace the existing text with your own. I’m changing the main restaurant heading to Bella Cucina.
The text settings let you adjust the heading style, font, size, italics, underlining, and other formatting options. Click elsewhere on the page when you’re finished.
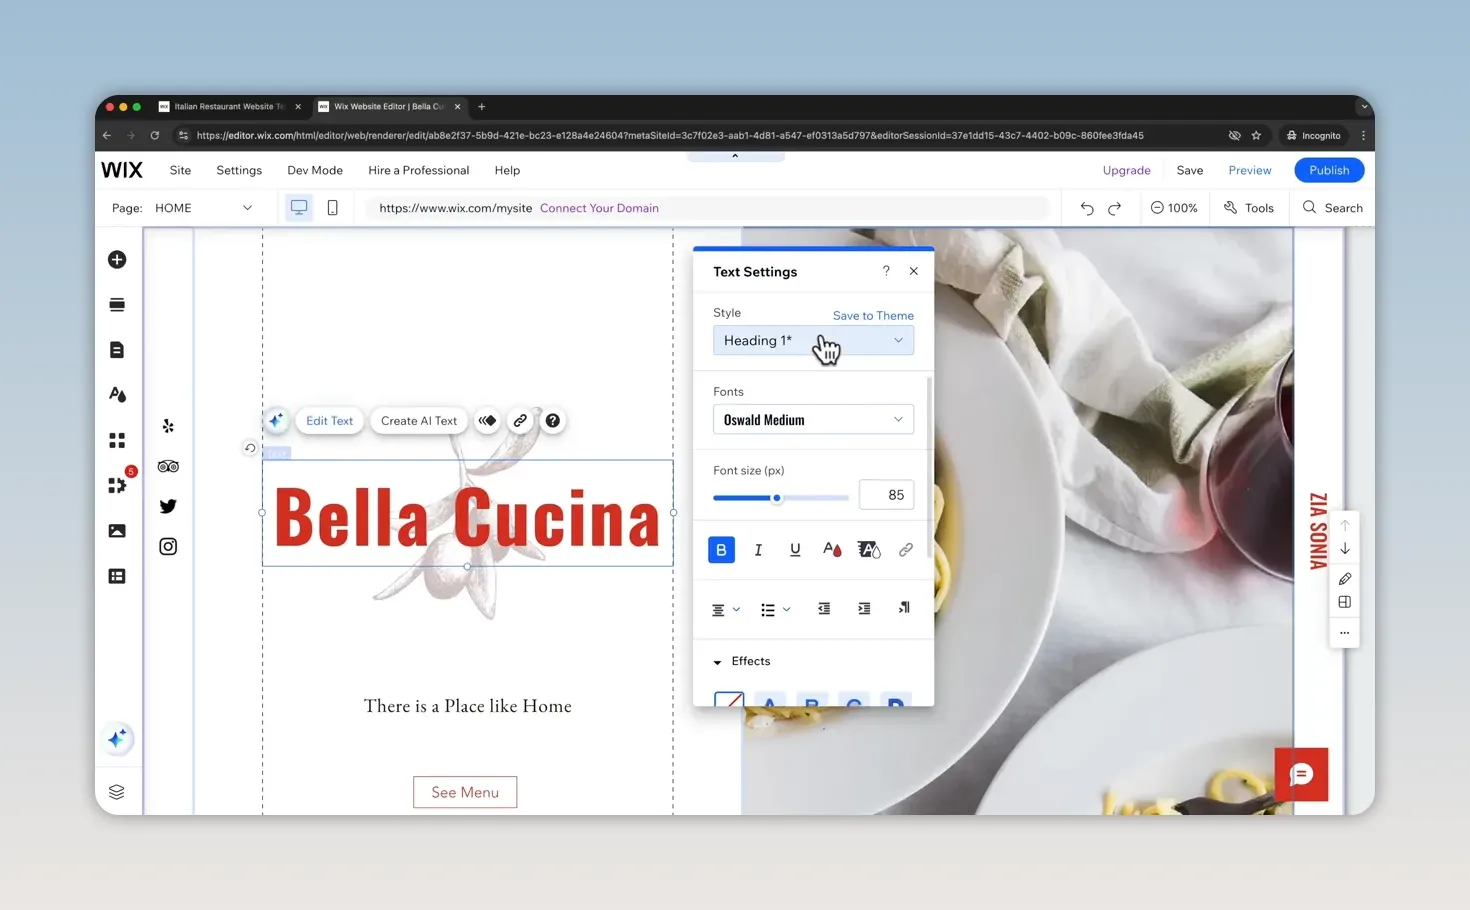
You can move an element by clicking and dragging it. Use the alignment guides that appear while dragging to keep it lined up with the surrounding content.
Work through all the template copy, not just the main heading. Some paragraphs are placeholder text and need to be replaced before publishing.
Use Wix AI to help draft copy
If writing the content is slowing you down, select a text element and open AI Tools > Generate New Text.
For the restaurant’s About section, I ask for a short paragraph explaining how Bella Cucina prepares its Italian dishes. Once Wix generates a suitable draft, click Use Text to replace the placeholder paragraph.
This is a useful way to get a starting point. Read through the result and make sure it accurately describes your business.
Edit button labels and destinations
Buttons help people get to the next relevant part of your website. Select a button to change its text and link.
A button can link to:
- Another page on your website.
- A specific section on a page.
- An external website.
- Other destinations available in the link settings.
In this example, the About section button links to the Our Story page. Check both parts of every button: what it says and where it goes.
Replace images
Click an image, then choose Change Image. You can upload your own file or browse the Wix media library.
To find a replacement for the restaurant’s About image, I search the Wix media collection for “Italian chef,” select an image, and click Choose Image.
Wix includes images you can use at no additional cost, so you don’t have to supply every photo yourself.
Delete anything you don’t need
To remove an element, right-click it and select Delete. The same approach works for an entire section: right-click the section and delete it.
Make sure you’ve selected the right item before confirming, especially when removing a large section containing several elements.
6. Add New Sections and Elements
You’re not limited to the content that came with your template. You can add predesigned sections or start with an empty one.
Add a team section
- Click Add Section in the left-side toolbar.
- Scroll to the place where you want the section to appear.
- Choose a section category, such as Team.
- Select a layout to add it to the page.
- Replace its text and images using the same editing controls as before.
I’m adding a team section below the reservation area. A predesigned layout saves time because the heading, images, and supporting text are already arranged.
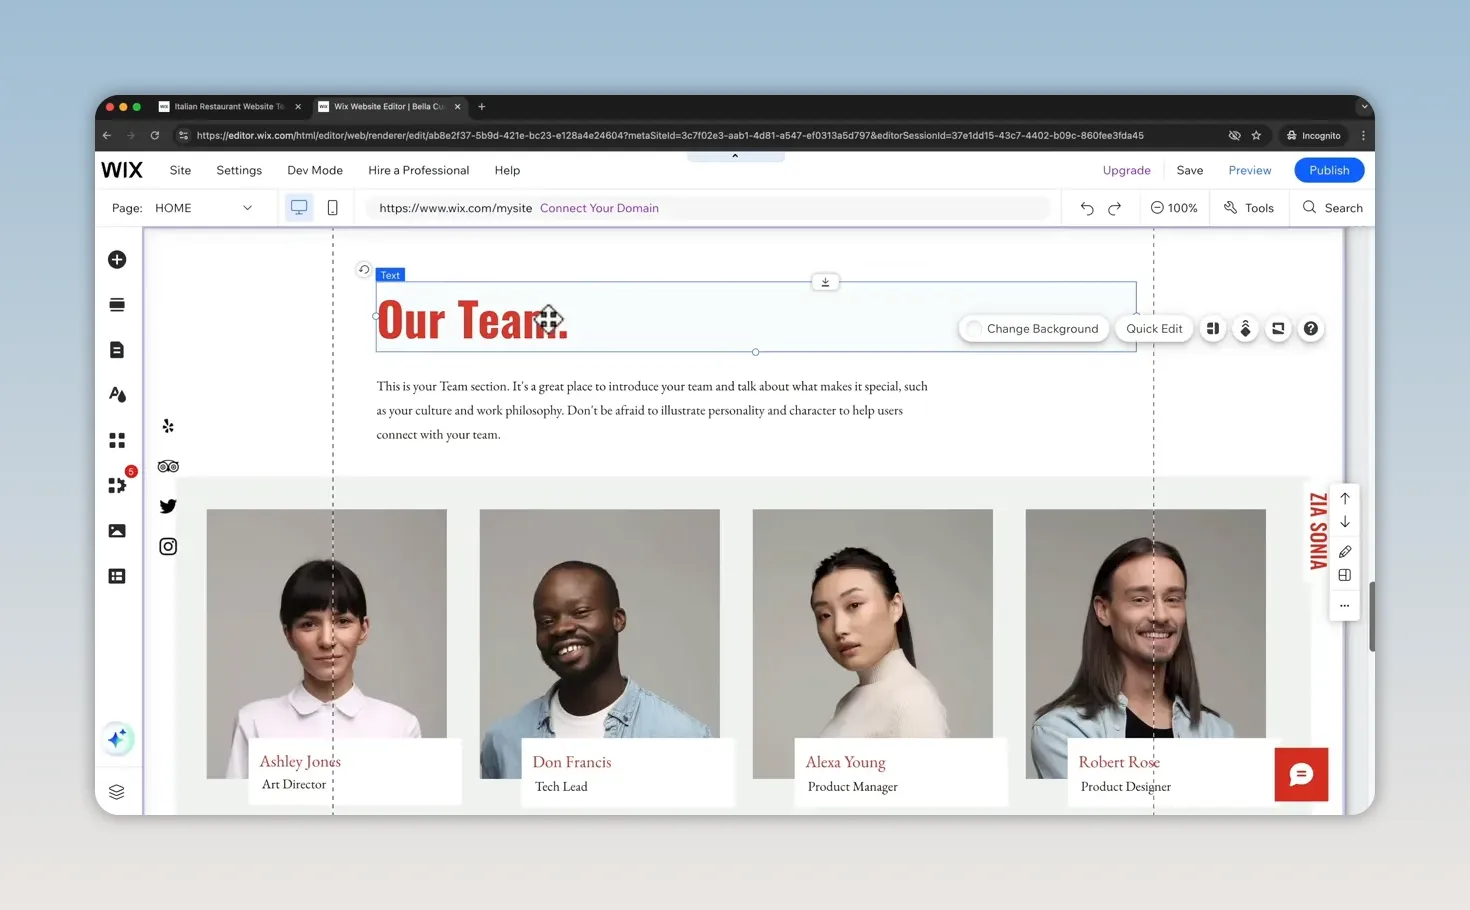
If you would rather build the layout yourself, choose Blank Section.
Add a button inside the section
To add an individual element, click the plus icon for Add Elements. Open the Button category and choose a themed button so it fits the existing design.
If there isn’t enough space beneath the team profiles, drag the section’s bottom boundary downward to increase its height. Then move the button into position.
Open the button settings, change the label, and add a link. I’m linking this button to Our Story.
After adding something new, I always zoom out and check how it fits into the rest of the page. If the button style looks wrong, select it, open Design, and try another option.
7. Manage Pages and Your Navigation Menu
Open Pages & Menu to manage the pages and links shown in your site navigation.
The restaurant template includes online ordering pages that we don’t need. To remove one, click the three dots beside its name, select Delete, and confirm.
Understand pages versus anchor links
Not every navigation item opens a separate page.
- Our Story and Menu open separate pages.
- Reservations and Contact link to sections on the homepage.
An anchor icon identifies a section link. When someone clicks it, the site scrolls to that section rather than opening a different page.
To edit another page, select it from the page selector or Pages & Menu. You can then change its text, images, and layout just as you did on the homepage.
Add an Events page
- Open Pages & Menu and click Add Page.
- Choose a blank page or a predesigned page layout.
- Select a layout that suits the content you want to add.
- Name the page and click Done.
- Customize the new page’s content.
For Bella Cucina, I’m choosing a layout from the Projects category to showcase events held at the restaurant, then naming the page Events.
The new page is automatically added to the navigation menu. Drag it within the page list to change its position. I’m moving Events to the end.
8. Create and Connect Your Contact Form
A form element in a template may still need to be configured. On the homepage, scroll to the contact area, select the form, and click Edit Form.
This opens the form tools in the dashboard.
- Name the form. I’m using Contact Form 1.
- Save it and return to the forms list.
- Open the form for editing.
- Add the fields you want people to complete.
- Save the finished form.
For this example, the fields are:
- First name.
- Last name.
- Email address.
- Phone number.
- A long-answer field labeled Message.
Close the dashboard window and return to the editor. Select the form element, open Settings, and choose the form you just created.
Creating the form and selecting it in the page element are two separate steps. Make sure you do both.
If the form doesn’t appear immediately, open Preview. That should make it visible, after which you can return to the editor.
9. Add Your Business Location With Google Maps
The restaurant template already has a map near the bottom of the homepage. To update it, click the map, choose Manage Locations, and enter the business address.
The map updates to reflect the location you entered.
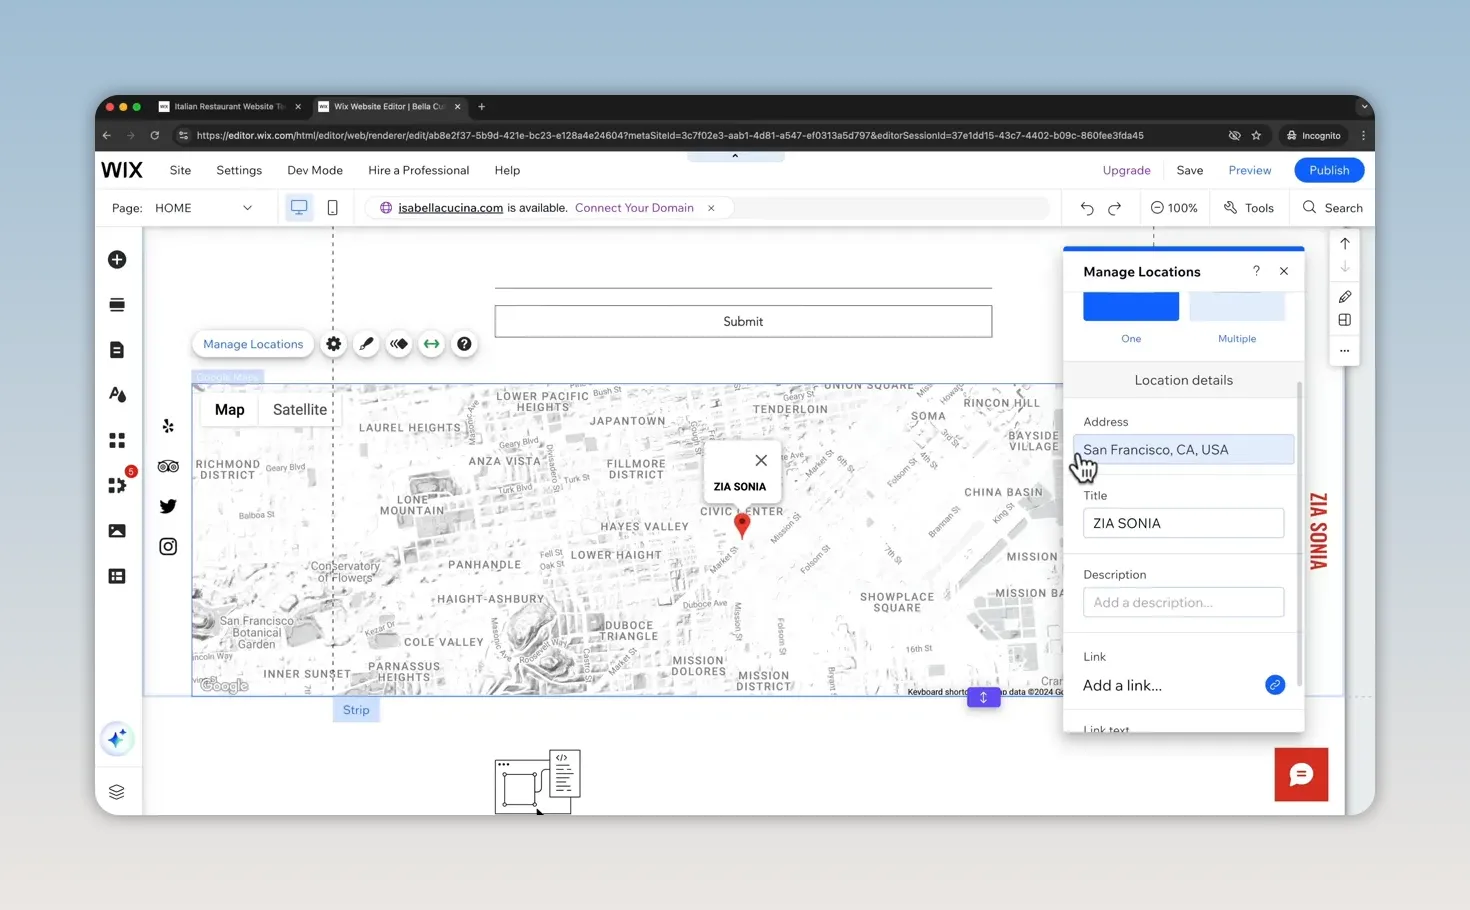
If your template doesn’t include a map:
- Open Add Elements.
- Go to Contact & Forms.
- Scroll to Google Maps.
- Choose a map design and add it to the page.
- Update it with your business location.
10. Customize Your Website Header
The header appears at the top of every page. Our template already includes navigation, but I want to add a logo on the left, keep the menu in the center, and place social links on the right.
Arrange the header columns
Select the header, then select the strip inside it. Open Manage Columns.
This template starts with two columns. Add a third, then use the arrow controls to move the wide column into the center. You can adjust the column proportions through the layout settings if necessary.
After changing the columns, check the menu. If it’s cut off, resize the menu element until all the navigation items are visible.
Upload and position your logo
I don’t need a member login option, so I’m removing the login bar from the header.
To add a logo:
- Open Add Elements > Image > Upload Images.
- Drag your logo file into the upload area.
- Click Add to Page.
- Resize the logo and move it into the left header column.
- Use the alignment guides to center it neatly.
Add social media links
Go to Add Elements > Social and choose a social icon style. Move the icons into the right column.
Use Layout to adjust their size, then click Set Social Links. Remove any platforms you don’t use and enter the correct profile link for each remaining icon.
Don’t leave the template’s default social destinations in place. Each icon should lead to your own business profile.
11. Change Colors and Fonts Across the Site
For site-wide design changes, open Site Design.
Change your color theme
Under Color Theme, click an individual color to replace it. You’ll see the change applied to the site as you make it.
You can also open Site Theme and try complete theme combinations. I prefer the original theme for this restaurant, so I’m keeping it after testing a few alternatives.
Change your text theme
Open Text Theme to adjust heading and paragraph fonts. Changing these theme settings applies the relevant fonts across the website, rather than requiring you to edit every text element individually.
These controls are useful when you like the template layout but want the overall design to feel more like your brand.
12. Optimize Your Wix Website for Mobile
After making desktop changes, click the mobile icon and review the smaller-screen layout.
The template gives us a useful mobile starting point, but manually added content can still need adjustments. In this example, the logo and social icons overlap in the header.
Fix the mobile header
- Select the social icons.
- Click the eye icon to hide them on mobile.
- Resize the logo so it fits comfortably.
- Align the logo with the hamburger menu icon.
- Reduce the header height to remove unnecessary space.
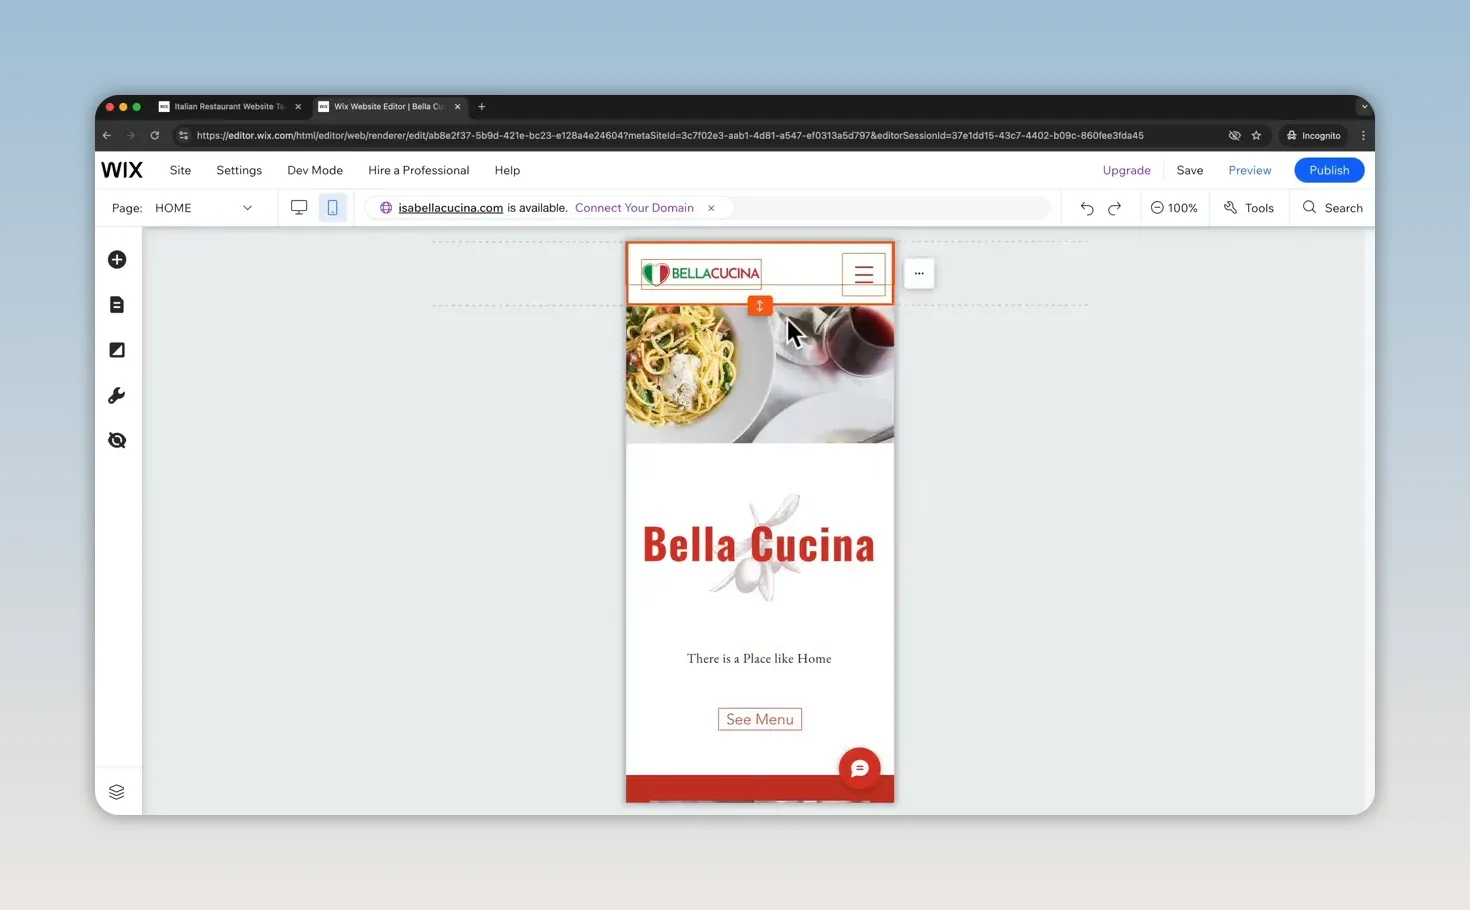
Hiding the social icons in the mobile editor does not remove them from the desktop layout. Likewise, these mobile layout adjustments let you improve the smaller-screen version without rearranging the desktop design.
My workflow is to build on desktop first, then refine the mobile layout. Desktop changes carry through to mobile, so check the mobile version again after significant edits.
Scroll through the entire page. Pay particular attention to new sections, button positions, and spacing. In the team section, I’m moving the button slightly lower and increasing the section height so the layout feels less cramped.
Set up mobile quick actions
The mobile layout also includes a quick action button. This can give people a convenient way to chat, call, or email your business.
Click Set Up Quick Actions. The existing setup includes chat, which you can manage through Wix using its app.
To add a calling option, choose More Actions, add Phone, and enter your phone number through Setup. You can add Email in the same way and supply your business email address.
13. Use Wix Apps for Additional Features
Features such as reservations, appointment bookings, selling products, and chat use apps. Wix offers its own apps, and third-party providers offer additional options.
For the restaurant reservation feature, select the reservation element and click Manage Reservations. This opens the relevant dashboard area.
To review installed apps, go to Apps > Manage Apps. Our restaurant template has already installed tools for forms, galleries, table reservations, and restaurant menus, along with other supporting apps.
Find apps in the Wix App Market
Open App Market and search for the functionality you need. Searching for “bookings,” for example, brings up Wix Bookings and other booking-related tools, including vacation rental options.
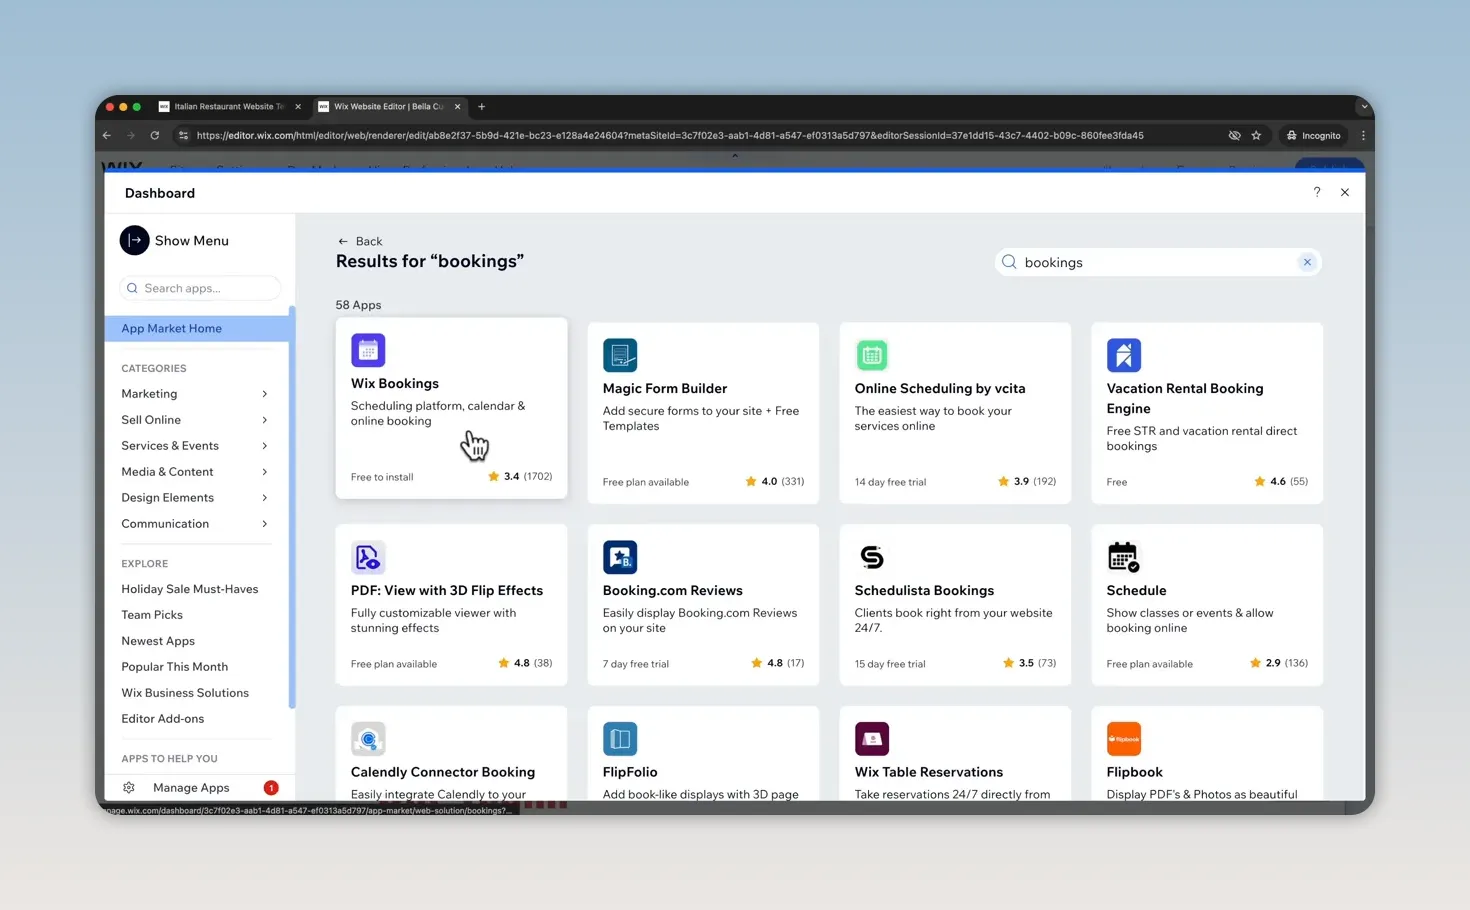
Some apps are free, while others are paid. Business features may also require an eligible paid Wix plan.
An installed app is not necessarily a fully configured, usable feature. Check its settings and upgrade requirements before relying on it for reservations, bookings, or sales. Adding the reservation section is the starting point, not the entire reservation setup.
14. Preview and Publish Your Website
Once the design and setup are ready, click Preview. This lets you explore the website as a visitor would, rather than selecting elements in the editor.
Before publishing, check:
- Navigation links open the correct pages or sections.
- Buttons lead to their intended destinations.
- Template text and images have been replaced where needed.
- The contact form is visible and has the right fields.
- The map shows your business location.
- Social icons link to your own profiles.
- The desktop and mobile layouts both look good.
- Any business apps you need are configured and available on your plan.
When you’re happy with everything, click Publish in the top-right corner. Then click View Site to open the live website in another tab.
15. Connect a Custom Domain and Remove Wix Branding
You can publish on the free Wix plan, but the website uses a Wix address containing wixsite.com. It also displays Wix advertising at the top of the site.
To use your own custom domain and remove that advertising, you need to upgrade to an appropriate paid plan.
Choose a domain and plan
- Return to the editor and click Connect Your Domain.
- Review the suggested domain or search for another name.
- Select an available domain.
- Choose the upgrade option that supports connecting it.
- Select a suitable plan and billing period.
- Enter your payment information and complete the purchase.
In my example, the entry-level plan offered at checkout was $11 per month with yearly billing. Treat that as the price shown for this particular setup, not a guaranteed current rate. Check Wix’s current plans and the final checkout details before purchasing.
Also make sure the plan supports the apps you need. A plan suitable for connecting a domain may not include every business feature.
Complete domain registration
After upgrading, continue with the domain registration process. Choose the registration period, enter your contact information, and review the registration options.
I recommend considering private registration where it’s available. It helps protect your registration contact details from public lookup. Review the privacy option and any associated cost before confirming.
Complete the purchase, then open a new browser tab and enter your custom domain to check the connection.
You now have the core workflow for building a Wix website: choose a strong template, customize its content, add the features your business needs, refine the mobile layout, and publish. Taking the time to check those details is what turns a starting template into a website that feels like your own.
Made with VideoToBlog using Wix Website Tutorial 2026 - Complete Guide for Beginners


